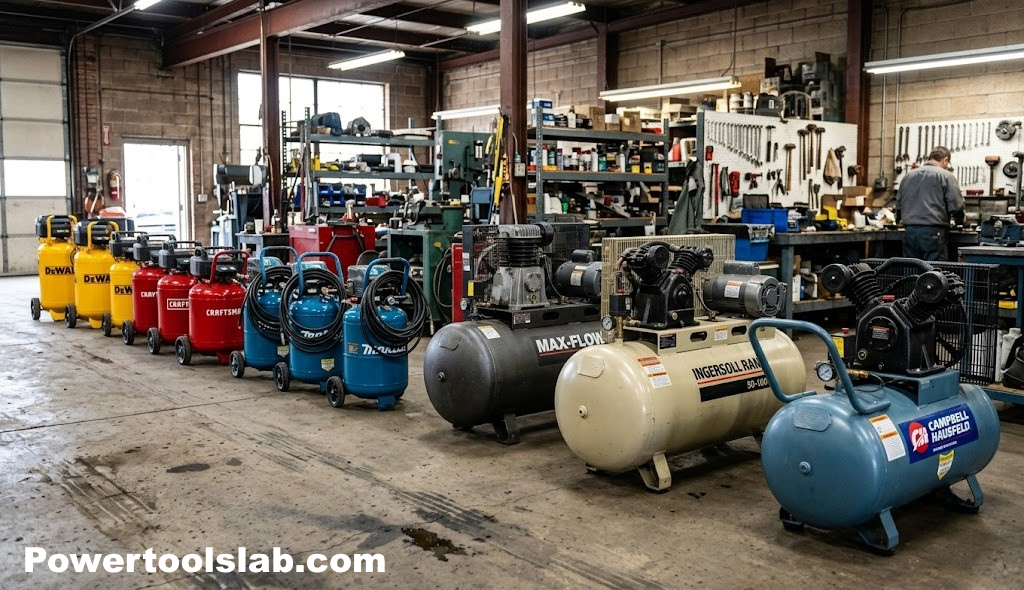
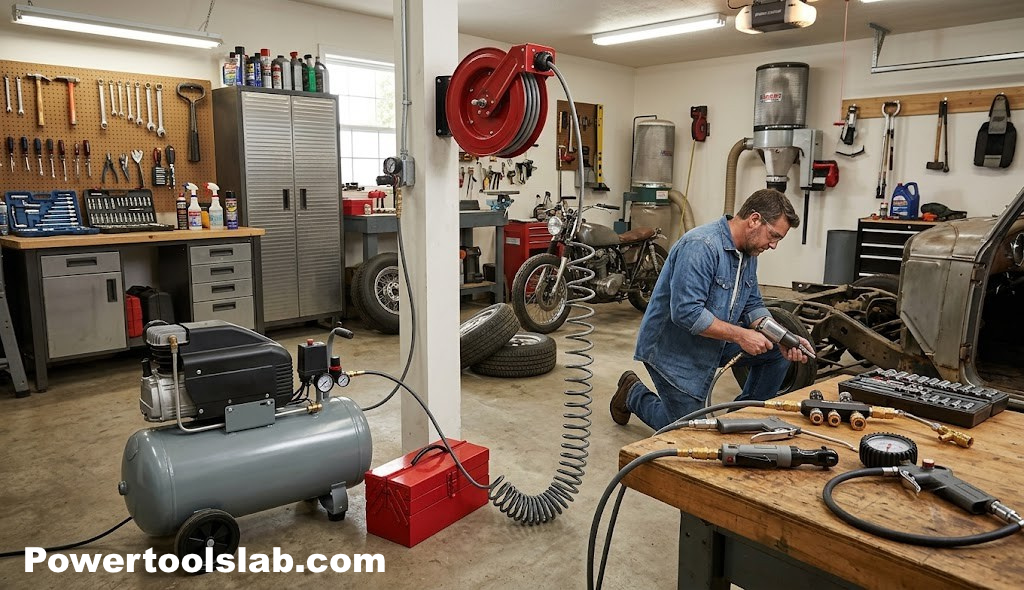
Walk into any tool aisle and the wall of air compressors looks less like a shopping decision and more like a spec-sheet exam. Tank sizes range from six gallons to eighty. Some units whisper, others sound like a jet taxiing for takeoff. Prices swing from under a hundred dollars to well over a thousand. None of that variety is arbitrary — every one of those numbers exists because some compressor, somewhere, was built for a specific kind of work. The trick is matching the machine to your work instead of buying based on tank size alone, which is the single most common mistake first-time buyers make.
This guide walks through that decision the way a shop foreman would walk a new hire through it — one variable at a time, in the order that actually matters. We will not just tell you what CFM means; we will show you how to calculate what you personally need, and why getting that number wrong is more expensive than getting tank size wrong. If you already know how compressors work at a mechanical level, feel free to jump to what size air compressor do I need; if you are starting from zero, our companion piece on how air compressors work is a good primer before diving into the buying criteria below.
The order of the twelve steps below is intentional, and it is worth resisting the urge to skip ahead to whichever spec you already feel confident about. Type, CFM, and PSI come first because they are the load-bearing decisions — get those three right and almost every other choice narrows itself down naturally. Tank size, power source, portability, and noise come next because they shape how the compressor fits into your actual space and daily routine, rather than how it performs on paper. Duty cycle, pump type, and budget follow because they are where “good enough for now” and “built to last” start to diverge, and the final two steps, accessories and maintenance, are the parts most buyers only think about after their first frustrating weekend without a regulator or their first rusted-out tank. Working through all twelve in order, even briefly, catches the blind spots that a spec-sheet skim alone tends to miss.
Understand the Compressor Types Before You Compare Specs
Every spec you will read about later in this guide only makes sense once you know which category of compressor you are actually shopping in. Air compressors split into a few broad families, and each one trades portability for capacity in a different way. Trying to compare a pancake compressor against a stationary two-stage unit on tank size alone is like comparing a hatchback to a delivery truck by cupholder count — the categories exist to serve different jobs in the first place.
Four common body styles, arranged from most portable to highest capacity
Pancake compressors get their name from the flat, round tank that doubles as a stable base, and they are the go-to choice for trim carpenters and DIYers who need something light enough to carry up a ladder in one hand. Hot dog compressors use a single cylindrical tank instead, favoring a low center of gravity over the pancake’s flat footprint. Twin-stack compressors stand two smaller tanks on top of each other, which lets manufacturers pack more air storage into a narrow footprint without widening the base. And stationary compressors, the largest category, are built to live permanently in a garage or shop, wired into a dedicated circuit and often plumbed directly into an air line running the length of the room.
There is also a distinction that cuts across all four body styles: single-stage versus two-stage pumps. A single-stage compressor pressurizes air in one pass through the pump, which is perfectly adequate up to roughly 150 PSI and covers essentially every home and light commercial need. A two-stage compressor compresses air once, cools it, then compresses it again through a second, smaller cylinder, allowing it to reach higher pressures and sustain much longer run times — the kind of duty cycle an auto body shop or a production woodworking shop needs, not a homeowner airing up bike tires on a Saturday.
| Type | Best For | Typical Tank | Portability |
|---|---|---|---|
| Pancake | Trim, deck work, jobsite tasks | 4–6 gal | Excellent |
| Hot Dog | General DIY, garage use | 4–8 gal | Very Good |
| Twin Stack | Framing, roofing crews | 8–10 gal | Good |
| Stationary Single-Stage | Home shop, spray finishing | 20–30 gal | Fair |
| Stationary Two-Stage | Production shop, auto body | 60–80+ gal | Low (fixed) |
It helps to think about single-stage versus two-stage in mechanical terms, not just spec-sheet terms. In a single-stage pump, the piston draws in ambient air and compresses it in one continuous stroke up to the tank’s cutoff pressure. That single compression stroke generates heat, and heat is the enemy of both efficiency and pump longevity — the hotter the air gets during compression, the more energy is wasted and the more thermal stress the piston, rings, and valves absorb over years of use. A two-stage pump solves this by splitting the job: a larger low-pressure cylinder does the first pass, an intercooler sheds some of that heat, and a smaller high-pressure cylinder finishes the compression on already-cooled air. The result is a pump that runs cooler, wastes less energy as heat, and can sustain both higher pressures and longer run times without the internal wear that a single-stage pump would accumulate under the same workload. None of that matters much if you are only running a brad nailer on weekends — a single-stage pancake unit will outlast the rest of the tool collection in that scenario. It starts to matter the moment daily run time climbs into hours rather than minutes, which is exactly the dividing line between a home shop and a working commercial shop. If you are unsure which side of that line your own use falls on, a useful gut check is to estimate how many total minutes per day the compressor’s motor would realistically need to run to keep pace with your tools; under roughly 20-30 minutes a day points toward single-stage, well above that starts to justify the extra cost of a two-stage pump. Understanding which family fits your work is the foundation everything else in this guide builds on. For a deeper mechanical breakdown of how the pump, tank, and motor actually interact, our guide on how air compressors work covers the internals in more detail than we have room for here.

Browse today’s top-rated portable and stationary air compressors, filtered by real buyer ratings.
Shop Air Compressors →Calculate Your CFM Needs Before Anything Else
If you only take one number seriously from this entire guide, make it CFM. Cubic feet per minute measures the volume of air a compressor can deliver continuously, and it is the single spec most likely to disappoint a buyer who skipped straight to tank size. A compressor can have a huge tank and still choke the moment you pull the trigger on a high-draw tool, because the tank only stores a reserve — it is the pump’s continuous CFM output that determines whether pressure holds steady during real use.
Match the compressor’s rated CFM against your highest-draw tool, not the average
Start by identifying the single most air-hungry tool you plan to run, since CFM requirements do not add together the way you might expect when tools run one at a time. Check the manufacturer’s spec sheet for that tool’s CFM requirement at 90 PSI, then add a safety margin of roughly 25 to 50 percent to account for hose leakage, fittings, and the compressor’s natural output drop as the tank empties. A random orbital sander might only need 4 to 6 CFM, while a full-size framing nailer used continuously can call for closer to 8 to 10 CFM sustained.
If you plan to run two tools simultaneously — say, a die grinder while a helper runs a blow gun — you do need to add their draws together and size the compressor for that combined total, plus margin. This is where a lot of shop owners get burned: they size for a single tool, then add a second workstation later and wonder why pressure drops the moment both are active.
Sizing Correctly
- Steady pressure under sustained trigger time
- Motor cycles less often, runs cooler
- Room to add a second tool later
Undersizing Your CFM
- Pressure sags mid-task
- Motor short-cycles and overheats
- Tools underperform even with full tank
Let’s walk through a worked example, because the math is simpler than it looks on paper. Suppose your primary tool is a 3/8-inch impact wrench rated at 4 CFM at 90 PSI according to the manufacturer, and you occasionally run it alongside a blow gun rated at 1.5 CFM for quick cleanup between uses. If those two tools genuinely never run at the same instant, you size for the impact wrench alone: 4 CFM, plus a 30 percent margin, lands you at roughly 5.2 CFM as your minimum compressor rating. If you do sometimes run both at once — say a helper is blowing debris while you finish a bolt — you add the two draws together first (5.5 CFM combined) and then apply the same margin, landing closer to 7.2 CFM as your realistic minimum.
| Tool | Typical CFM @ 90 PSI | Duty Pattern |
|---|---|---|
| Blow gun | 1–3 CFM | Intermittent, short bursts |
| Brad/finish nailer | 0.3–0.5 CFM per shot | Intermittent |
| Framing nailer | 2–3.5 CFM sustained | Frequent bursts |
| Random orbital sander | 4–6 CFM | Continuous while in use |
| 3/8″ impact wrench | 3–5 CFM | Intermittent |
| 1/2″ impact wrench | 5–8 CFM | Intermittent to continuous |
| Die grinder | 4–6 CFM | Continuous while in use |
| HVLP spray gun | 8–14 CFM | Continuous while spraying |
Notice how much higher spray guns sit on that list compared to nail guns. This is precisely why a compressor that handles trim carpentry beautifully can feel badly underpowered the moment you switch it over to spray finishing — the CFM demand of the tool category changed even though the compressor did not. Whenever you are shopping with more than one tool category in mind, size the compressor for whichever category draws the most air, not for the average of everything you own.
Our companion guide on what size air compressor do I need includes a worksheet for adding up CFM draw across an entire multi-tool shop setup, which is worth bookmarking before you finalize a purchase.
Match Your PSI Requirements to Your Tools
Where CFM measures volume, PSI measures pressure — how hard the air pushes rather than how much of it flows. Nearly every air tool on the market is designed around a 90 PSI operating pressure, so this spec trips up far fewer buyers than CFM does, but it is still worth confirming, especially if you are shopping for specialty equipment like a high-pressure paintball fill station or a low-pressure irrigation blower that falls outside the standard range.
Tank PSI (max storage pressure) is not the same as tool working pressure
It helps to separate two different PSI numbers you will see on any spec sheet. Tank PSI is the maximum pressure the tank can hold before the motor shuts off, commonly 135 to 175 PSI on consumer units. Tool working pressure, by contrast, is regulated down at the outlet — usually to that familiar 90 PSI — through a regulator on the compressor itself. A higher max tank PSI mostly buys you a slightly longer reserve of usable air between motor cycles, not higher force at the tool.
The exception worth flagging is specialty pneumatic equipment: some sandblasting cabinets, certain pressure washers, and high-flow spray systems call for pressures above the standard 90 PSI ceiling, so it is worth checking the exact requirement on any specialty tool before assuming a standard compressor will cover it.
Almost every compressor built for the consumer or light-commercial market ships with an adjustable regulator knob right at the outlet, which lets you dial working pressure down for delicate tasks — a staple gun tacking thin trim, for instance, benefits from a lower working pressure than a framing nailer driving into dense lumber, even though both tools plug into the exact same air line. Getting comfortable with that regulator knob is worth more to your finished work quality than any spec-sheet number, since it is the one control you will actually touch on every single job.
| Tool Category | Typical Working PSI |
|---|---|
| Finish/brad nailers | 70–90 PSI |
| Framing nailers | 90–120 PSI |
| Impact wrenches | 90 PSI |
| HVLP spray guns | 25–50 PSI (regulated at gun) |
| Tire inflation | 30–35 PSI (vehicle-dependent) |
| Sandblasting cabinets | 90–125 PSI |
Choose the Right Tank Size for How You Actually Work
Tank size gets more attention from first-time buyers than almost any other spec, largely because it is the easiest number to visualize — a bigger tank obviously means more air on tap. But tank size is really a buffer, not a power source. It determines how long you can run a tool before the motor kicks back on to refill the reserve, and how much cushion you have for short, high-demand bursts like a framing nailer’s rapid-fire sequence.
Larger tanks store more reserve, but the pump still refills at the same CFM rate
As a rule of thumb, tools that fire in short intermittent bursts — nail guns, staplers, blow guns — do fine with a smaller tank because the reserve has time to rebuild between shots. Tools with continuous or near-continuous trigger time — sanders, grinders, spray guns, impact wrenches under sustained load — depend much more on CFM output than on tank size, since a small tank simply drains and the motor has to keep pace in real time regardless of how big the tank was to begin with.
| Tank Size | Typical Use Case | Trade-off |
|---|---|---|
| 1–6 gallons | Trim nailing, inflation, jobsite portability | Frequent motor cycling under sustained load |
| 10–20 gallons | General garage/DIY, occasional spray work | Balanced size-to-portability ratio |
| 26–30 gallons | Home shop, small spray finishing jobs | Heavier, usually wheeled rather than carried |
| 60–80+ gallons | Production shops, auto body, multi-tool bays | Fixed placement, dedicated circuit required |
If you want to get more precise than the table above, recovery time — how long the motor needs to refill the tank from its cut-in pressure back to its cut-out pressure — is a genuinely useful number to estimate before buying. As a rough approximation, recovery time in minutes equals tank size in gallons multiplied by the pressure difference between cut-in and cut-out, divided by the compressor’s CFM output at that pressure, times a small constant to account for real-world losses. In plain terms: a small tank paired with a strong pump recovers quickly, while a large tank paired with a weak pump can leave you waiting far longer between bursts of work than the gallon number alone would suggest. This is the same underlying reason a 6 CFM pump on a 20-gallon tank will out-perform a 3 CFM pump on a 30-gallon tank for anything beyond short, intermittent tasks, even though the second unit looks larger on the shelf.

Compare 20-to-30 gallon compressors — the sweet spot for most home shops.
Shop Mid-Size Compressors →Pick a Power Source: Electric, Gas, or 240V
Most home and shop compressors run on standard 120V household current, which covers the vast majority of portable and small stationary units without any electrical upgrades. Once you move into larger stationary two-stage compressors, though, you often cross into 240V territory, which typically means running a dedicated circuit — worth checking against your garage’s existing panel capacity before you fall in love with a specific model.
Electric suits fixed shops; gas suits sites without power access
Gas-powered compressors exist for one clear reason: job sites without reliable electrical service, like a framing crew working a new build before the panel is even installed. They trade the convenience of an extension cord for engine noise, exhaust fumes that make indoor use a non-starter, and routine small-engine maintenance on top of the compressor’s own upkeep. Unless your work genuinely takes you off-grid on a regular basis, an electric compressor is simpler, quieter, and considerably cheaper to run over its lifetime.
Before you settle on an electric model, it is worth checking the startup amperage draw against your circuit, not just the running amperage. Compressor motors pull significantly more current for a brief moment at startup than they do once running, and that startup surge is what trips a marginal circuit breaker even though the “running amps” number on the spec sheet looks perfectly reasonable.
| Compressor Class | Typical Circuit | Startup Consideration |
|---|---|---|
| Small portable (1-6 gal) | Standard 15A/120V outlet | Minimal surge, works on shared circuits |
| Mid-size (10-30 gal) | Dedicated 15-20A/120V circuit | Can trip breakers on shared/older circuits |
| Large stationary (60+ gal, single-stage) | Dedicated 20A/120V or 240V circuit | Usually needs its own breaker |
| Two-stage industrial | Dedicated 240V circuit | Often needs electrician-installed wiring |
If you plan to run a compressor off a portable generator on a job site rather than shop power, check the generator’s rated surge wattage against the compressor’s startup draw specifically — this is one of the more common mismatches that leaves a contractor with a generator that runs everything except the one tool it was bought to power.
Weigh Portability Against Shop Footprint
A compressor’s real-world usability often comes down to whether you can move it to where the work is, or whether the work has to come to it. If your projects move around a job site or between rooms in a house, weight and handle design matter as much as any performance spec. If your compressor lives permanently in one corner of a shop, floor footprint and clearance for maintenance access matter more than portability ever will.
Reserve clearance space around a fixed unit for filter access and airflow
Wheeled carts turn even a mid-size 20 to 30 gallon tank into something one person can reposition without strain, and they are worth prioritizing if your shop layout changes from project to project. Fixed stationary units skip the wheels entirely in favor of a permanent mounting pad, but they do need enough clearance around the motor housing for filter changes, oil checks, and adequate airflow — tucking one into a tight corner shortens its service life more than most owners expect.
Vertical tank designs are worth a specific mention here, since they solve a real space problem without sacrificing much capacity. Standing a 30-gallon tank on end instead of laying it horizontally can cut its floor footprint by roughly a third, which matters a great deal in a single-car garage that also has to fit a workbench, a vehicle, and storage shelving. The trade-off is height — a vertical 30-gallon unit can stand close to five feet tall, so check your ceiling clearance and any shelving above the intended spot before committing to that layout.
It’s also worth thinking about how far the compressor sits from where you actually use air tools. A long trip from a corner-mounted stationary unit to the far end of a shop means either running a long hose (which introduces some pressure drop over distance) or plumbing rigid air line to multiple drop points around the room — a common upgrade for shops that outgrow the “drag the hose everywhere” phase.
Consider Noise Level, Especially for Indoor Use
Noise rarely makes anyone’s initial shopping checklist, right up until the first time a compressor kicks on mid-conversation or wakes a sleeping household. Traditional oil-lubricated pumps commonly run in the 78 to 90 decibel range, loud enough to require raised voices nearby, while newer low-noise designs — often oil-free models with revised pump geometry — can sit in the high 60s, closer to normal conversation level.
Check the manufacturer’s dBA rating before buying for a shared or indoor space
If the compressor is going to live in an attached garage next to a bedroom wall, or in a shared workshop where several people are trying to hold a conversation over it, it is worth paying the modest premium for a quieter model. Manufacturers list a dBA rating on most spec sheets now, and it is one of the few numbers on this list that a spec sheet reports honestly and consistently across brands.
To put those numbers in everyday context: normal conversation sits around 60 decibels, a running dishwasher or clothes dryer sits around 70 to 75, and a gas-powered lawn mower runs closer to 90. A compressor rated in the high 60s will blend into typical household background noise, one in the mid-70s will be noticeable but not disruptive from another room, and anything approaching or exceeding 85 decibels warrants hearing protection if you’re working near it for extended stretches, similar to the guidance given for any sustained workplace noise exposure at that level.

See today’s quietest-rated air compressors for garage and indoor use.
Shop Low-Noise Compressors →Check the Duty Cycle and Motor Type
Duty cycle describes what percentage of every hour a compressor’s motor is designed to run before it needs a rest to cool down. A 50 percent duty cycle rating means the motor is built to run 30 minutes out of every 60; push it to run continuously and the thermal overload protector will eventually trip, or worse, the motor windings will degrade well ahead of schedule. Consumer-grade compressors commonly carry duty cycles in the 25 to 50 percent range, while commercial and industrial units are often rated for continuous, 100 percent duty operation.
Orange segment = active run time; grey = required rest within the hour
Duty cycle matters most for anyone running spray finishing equipment, sandblasting setups, or any tool that draws air near-continuously for long stretches. If your workflow regularly demands more run time than a 25 to 50 percent duty cycle can deliver, it is worth stepping up to a compressor explicitly rated for continuous duty rather than pushing a consumer unit past its design limits and shortening its lifespan.
Most consumer compressors include a thermal overload protector as a built-in safeguard, a small switch that cuts power to the motor once internal temperatures climb past a safe threshold. Tripping that protector occasionally, say once during an unusually demanding day, is not something to worry about; it did exactly what it was designed to do. Tripping it repeatedly on a regular basis is a clear signal that the compressor is undersized for the actual workload being asked of it, and continuing to push through those trips rather than stepping up to a higher-duty unit is one of the more common ways a compressor’s lifespan gets cut short well before its time.
Oil-Lubricated vs. Oil-Free: Which Pump Type Fits Your Use
Inside every compressor pump, the piston needs lubrication to keep friction and heat in check, and manufacturers solve that problem one of two ways. Oil-lubricated pumps use a small reservoir of pump oil the same way a car engine does, which needs periodic checking and changing but runs cooler and generally lasts longer under sustained, heavy use. Oil-free pumps use a self-lubricating piston material instead, trading some longevity under hard use for a pump that needs essentially no maintenance and can be tilted or transported without worrying about oil spills.
No oil reservoir means no oil changes, but typically shorter pump life under heavy load
Oil-Free Pumps
- Zero oil maintenance
- Lighter overall weight
- Can be transported at any angle
Oil-Lubricated Pumps
- Runs cooler under sustained load
- Generally longer service life
- Requires periodic oil checks/changes
For occasional homeowner use — a few weekends a month, light-duty tools — oil-free is usually the simpler, lower-hassle choice. For a shop running tools daily for hours at a stretch, the extra maintenance of an oil-lubricated pump tends to pay for itself in a longer working life.
There is one more practical difference worth knowing about before you decide: oil-free pumps tend to run louder than their oil-lubricated counterparts at a comparable size, since the self-lubricating piston material generates more mechanical friction noise without an oil film to dampen it. If both noise level and maintenance-free operation matter to you equally, that trade-off is worth weighing alongside everything covered in the noise section above, since the two decisions are more connected than most buying guides let on.

Browse top oil-free compressors for low-maintenance home and garage use.
Shop Oil-Free Compressors →Set a Realistic Budget Based on Actual Demand, Not the Sale Price
It is tempting to let a discount sticker set your budget rather than your actual air demand, but a compressor that undershoots your CFM needs is a worse deal at any price than a properly sized one at a higher sticker price. Think of the budget conversation in three tiers: light-duty portable units for occasional home projects, mid-range 20 to 30 gallon compressors for a serious home shop, and heavier stationary two-stage units for anyone running a business off the equipment.
A correctly sized compressor at a fair price outperforms an undersized bargain
| Tier | Typical Use | What You’re Paying For |
|---|---|---|
| Entry-level portable | Occasional inflation, small nail guns | Basic CFM/PSI, minimal features |
| Mid-range shop | Regular DIY, light spray finishing | Better CFM headroom, lower noise, wheels |
| Professional stationary | Daily commercial use | Two-stage pump, higher duty cycle, durability |
A helpful gut-check before purchasing: price out the compressor that actually meets your calculated CFM and duty cycle needs first, and only then look for the best value within that tier. Buying down from there to save money almost always means re-buying within a year or two once the undersized unit reveals its limits.
Remember to factor a few costs that rarely appear on the price tag itself. Larger stationary units sometimes require an electrician to run a dedicated 240V circuit, which is a real line-item cost if your garage panel doesn’t already have the capacity. Hose, fittings, a regulator, and any tool-specific attachments add up quickly and are easy to underestimate when comparing sticker prices side by side. Building those extras into your budget from the start avoids the unpleasant surprise of a “great deal” compressor that ends up costing just as much as the mid-tier option once everything it needs is accounted for.
Plan Your Accessories Before You Check Out
A compressor by itself is only half a working air system. Budget for a short list of accessories at the same time as the compressor itself, since forgetting them tends to mean an inconvenient second trip before the first project can even start.
A regulator, inline filter, and quick-connect fittings turn a bare compressor into a working system
- Air hose: rated for your compressor’s max PSI, sized long enough to reach your work area without excessive coiling loss.
- Inline regulator and filter: protects downstream tools from moisture and debris while dialing pressure down to each tool’s rated PSI.
- Quick-connect fittings: standardize your setup so tools swap in seconds rather than requiring a wrench each time.
- Pump oil: for oil-lubricated models, keep the manufacturer-specified oil type on hand for scheduled changes.
- Tool-specific attachments: blow guns, tire chucks, or spray gun cups depending on your primary use case.
- Moisture trap or auto-drain valve: especially valuable in humid climates, where condensation inside the tank builds up faster and needs more frequent draining.
Hose material is worth a quick word too, since it changes how the setup actually feels to use day to day. Rubber hoses stay flexible in cold weather and resist kinking but weigh more and coil less neatly. PVC hoses are lightweight and inexpensive but stiffen noticeably in cold garages. Polyurethane hybrid hoses split the difference — lighter than rubber, more flexible in the cold than PVC — at a modest price premium that most shop owners find worthwhile once they’ve fought a stiff, kinked hose on a cold morning.
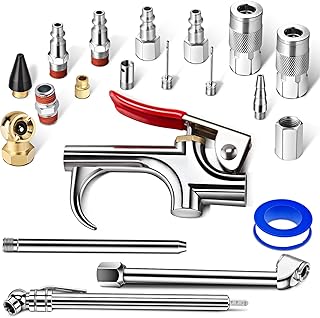
Grab a complete air hose, fitting, and regulator kit to pair with your new compressor.
Shop Compressor Accessories →Once your compressor and accessories are set up, see our walkthrough on how to use an air compressor for safe startup, pressure-setting, and shutdown steps.
Factor In Maintenance and Long-Term Reliability
The compressor you choose today is also a maintenance commitment, and it is worth understanding that upkeep schedule before you buy rather than after the first thermal shutdown. Daily tank draining prevents moisture buildup that would otherwise rust the tank from the inside out over time — a single overlooked step that shortens more compressor lifespans than any mechanical defect does.
A short recurring checklist prevents the majority of premature compressor failures
QUICK MAINTENANCE REFERENCE
Beyond routine care, longevity also comes down to respecting the duty cycle discussed earlier and keeping the unit in a reasonably clean, ventilated space. Before your first startup, review our dedicated air compressor safety guide, which covers pressure-relief checks, proper tank draining technique, and safe storage — all of which directly extend the working life of whichever model you choose.
Two more things worth a quick check before you buy: tank certification and warranty length. Reputable manufacturers stamp their tanks with a pressure-vessel certification confirming the tank has been tested to safely hold its rated pressure, which is a basic safety baseline worth confirming rather than assuming on any tank you’ll be pressurizing regularly. Warranty length also tends to track a manufacturer’s own confidence in the unit — a one-year warranty on a stationary shop compressor is on the shorter end for that category, while multi-year coverage on the pump and motor is a reasonable sign the internals are built to hold up under real use rather than just look good on a shelf.
Stock up on replacement filters, pump oil, and drain valves to keep your compressor running for years.
Shop Maintenance Parts →Air Compressor Glossary: Key Terms Explained
Spec sheets lean heavily on abbreviations that assume you already speak the language. Here is a quick reference for the terms that matter most when comparing models.
CFM (Cubic Feet per Minute): the volume of air a compressor delivers per minute at a given pressure. This is the number to prioritize when matching a compressor to your tools, as covered in Step 2 above.
SCFM (Standard Cubic Feet per Minute): CFM measured under standardized temperature, pressure, and humidity conditions, which allows fair comparison between compressors tested in different locations or seasons. Most consumer spec sheets use SCFM even when they simply print “CFM.”
ACFM (Actual Cubic Feet per Minute): the real-world airflow at your specific altitude, temperature, and humidity, which can differ from the standardized SCFM rating, particularly at higher elevations where thinner air reduces actual output.
PSI (Pounds per Square Inch): the unit of pressure, measuring how hard the compressed air pushes rather than how much of it flows, as detailed in Step 3.
Duty Cycle: the percentage of time within a given period, usually an hour, that a compressor’s motor is designed to run continuously before needing to rest and cool, covered in depth in Step 8.
Single-Stage vs. Two-Stage: describes whether the pump compresses air in one pass or two, with two-stage pumps reaching higher pressures and sustaining longer run times, as explained in Step 1.
Pancake, Hot Dog, Twin Stack: common portable compressor body shapes named for their tank silhouette, each trading off portability against reserve capacity differently.
Thermal Overload Protector: a safety switch that cuts power to the motor if internal temperatures exceed a safe threshold, preventing damage from being pushed past the rated duty cycle.
Drain Valve (Petcock): the small valve at the bottom of the tank used to release accumulated moisture, which should be opened after every use to prevent internal rust.
Regulator: the adjustable control that sets the working pressure delivered to a tool, independent of the tank’s overall storage pressure.
ASME Certification: a pressure-vessel safety standard many manufacturers test their tanks against, confirming the tank can safely hold its rated maximum pressure.
Quick-Connect Fitting: a standardized coupling that lets air tools and hoses snap together and disconnect without tools, speeding up switching between accessories.
Check Valve: a one-way valve between the pump and tank that prevents compressed air from flowing backward into the pump when the motor shuts off, protecting the pump from unnecessary back-pressure.
Pressure Switch: the component that senses tank pressure and automatically starts the motor at the cut-in pressure and stops it at the cut-out pressure, keeping the tank within its designed operating range without manual intervention.
Unloader Valve: a small valve that releases pressure from the pump head the instant the motor shuts off, so the motor can restart under low resistance rather than straining against full tank pressure on its next cycle.
How to Read a Compressor Spec Sheet Without Getting Misled
Manufacturer spec sheets are not dishonest so much as selectively generous, and knowing where the generosity tends to concentrate helps you compare models on a level footing. The headline CFM number printed in bold on the box is often measured at a lower pressure than your tools actually use — a “CFM @ 40 PSI” figure looks much more impressive than the “CFM @ 90 PSI” figure directly beneath it in smaller print, even though the 90 PSI number is the one that actually predicts real-world tool performance.
Peak horsepower is another figure worth reading skeptically. Some manufacturers list a motor’s peak, instantaneous horsepower rather than its continuous running horsepower, which can inflate the number on the box without changing anything about how the compressor performs once it’s actually working. Running horsepower, when listed, is the more honest predictor of sustained performance.
Tank capacity, by contrast, is one of the few numbers that is essentially always accurate and directly comparable across brands — a 26-gallon tank holds 26 gallons regardless of who made it. The practical takeaway: treat CFM at your actual working pressure and running horsepower as the numbers worth scrutinizing closely, and treat tank size and physical dimensions as the numbers you can take at face value.
| Spec Sheet Term | What to Watch For |
|---|---|
| CFM @ 40 PSI | Inflated compared to real working pressure; check the 90 PSI figure instead |
| Peak HP | Instantaneous, not sustained; look for “running HP” if listed |
| Tank Capacity | Reliable and directly comparable across brands |
| Max PSI | Tank storage limit, not tool working pressure |
| dBA Rating | Generally reliable; measured at a standard distance |
Buying New vs. Buying Used
A used compressor can be a genuine bargain, particularly for stationary shop units where a previous owner upgraded or closed a business, but the pump and tank both deserve a careful look before money changes hands. Cycle the compressor on and listen for grinding, knocking, or excessive vibration beyond normal motor hum, since pump wear is the most expensive thing to inherit from a used unit. Check the tank for rust, dents, or bulging, especially near weld seams — a compromised tank is a safety issue, not just a cosmetic one, and it is not something to gamble on to save a modest amount of money.
Ask about maintenance history if the seller has it, particularly oil change records on oil-lubricated pumps, and check whether the unit still holds pressure steadily without an audible hiss from fittings or the tank itself, which would indicate a leak that needs addressing before the compressor is put back into regular service. A used unit with clean maintenance records and a solid tank can be an excellent value; one with unknown history and visible tank corrosion rarely is, regardless of the asking price.
Age alone is not automatically disqualifying — a well-maintained ten-year-old cast iron pump can easily outlast a poorly cared-for two-year-old aluminum one. What matters far more than the manufacture date is how the previous owner actually treated it: was the tank drained regularly, was oil changed on schedule, was it stored somewhere dry rather than left exposed to weather. If a seller can answer those questions confidently, age becomes a minor factor rather than a deciding one.
Environmental Factors: Altitude, Temperature, and Humidity
A compressor’s rated output assumes fairly standard operating conditions, and real-world environments do not always cooperate. At higher altitudes, thinner air means the pump has to work harder to deliver the same actual CFM, so a compressor sized with no margin at sea level can feel noticeably underpowered in a mountain workshop — padding your CFM calculation with extra headroom is worth doing if you live at meaningful elevation.
Cold temperatures thicken pump oil and stiffen hoses, making startup harder on the motor and reducing hose flexibility exactly when you need it most; a shop that regularly dips below freezing benefits from oil rated for colder operation and a hose material that stays pliable in the cold, as discussed in Step 11. Humidity, meanwhile, directly affects how much moisture accumulates in the tank between drainings — a compressor used in a humid coastal climate needs more frequent tank draining and benefits more from an auto-drain valve than the same unit would in a dry inland climate.
Specs That Rarely Make the Marketing Copy
Beyond the headline numbers covered in the twelve steps above, a handful of quieter specs separate a genuinely well-built compressor from one that merely looks the part on a store shelf.
Belt-Drive vs. Direct-Drive
Direct-drive compressors connect the motor straight to the pump, which keeps the design compact and inexpensive but tends to run the pump at higher RPM, generating more heat and wear over time. Belt-drive compressors use a pulley system to run the pump at a slower, more efficient speed than the motor itself spins, which is quieter, runs cooler, and is generally more durable — one reason belt-drive designs dominate the stationary shop category despite costing more upfront than an equivalent direct-drive unit.
Cast Iron vs. Aluminum Cylinders
Cast iron cylinder sleeves dissipate heat more effectively and resist wear better over a long service life, which is why most two-stage and heavy-duty single-stage pumps use them. Aluminum cylinders are lighter and cheaper to manufacture, a reasonable trade-off in a portable unit that prioritizes weight over decade-long durability, but a less reasonable one in a stationary compressor meant to run daily for years.
Number of Tank Outlets
A single-outlet tank works fine for one person running one tool at a time, but a shop running multiple simultaneous air drops benefits from a compressor with two or more outlets straight off the tank, or from plumbing additional drops into rigid air line downstream. This is easy to overlook while comparing CFM and PSI figures, but it directly affects how flexible your setup can be as your tool collection grows.
Included Gauges and Their Accuracy
Every compressor ships with at least a tank pressure gauge and usually a regulated output gauge as well, but gauge quality varies more than most buyers expect. A gauge that reads several PSI off from actual pressure can lead to subtly over- or under-driven tools without any obvious symptom pointing to the cause. If precise pressure control matters for your work — spray finishing is the most sensitive example — a separate, verified gauge is a small investment that removes that uncertainty entirely.
Vibration and Mounting Feet
A compressor bolted or resting directly on a hard concrete floor transmits far more vibration and structural noise through the building than one sitting on rubber isolation feet. This detail rarely appears prominently in marketing copy, but it makes a real, noticeable difference in shared or attached spaces — a compressor rated at a modest dBA level can still feel considerably louder if its vibration is being amplified through an uninsulated concrete slab. Aftermarket anti-vibration pads are inexpensive and worth adding to a stationary unit that will run daily, regardless of what came included in the box.
Quick Decision Checklist
Before you check out, run through this short list one more time. Each line corresponds to a step covered above, and answering all twelve honestly is the fastest way to avoid an expensive mismatch between the compressor you buy and the work you actually intend to do with it.
PRE-PURCHASE CHECKLIST
If every line on that list has a confident answer, you are in a strong position to buy without second-guessing the decision six months from now. If two or three lines still feel uncertain, it is worth revisiting the corresponding step above before finalizing anything — the fifteen extra minutes spent there is considerably cheaper than an undersized compressor discovered mid-project.
Real-World Buying Scenarios
Specs are easier to apply once you see them worked through in context. Here are four common buyer profiles and how the twelve steps above actually play out for each one.
The Weekend DIYer
This buyer inflates tires, runs a brad nailer for small trim projects a few times a year, and occasionally uses a blow gun to clear sawdust off a workbench. None of these tasks draw more than 2-3 CFM, and none of them run for more than a few minutes at a stretch. A 4 to 6 gallon pancake or hot dog compressor, oil-free for simplicity, comfortably covers this entire use case, and the modest noise level and light weight matter more here than any capacity headroom this buyer will likely never use.
The Serious Home Woodworker
This buyer runs a finish nailer regularly, occasionally sprays a clear coat with an HVLP gun, and wants enough reserve capacity that the compressor isn’t cycling constantly through a long finishing session. The HVLP gun is the deciding factor here — its 8 to 14 CFM draw pushes this buyer well past entry-level territory. A 20 to 30 gallon single-stage compressor rated for at least 6.5 CFM at 90 PSI, ideally a lower-noise model since the shop shares a wall with living space, fits this profile closely.
The Small Contracting Crew
Two or three people on a framing or deck crew running framing nailers, a couple of impact wrenches, and occasionally a stapler simultaneously need a compressor that can absorb multiple tools cycling in overlapping bursts. A twin-stack or larger wheeled unit in the 8 to 10 gallon range, sized for combined CFM draw with real margin, plus genuine portability for moving between job sites, matches this crew’s actual working pattern far better than a stationary shop unit would.
The Auto Body or Production Shop
Continuous spray finishing, sanders running for hours at a stretch, and multiple simultaneous air drops throughout the shop push this buyer squarely into two-stage, high-duty-cycle territory. A 60 to 80+ gallon stationary two-stage compressor on a dedicated 240V circuit, plumbed into rigid air line with multiple drop points, is the appropriate scale here — anything smaller will spend most of its working life in thermal overload rather than actually finishing work.
The Off-Grid Remodeler
This buyer works on properties without reliable power access — a barn conversion, a detached workshop awaiting electrical service, or a remote property mid-renovation. Portability and independence from a wall outlet matter more here than raw capacity. A gas-powered compressor, despite its added noise and maintenance, is the appropriate trade-off for this specific circumstance, since no electric model can solve the underlying problem of having nowhere to plug one in.
The RV and Overlanding Enthusiast
Airing down and re-inflating tires for off-road travel, running a small air tool occasionally at a remote campsite, and needing something compact enough to store in a vehicle without dominating cargo space defines this buyer’s needs. A small 12V or compact portable inflator-style compressor, sized around tire inflation rather than shop tool use, fits this scenario far better than any of the shop-oriented units discussed elsewhere in this guide — a reminder that “best” always depends on matching the machine to the actual job, not to the biggest spec sheet available.
Common Mistakes to Avoid
Buying on Tank Size Alone
This is the single most common mistake covered throughout this guide, and it bears repeating here: tank size is a buffer, not a power source. A large tank on an underpowered pump still runs out of usable pressure the moment a continuous-draw tool empties it, and then waits on the same undersized motor to refill it. Lead with CFM, not gallons.
Ignoring the Combined Draw of Multiple Tools
Sizing a compressor for one tool in isolation, then adding a second workstation or a helper running a second tool later, is a frequent source of disappointment. If your shop’s future plans include more than one air drop running at once, size for that combined total from the start rather than discovering the shortfall mid-project.
Skipping the Electrical Check
Larger stationary compressors often need a dedicated 240V circuit, and discovering that requirement after the unit is already in the garage is an expensive surprise. Confirm your panel’s available capacity and the compressor’s electrical requirements before you buy, not after delivery.
Neglecting Daily Tank Drainage
Moisture collects in every compressor tank as a natural byproduct of compressing ambient air, and if that condensation isn’t drained regularly, it rusts the tank from the inside out — often invisibly, until the day it fails. This is a thirty-second habit that prevents one of the most common causes of premature tank failure.
Overlooking Noise Until After Delivery
A compressor that sounded fine in a big-box store’s showroom floor can feel considerably louder in an enclosed garage with hard concrete walls reflecting the sound back. Checking the dBA rating in advance, and being realistic about where the unit will actually live, avoids a returns process nobody enjoys.
Forgetting the Accessories Budget
A compressor without a matched hose, regulator, and fittings isn’t really a working system yet. Budgeting for those pieces alongside the compressor itself, rather than as an afterthought, keeps the total project cost from creeping past what was originally planned.
Assuming Every Tool Needs the Same Pressure
Running every attachment at a single fixed pressure, rather than adjusting the regulator for each tool’s actual rating, is a subtle mistake that shows up as inconsistent results rather than an obvious failure — over-driven fasteners, uneven spray patterns, or premature tool wear. Getting comfortable adjusting the regulator for each specific task pays off in finished work quality more than most buyers expect going in.
Buying Based on Peak Horsepower Alone
As covered in the spec-sheet section above, a bold peak horsepower number on the box does not reliably predict sustained performance. Buyers who shop on that single figure without checking CFM at actual working pressure sometimes end up with a compressor that sounds powerful but underperforms the moment a real tool is attached.
Sizing a Full Shop: A Worked CFM Budget Example
The single-tool math covered in Step 2 is straightforward, but a shop with several stations running air at once benefits from working through a complete budget rather than sizing around just one tool. Here is how that budgeting exercise looks in practice for a small two-person cabinet shop.
Station one runs a random orbital sander during finish sanding, drawing roughly 5 CFM continuously while in use. Station two runs a brad nailer intermittently for case assembly, drawing closer to 0.5 CFM per shot with plenty of recovery time between shots, which means its continuous-equivalent draw is much lower than its instantaneous draw. Station three occasionally runs an HVLP spray gun for finishing work, drawing up to 10 CFM while actively spraying.
If all three stations genuinely never overlap, you size for the single highest continuous draw — the spray gun’s 10 CFM — plus a margin, landing around 13 CFM as your target. If sanding and nailing do sometimes overlap, but spraying always happens as a separate, isolated step, you would size for the sander-plus-nailer combined load against the spray gun’s isolated load and take whichever total is higher. In this shop’s case, that still points to the spray gun as the deciding factor, which is a common pattern: whichever single tool has the highest continuous CFM draw, run in isolation, is very often the number that ultimately sets the whole shop’s compressor requirement, even in a room full of other tools.
This is also where a two-stage or larger single-stage stationary compressor starts to make more sense than the pancake or hot dog units discussed for lighter use earlier in this guide — not because the shop needs more tank capacity exactly, but because sustaining 13 CFM continuously for the length of a spray session calls for a pump built for that kind of extended output rather than one designed around short intermittent bursts.
Frequently Asked Questions
A few questions come up more than any others once buyers start comparing specific models side by side. Here are straightforward answers to the ones we hear most often.
What size air compressor do I need for a home garage?
For most home garage work — inflating tires, running a brad nailer, light spray painting — a 20 to 30 gallon compressor delivering 4 to 6 CFM at 90 PSI is enough for the vast majority of DIY tasks. Stepping up in tank size mainly buys extra reserve for occasional bigger projects rather than being strictly necessary for everyday use.
Is a bigger tank always better?
Not necessarily. A larger tank gives you more reserve air between motor cycles, which is great for intermittent tools, but it also adds weight, cost, and floor space. The right tank size depends on how you actually use air, not just on having extra capacity sitting around.
What is the difference between CFM and PSI?
PSI measures pressure, or how hard the air pushes, while CFM measures volume, or how much air flows over time. Tools need both a minimum pressure to function and a minimum volume to run continuously, and CFM is usually the harder spec to satisfy, which is why it deserves the most attention when comparing models.
Should I buy an oil-free or oil-lubricated air compressor?
Oil-free models need less maintenance and are lighter, making them a good fit for occasional homeowner use, while oil-lubricated pumps run cooler and last longer under sustained daily use, which matters more for a busy shop or jobsite. Noise level is a secondary factor worth weighing too, since oil-free pumps tend to run somewhat louder than comparable oil-lubricated models.
How loud is too loud for an air compressor?
Most contractor-grade compressors run between 75 and 80 decibels, comparable to a running dishwasher, while newer low-noise designs can drop into the high 60s. Anything consistently above 85 decibels is worth pairing with hearing protection for extended use, and it’s worth remembering that hard-walled garages can make a compressor sound louder in practice than its rated dBA number suggests.
Can I run a framing nailer and an impact wrench off the same compressor?
Yes, as long as the compressor’s CFM output covers the combined air draw of both tools running at once, plus a margin for recovery time, otherwise you will notice the pressure sag when both are in use simultaneously. Adding up each tool’s rated CFM at your actual working pressure, rather than estimating, is the most reliable way to confirm a compressor can handle both at once.
What is duty cycle and why does it matter?
Duty cycle describes what portion of an hour the motor is rated to run before it needs to rest and cool down, and a compressor pushed beyond its rated duty cycle can overheat, trip its thermal protector, or wear out prematurely.
Do I need a single-stage or two-stage compressor?
Single-stage compressors suit most home and light commercial needs up to around 150 PSI, while two-stage compressors compress air twice for higher pressure and continuous heavy-duty output, which matters mainly in industrial or high-volume production settings.
How much should I budget for a reliable air compressor?
A dependable portable compressor for home use typically falls in a moderate price range, while stationary shop compressors with larger tanks and two-stage pumps sit well above that, and the right number depends far more on your actual air demand than on chasing the cheapest or priciest option.
Are pancake compressors good for construction work?
Pancake compressors are excellent for trim carpentry, deck work, and other jobsite tasks that need portability and quick setup, though their smaller tanks mean the motor cycles more often under sustained high-demand tools.
Does a gas-powered air compressor make sense for a home shop?
Gas-powered compressors are built for job sites without electrical access, so unless you regularly work off-grid, an electric model is simpler, quieter, and cheaper to run for a home shop.
What accessories do I need alongside a new air compressor?
A basic setup benefits from a quality air hose rated for your PSI, an inline regulator and filter, quick-connect fittings, and oil for lubricated pumps, with additional tool-specific attachments added as your air-tool collection grows.
Bringing It All Together
Choosing an air compressor comes down to working through the same short list of questions any experienced shop owner would ask before spending a dollar: what tools will actually run off this unit, how much CFM do they draw at their peak, how much reserve does your workflow really need, and where will the compressor physically live. Get those four answers straight, and tank size, PSI, and price largely sort themselves out from there.
It is worth resisting the pull of the biggest tank on the shelf or the lowest price tag at the register, since neither number tells you whether the compressor can actually keep pace with the tools you own. A correctly sized 20-gallon unit that matches your real CFM demand will serve you far better than an oversized bargain that still can’t keep up with a spray gun, and a compressor bought with accessories, electrical requirements, and maintenance already budgeted in will feel like a far better purchase a year from now than one that required a second and third trip back to the store to actually finish the setup.
If your next project involves cutting material to size before the air tools even come out, our guide to the best power saws is a natural next stop, and our how to use an air compressor walkthrough will get your new setup running safely from day one.
See Today’s Top-Rated Air Compressors →