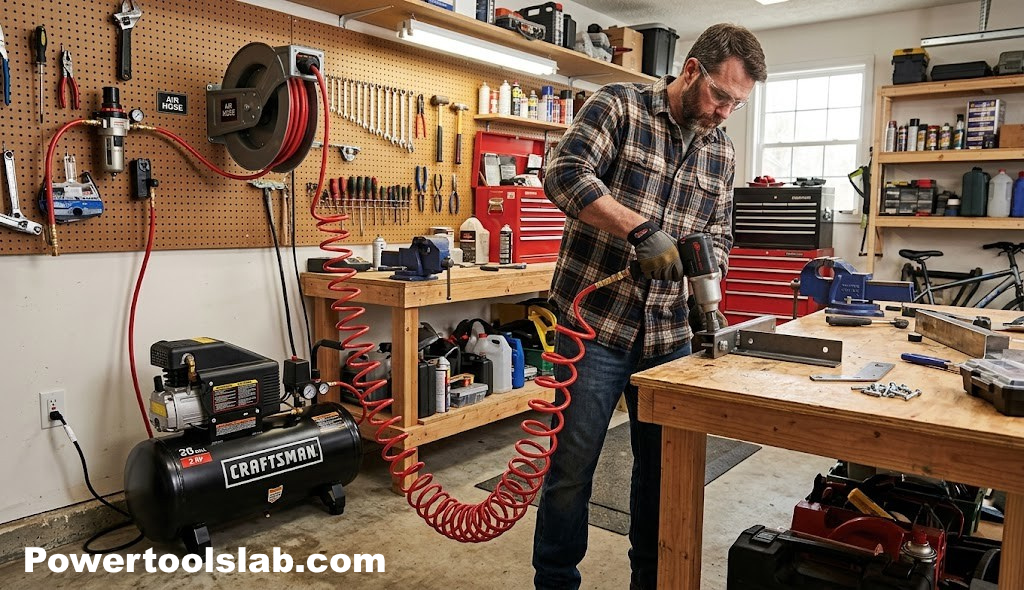
How to Use an Air Compressor: The Complete Step-by-Step Guide
Everything you need to know to set up, operate, and maintain an air compressor safely — whether you’re inflating tires, running a nail gun, or powering an impact wrench.
What an Air Compressor Actually Does
An air compressor is, at its core, a simple machine that takes ordinary air, squeezes it into a much smaller space, and stores that compressed air under pressure so it can be released on demand to do work. That stored energy is what powers everything from a nail gun driving fasteners in a fraction of a second to a spray gun laying down an even coat of paint, to an impact wrench breaking loose a stubborn lug nut. Understanding this basic idea — pressure stored, then released through a controlled path — makes every other concept in this guide much easier to follow.
If you’re brand new to compressed air tools, it helps to know that the compressor itself is only half of the system. The other half is the regulator, hose, and connectors that control how much of that stored pressure actually reaches your tool. Get the balance wrong and you can either starve a tool of the air it needs or send it more pressure than it was built to handle. Everything in this guide is built around getting that balance right, every time you power up the machine.
Compressors also differ quite a bit in how they’re built to run — some are designed for short, occasional bursts of use around the house, while others are built for near-continuous operation in a professional shop. Neither type is “better” in an absolute sense; the right choice depends entirely on the tools you plan to run and how often you plan to run them. Treating a light-duty home compressor like a commercial unit, or expecting a commercial unit’s noise and footprint from a light-duty one, is one of the most common sources of frustration for new owners, so it helps to be honest about your actual use case from the start.
Before diving into the step-by-step process, it’s worth reading our companion guide on how air compressors work, which breaks down the internal mechanics — pistons, motors, and pressure switches — in more depth than we’ll cover here. If you haven’t purchased a unit yet, our guide on how to choose an air compressor and our companion piece on what size air compressor do I need will help you land on the right model before you ever plug one in.
Understanding Duty Cycle (And Why It Protects Your Motor)
Duty cycle describes how long a compressor’s motor can run continuously before it needs to rest and cool down, usually expressed as a percentage over a set time window — for example, a 50% duty cycle over 10 minutes means the motor is designed to run for 5 minutes and then sit idle for 5 minutes. Consumer-grade compressors typically have lower duty cycles than commercial or industrial units, which is fine for occasional home projects but becomes a real limitation if you’re running a tool continuously for long stretches, such as sandblasting a large surface or spraying an entire fence.
Pushing a compressor past its duty cycle doesn’t usually cause an immediate failure, but it accelerates wear on the motor windings and pump components, and in oil-lubricated units it can lead to overheating that breaks down the oil’s lubricating properties faster than normal. If you notice the motor running almost non-stop with only brief pauses, or if the housing becomes hot to the touch, that’s a sign you’re either exceeding the duty cycle or the compressor is undersized for the task at hand.
For occasional tasks, this rarely becomes an issue since most home use involves short bursts of tool operation followed by natural pauses to reposition material or change fasteners. It becomes far more relevant for continuous-draw tasks like spray painting a whole room or running a die grinder for extended metal fabrication work, where you may need to plan intentional cool-down breaks even if the compressor doesn’t force them on you automatically.
Manufacturers list duty cycle in the spec sheet or owner’s manual, though it’s often buried below the headline PSI and tank size numbers that get top billing on the box. If you can’t find it listed, a reasonable rule of thumb for a budget consumer compressor is to assume something in the 25-50% range, meaning frequent short breaks rather than hours of uninterrupted running, unless the listing specifically markets the unit as a commercial or continuous-duty model designed for exactly that kind of sustained use.
Oil-Lubricated vs. Oil-Free: Which Do You Have?
Before you can follow Step 2 correctly, you need to know which category your compressor falls into, since the maintenance routine differs significantly between the two. Oil-lubricated compressors use a small reservoir of oil to lubricate the piston and cylinder walls, similar in principle to a small engine, and they typically run quieter and last longer under heavy use, which is why they’re common in professional and stationary shop compressors. Oil-free compressors use permanently lubricated or self-lubricating components instead, trading some of that longevity and quiet operation for a lighter, more portable, maintenance-free design that’s popular in pancake and hot-dog style units aimed at homeowners and light-duty jobsite use.
Oil-Lubricated Advantages
- Generally quieter operation
- Longer pump lifespan under heavy use
- Better suited to continuous or frequent daily use
Oil-Free Advantages
- No oil checks or changes required
- Lighter weight, easier to transport
- Works in any orientation without oil spill concerns
If you’re not sure which type you own, check the owner’s manual or look for a small oil fill cap and sight glass near the pump housing — its presence almost always indicates an oil-lubricated design. When in doubt, treat the unit as oil-lubricated until you’ve confirmed otherwise, since running an oil-free unit through an oil-check routine causes no harm, while skipping oil checks on a unit that actually needs them can cause real damage.
Some compressors also use a hybrid approach, with permanently sealed, factory-lubricated bearings on an otherwise oil-free pump design, which is worth noting only because it means “oil-free” doesn’t always mean zero lubrication was ever used — it means there’s nothing for you to check, top off, or change yourself. These units are serviced, if ever, by a technician rather than through routine owner maintenance, which is part of why they’re marketed as maintenance-free even though lubrication is technically present inside the sealed components.
Safety Gear and Prep Checklist
Before you touch the power switch, gather the following:
- Safety glasses or goggles rated for impact protection
- Hearing protection, especially for oil-lubricated or gas-powered units that run louder
- Work gloves suited to the task (avoid loose gloves near moving belts or fittings)
- A properly rated extension cord if the outlet is out of reach (12-gauge or heavier for most compressors)
- The compressor’s owner’s manual, at least the first time, to confirm your specific model’s startup sequence
For a full rundown of hazards and prevention, see our dedicated air compressor safety guide, which covers everything from tank inspection to safe storage in more detail than we have room for here.
It’s also worth doing a quick visual inspection of the compressor itself before every session, not just before the very first use. Look over the power cord for cracks or exposed wire, check that the tank shows no visible bulging, rust-through, or dents, and confirm the safety relief valve moves freely when you pull its test ring. These checks take under a minute but catch the kind of wear that, left unnoticed, turns a routine session into a real hazard.
CFM vs PSI: The Number That Actually Matters
Most people shopping for an air compressor fixate on the PSI rating printed on the box, but PSI only tells you how hard the air is pushing, not how much of it the machine can deliver over time. The number that actually determines whether a compressor can keep up with a tool is CFM, or cubic feet per minute — a measure of volume, not force. A tool can technically run on a compressor’s peak PSI and still stall out or lose power because the compressor simply cannot refill the tank fast enough to match the tool’s continuous air draw.
This distinction becomes obvious the first time someone tries to run a high-demand tool, like a die grinder or a sandblaster, off a small pancake compressor. The gauge shows plenty of pressure at the start, but within seconds the tool bogs down as the tank empties faster than the motor can refill it. Nail guns and staplers, by contrast, use quick bursts of air rather than a continuous stream, which is why even small compressors handle trim and framing work comfortably despite modest CFM ratings.
As a rule of thumb, always check a tool’s CFM requirement at its rated operating pressure, then compare that number against your compressor’s CFM output at the same pressure — not at zero PSI, which manufacturers sometimes use to advertise an inflated number. If your compressor’s CFM output falls short of what a tool demands, expect reduced performance, increased duty cycling, and, over time, added wear on the motor from running almost constantly to keep up.
| Tool | Typical CFM Requirement (at rated PSI) |
|---|---|
| Brad nailer | 0.5–1.0 CFM |
| Framing nailer | 2.0–3.5 CFM |
| Orbital sander | 4.0–6.0 CFM |
| Impact wrench (1/2″) | 4.0–5.0 CFM |
| Die grinder | 4.0–6.0 CFM |
| Spray gun (HVLP) | 8.0–14.0 CFM |
| Sandblaster (small) | 10.0–20.0 CFM |
Air Compressor Applications: Task-by-Task Breakdown
The steps in this guide apply to almost every scenario you’ll encounter, but a few task categories deserve their own notes because the setup or technique shifts slightly depending on what you’re doing.
Nailing and Stapling (Trim, Framing, Flooring)
Nail guns are forgiving on CFM but sensitive to consistent PSI. Set the regulator to the manufacturer’s recommended range and do a few test shots into scrap material before working on the actual piece, adjusting pressure up or down in small 5 PSI increments until the fastener sets flush without overdriving through the surface.
Painting and Finishing With a Spray Gun
Spray guns need steady, moderate pressure and relatively high CFM to atomize paint evenly. A compressor that cycles on and off frequently during a spray pass will produce visible inconsistencies in the finish, so this is one of the few tasks where tank size and CFM matter more than in most other home projects. Test your spray pattern on cardboard first and adjust both the regulator and the gun’s own fan-pattern control together.
Automotive Work (Impact Wrenches, Tire Inflation)
Impact wrenches draw air in short, forceful bursts similar to nail guns but at a higher CFM per burst, especially for larger lug nuts or rusted fasteners. For tire inflation, always use a separate calibrated gauge to double-check pressure rather than relying solely on the compressor’s built-in gauge, since small inaccuracies matter more at the lower PSI ranges tires require.
Cleaning and Blow-Off Tasks
Blow guns used for clearing dust and debris should be fitted with an OSHA-compliant nozzle that caps dead-end pressure at 30 PSI and includes side vents, reducing the risk of air embolism if the nozzle is accidentally held against skin. Keep the regulator set no higher than necessary for the task.
Inflating Sports Equipment and Recreational Items
Basketballs, pool floats, and similar items need very low, tightly controlled pressure. Use a needle or specialty adapter rather than a standard blow gun, and inflate in short bursts, checking firmness by hand between bursts rather than relying on the tank gauge, which is not precise enough for these small volumes.
Airbrushing and Fine Detail Work
Airbrushes need very low, extremely stable pressure — often in the 15 to 30 PSI range — and are sensitive to even small fluctuations caused by a compressor cycling on and off mid-stroke. A small tank paired with a precise regulator, or a dedicated airbrush compressor with a built-in tank to smooth out pulses, produces noticeably better results than trying to run an airbrush directly off a large shop compressor without a buffer tank in between.
Pneumatic Tools in Woodworking (Pin Nailers, Staplers, Crown Staplers)
Fine woodworking tools like pin nailers and crown staplers are similar in behavior to brad nailers but often run at the lower end of the pressure spectrum, sometimes as low as 60-70 PSI, since the fasteners themselves are thinner and more prone to bending or blowing through delicate trim if driven too hard. Always test on an offcut of the same material and thickness you’re working with before moving to the visible piece.
Understanding the Parts Before You Start
Every air compressor, whether it’s a small pancake-style unit or a large stationary shop compressor, shares a handful of common components. Knowing what each one does removes a lot of the guesswork from the steps that follow.
| Part | What It Does |
|---|---|
| Motor | Drives the pump that compresses air; can be electric, gas, or diesel powered |
| Pump/Cylinder | Physically compresses incoming air using a piston or rotary screw mechanism |
| Tank | Stores compressed air so tools have a steady reserve to draw from |
| Pressure switch | Automatically starts and stops the motor based on tank pressure |
| Regulator | Controls the output pressure delivered to your tool, separate from tank pressure |
| Tank gauge | Shows the current pressure stored inside the tank |
| Regulator gauge | Shows the pressure currently set for outgoing air |
| Safety valve | Releases air automatically if tank pressure exceeds a safe threshold |
| Drain valve | Located at the tank’s lowest point, used to release condensed moisture |
| Quick-connect coupler | Lets you attach and detach hoses and tools without tools of your own |
It’s worth spending a minute walking around your specific compressor and physically locating each of these parts before your first use, rather than only reading about them here. Manuals vary in how clearly they label components, and a hands-on look — finding the drain valve, tracing the hose from the tank to the regulator, identifying the safety valve — builds the kind of familiarity that makes the step-by-step process below feel intuitive rather than like a checklist you’re following blindly.
Step 1: Choose a Safe Location
Set the compressor on a flat, stable, dry surface with at least a foot of clearance on all sides for airflow around the motor. Oil-lubricated and gas-powered units need extra clearance and, ideally, outdoor or well-ventilated placement because of exhaust and heat. Avoid running any compressor in a space with flammable vapors, dust, or standing water nearby.
Diagram: clearance zones around a stationary compressor
Portable pancake and hot-dog style compressors are more forgiving about placement since they run cooler and quieter, but the same basic rules apply: flat ground, no standing water, and enough room that the intake vents aren’t blocked by a wall or stack of materials.
It’s also worth thinking about hose routing before you settle on a final spot. Placing the compressor at the center of your work area, rather than off to one side, often means you can reach every corner of a room or garage bay with a shorter hose, which reduces pressure drop and trip hazards alike. If you’re working on an elevated surface like a ladder or scaffold, route the hose along the floor rather than draping it across a walkway where it can catch a foot mid-task.
Step 2: Check Oil and Fluid Levels
If your compressor is oil-lubricated, check the sight glass or dipstick before every startup, especially the first time you use a new unit. Oil should sit between the minimum and maximum marks; running the pump dry, even briefly, can score the cylinder walls and shorten the compressor’s life dramatically. Oil-free compressors skip this step entirely — there is nothing to check or top off.
Diagram: reading oil level between MIN and MAX marks
Step 3: Connect to Power
Plug the compressor directly into a wall outlet whenever possible. If you must use an extension cord, use a short, heavy-gauge cord (12-gauge or thicker) rated for the compressor’s amperage — thin or long cords cause voltage drop, which can overheat the motor and trip breakers unnecessarily. Confirm the pressure switch is in the “off” position before plugging in, since some units start automatically the moment they receive power.
Diagram: proper cord path from wall outlet to compressor inlet
Step 4: Build Tank Pressure
Switch the compressor to “on” or “auto” and let it run until the pressure switch clicks off on its own — this means the tank has reached its cutoff pressure, typically between 125 and 155 PSI on most consumer units. Watch the tank gauge, not the regulator gauge, during this stage; the two are separate readings and only the tank gauge tells you how much reserve air is stored.
Diagram: tank pressure gauge climbing toward cutoff pressure
The first fill after a fresh startup typically takes the longest, since the tank is starting from zero. On most consumer compressors in the 6-20 gallon range, expect this initial fill to take somewhere between 30 seconds and two minutes depending on motor size and tank volume. Subsequent refills, once you’re actively using a tool, are usually much faster since the motor is only making up the difference the tool has drawn down rather than filling from empty.
Step 5: Set the Regulator (PSI)
Once the tank is pressurized, turn the regulator knob to set the output pressure your tool actually needs — this is almost always lower than the tank’s cutoff pressure. Pull the knob out to unlock it, turn to the desired PSI on the regulator gauge, then push it back in to lock the setting. Setting the regulator too high for a delicate tool, like a brad nailer or airbrush, risks damaging both the tool and your workpiece.
| Tool | Typical PSI Range |
|---|---|
| Brad nailer | 70–90 PSI |
| Framing nailer | 100–120 PSI |
| Impact wrench | 90–120 PSI |
| Orbital sander | 70–90 PSI |
| Spray gun (painting) | 25–50 PSI |
| Tire inflator | Per tire spec, usually 30–35 PSI |
| Blow gun (cleaning) | 30–40 PSI (OSHA capped at 30 PSI for dead-end blow) |
Diagram: adjusting the regulator to the tool’s required PSI
Step 6: Attach the Hose and Tools
With the regulator set, connect your air hose to the quick-connect coupler on the compressor, then attach your tool to the other end of the hose. Push the connector in firmly until you hear or feel it click into place, then give it a light tug to confirm it’s seated. Never connect or disconnect fittings while the line is under high pressure with the trigger held open — release trapped air first if the tool has a bleed-off feature.
Diagram: hose routed from compressor coupler to tool
Step 7: Operate the Tool
With everything connected, engage the tool as intended — pull the nailer’s trigger, hold the impact wrench against the fastener, or squeeze the spray gun trigger for a test pass on scrap material first. Keep an eye on the tank gauge during extended use; high-demand tools can draw down pressure faster than the motor refills it, causing the compressor to cycle on frequently or the tool to lose power mid-task.
Diagram: monitoring pressure while a tool draws air
If you notice the motor cycling on much more frequently than it did when you started, that’s a useful early signal that the task is approaching or exceeding your compressor’s sustainable CFM output at your working pressure. Taking short breaks between passes — repositioning material, checking your work, swapping fasteners — naturally gives the tank time to recover and keeps the motor from running in an almost continuous loop, which is gentler on the whole system over the course of a long project.
Step 8: Shut Down and Drain the Tank
When you’re finished, switch the compressor off, unplug it, and disconnect the hose and tool. Open the drain valve at the bottom of the tank to release any remaining pressure and condensed moisture — tilt the compressor slightly if needed so water drains completely. Leaving moisture inside the tank is one of the leading causes of premature rust and tank failure.
Diagram: draining condensation from the tank’s lowest point
Ready to Get Started?
See our top-tested pick for reliable home and garage use.
Check Price on AmazonCommon Mistakes to Avoid
Most compressor problems trace back to one of a small handful of habits rather than a defective machine. Recognizing these patterns early saves both money and downtime.
Skipping the Tank Drain
Even oil-free compressors accumulate condensation inside the tank as humid air cools and compresses. Left sitting, that moisture pools at the bottom of the tank and slowly rusts it from the inside out — a problem you won’t notice until the tank fails, sometimes catastrophically. Draining after every session, or at minimum once a week with regular use, prevents this entirely and takes only a few seconds.
Confusing Tank Pressure With Regulated Output Pressure
New users often assume there’s a single pressure number to worry about, but a compressor actually reports two: the tank gauge, which shows total stored pressure, and the regulator gauge, which shows what’s actually being sent to your tool. Adjusting the wrong knob, or reading the wrong gauge, is one of the most common points of confusion for first-time users and can lead to a tool receiving far more pressure than it’s rated for.
Using an Undersized Extension Cord
Compressors draw a meaningful surge of current at startup, and a thin or overly long extension cord can’t deliver that current without a voltage drop. The motor compensates by drawing even more current to make up for the lost voltage, which generates excess heat and often trips breakers or, over time, shortens motor life. If a cord is unavoidable, use the shortest, heaviest-gauge option you have on hand.
Running the Wrong Oil (or No Oil) in Oil-Lubricated Models
Not all compressor oils are interchangeable with automotive motor oil — many manufacturers specify a non-detergent oil formulated specifically for compressor pumps. Using the wrong type, or skipping oil entirely because you weren’t sure the unit needed it, can cause premature wear that shows up as knocking noises or reduced pressure output well before the pump’s expected lifespan.
Leaving the Unit Plugged In and Pressurized Long-Term
A compressor sitting fully pressurized with the power connected can, in rare cases, cycle on unexpectedly if the pressure switch develops a fault or a slow leak drops the tank pressure below the cut-in point. Unplugging the unit between sessions removes this risk entirely and is a habit worth building even if your specific model has never given you trouble.
Pointing a Live Air Nozzle at Skin
This deserves repeating on its own: compressed air directed at skin, even briefly, can force air beneath the surface and into the bloodstream, which is a genuine medical emergency requiring immediate attention. Treat every nozzle as if it’s live, even when you believe the line is depressurized.
Ignoring Unusual Noises or Smells
A burning smell often means the motor is overheating or a belt is slipping; a grinding or knocking sound from the pump usually points to a lubrication problem or worn bearing. Both are signals to shut down and investigate rather than finish “just one more” task, since continuing to run a compressor showing these symptoms tends to turn a minor repair into a full pump or motor replacement.
A Simple Maintenance Schedule You Can Actually Follow
Most maintenance advice gets ignored simply because it’s not organized into a routine. Breaking it down by frequency, rather than presenting a long undifferentiated list, makes it much easier to actually stick with over the life of the compressor.
| Frequency | Task |
|---|---|
| Every use | Drain the tank; check oil level (if applicable) |
| Weekly (regular use) | Inspect hoses and fittings for wear or leaks |
| Monthly | Clean or check the intake air filter; test the safety relief valve |
| Every 50 hours (new unit) | First oil change, oil-lubricated models |
| Every 500–1,000 hours or seasonally | Routine oil change, oil-lubricated models |
| Annually | Inspect belts (if belt-driven), check mounting bolts, verify pressure switch calibration |
Sticking a small printed version of this table to the wall near your compressor, or keeping a note on your phone, turns maintenance from something you have to remember into something you simply check off as part of your normal shop routine.
Storing Your Air Compressor Between Uses
How you store a compressor between projects has a bigger impact on its lifespan than most people expect. Extreme temperature swings, humidity, and dust are the three biggest long-term threats to both the pump and the electrical components, and a little attention at the end of each project goes a long way.
- Drain the tank completely before long-term storage, not just partially, to avoid rust forming during weeks or months of inactivity.
- Store indoors when possible, ideally in a space that doesn’t swing between freezing and hot temperatures, which stresses seals and gaskets over time.
- Cover the unit if it must be stored in a garage or shed with dust or debris in the air, using a breathable cover rather than sealed plastic that can trap condensation.
- Coil hoses loosely rather than kinking them tightly, which can create weak points that crack or leak over time.
- Release regulator pressure to zero before storage so the diaphragm isn’t left under tension for extended periods.
Maintenance Tips for Longevity
Do This Regularly
- Drain the tank after every use
- Check and clean or replace the intake air filter
- Inspect hoses and fittings for cracks or leaks
- Check oil level before each session (oil-lubricated units)
- Store in a dry, temperature-stable space
Avoid Doing This
- Running the unit with a clogged or missing filter
- Storing it outdoors uncovered through winter
- Overfilling the oil past the max mark
- Ignoring the safety relief valve if it starts leaking
- Using degraded or kinked hoses that restrict airflow
Disposing of Used Compressor Oil Responsibly
When it’s time for an oil change on a lubricated compressor, never pour the used oil down a drain or into the trash. Most auto parts stores and municipal recycling centers accept used motor and compressor oil free of charge, and many will also take the oil filter if your model has one. Store used oil in a sealed, labeled container between the change and drop-off to avoid spills and to keep it clearly separated from other shop fluids.
Choosing a Hose Material: Rubber, PVC, Polyurethane, or Hybrid
Hose material affects flexibility, weight, and cold-weather performance more than most buyers expect. Rubber hoses stay flexible in cold temperatures and resist abrasion well but are heavier to drag around a job site. PVC hoses are lightweight and inexpensive but stiffen considerably in cold weather, becoming difficult to uncoil and prone to kinking. Polyurethane hoses split the difference, offering good flexibility and low weight, while hybrid polymer blends aim to combine rubber’s durability with PVC’s lighter weight at a higher price point. For most home garage use in a temperature-controlled space, any of these will perform adequately; for outdoor winter work, rubber or polyurethane is generally the more comfortable choice.
Helpful Accessories That Make Life Easier
A handful of low-cost accessories dramatically improve the day-to-day experience of owning a compressor, and most beginners don’t discover them until after their first frustrating session — a spray job ruined by moisture spitting out of the gun, an impact wrench that seizes up early from lack of lubrication, or a tangle of straight hose underfoot in a small garage. None of these problems require a bigger or more expensive compressor to fix; they just require the right small part in the right place along the air line.
- In-line water filter/separator: Catches moisture before it reaches your tool or spray gun, protecting against rust inside sensitive equipment and reducing spotting on paint finishes.
- In-line oiler: Automatically feeds a small amount of lubricant into the air stream for tools that need it, such as impact wrenches and grinders, extending their service life.
- Coiled recoil hose: Reduces clutter and tripping hazards in smaller shop spaces, though it offers slightly less airflow than a straight hose of the same length.
- Quick-connect fitting sets: Standardizing on one coupler style (commonly “Industrial” or “ARO” style in the U.S.) across all your tools saves time swapping adapters.
- Pressure regulator with gauge, mounted at the tool end: Useful when running a long hose to multiple stations, letting each user set pressure locally without walking back to the compressor.
- Tank drain valve accessory (ball-valve style): Many stock petcock drain valves are awkward to operate; swapping in a ball-valve style drain makes draining faster and less messy.
Troubleshooting Common Air Compressor Problems
Even a well-maintained compressor will occasionally act up. The table below covers the issues most home users run into, along with the most likely cause and fix for each. As a general rule, work through the simplest and cheapest explanation first — a loose fitting, a low oil level, a tripped breaker — before assuming a major internal component has failed, since the vast majority of compressor complaints trace back to something minor and easily fixed rather than a pump or motor replacement.
| Symptom | Likely Cause | What To Do |
|---|---|---|
| Motor hums but won’t start | Low voltage, seized pump, or capacitor failure | Check power source and cord gauge; if it persists, the pump or capacitor may need service |
| Compressor won’t build full pressure | Leak in fittings, worn check valve, or clogged filter | Spray soapy water on fittings to spot leaks; replace worn parts as needed |
| Tool loses power during use | CFM demand exceeds compressor output | Switch to a lower-draw tool or upgrade to a higher-CFM compressor |
| Excess moisture in the air line | Humid climate, insufficient draining | Drain more frequently and add an in-line water separator |
| Loud hissing when off | Leaking check valve or fitting | Identify the leak point and tighten or replace the fitting |
| Motor overheats and shuts off | Poor ventilation, prolonged duty cycle, low oil | Improve clearance around the unit and let it cool before restarting |
| Pressure switch won’t shut off motor | Faulty or stuck pressure switch | Stop use immediately and have the switch inspected or replaced |
Air Compressor Tank Sizes Explained
Tank size determines how much reserve air is available before the motor has to kick back in, and it’s one of the most misunderstood specs on the box. A larger tank doesn’t make the compressor more powerful in terms of PSI or CFM, but it does give you a bigger buffer for tasks that use quick bursts of air, letting you fire off several nail gun shots or short bursts from a blow gun before the motor needs to refill the reserve.
| Tank Size | Typical Use Case |
|---|---|
| 1–3 gallons | Inflation, light trim nailing, small crafts |
| 4–6 gallons | General DIY, trim and finish nailing |
| 8–20 gallons | Home garage/shop use, framing, light spray work |
| 30–60 gallons | Small shop, frequent tool use, moderate spray painting |
| 60+ gallons | Professional shop, sandblasting, continuous-draw tools |
For tasks that use air continuously rather than in short bursts — spray painting, sandblasting, running air-powered sanders for extended periods — tank size matters less than CFM output, since the motor will be cycling on almost constantly regardless of how large the tank is. For burst-style tasks, a larger tank means fewer motor cycles overall, which can extend the life of the motor and pressure switch over years of use.
It’s also worth remembering that tank size adds meaningfully to weight and footprint. A 20-gallon vertical tank compressor is a very different object to move around a garage than a 6-gallon pancake unit, even though both might be marketed toward similar home-use audiences. If portability matters as much as capacity for your situation, it’s worth physically comparing dimensions and weight between models rather than sizing purely by gallon count on a spec sheet, since two compressors with the same tank size can differ substantially in overall bulk depending on tank shape and frame design.
Noise Levels: What to Expect
Noise is one of the most common complaints from first-time compressor owners, particularly with oil-free models, which tend to run louder than their oil-lubricated counterparts due to differences in pump design. Understanding roughly what to expect helps you plan for hearing protection and, if needed, choose a quieter model for indoor or shared-space use.
| Compressor Type | Approximate Noise Level |
|---|---|
| Quiet/oil-free “hush” models | 50–65 dB |
| Standard oil-free pancake/hot-dog | 75–90 dB |
| Oil-lubricated stationary | 65–80 dB |
| Gas-powered | 85–100+ dB |
For reference, normal conversation sits around 60 dB, while a standard pancake compressor at 80-90 dB is comparable to a running lawnmower. Hearing protection is a good idea any time you’re working near a compressor for extended periods, especially with louder oil-free or gas-powered models. Foam earplugs are sufficient for occasional use, while over-ear muffs are worth the extra comfort if you’re spending several hours a week around a louder unit.
Gas-Powered vs. Electric Compressors
Most home users will never need to consider a gas-powered compressor, but they’re worth understanding if you do remote or outdoor work where electrical power isn’t available. Gas models trade the convenience of an electrical cord for independence from power outlets, at the cost of added noise, exhaust fumes, and engine-specific maintenance like fuel stabilization and spark plug checks.
Electric Compressor Advantages
- Quieter operation overall
- No exhaust, safe for enclosed spaces with ventilation
- Simpler maintenance (no engine components)
Gas Compressor Advantages
- Works anywhere, no outlet required
- Common on remote jobsites and rural properties
- Not limited by extension cord length or circuit capacity
If you’re weighing this decision alongside overall model selection, our how to choose an air compressor guide walks through the tradeoffs in more depth, including how power source interacts with portability and tank size for different use cases.
Cold Weather and Altitude Effects on Performance
Compressor performance isn’t perfectly consistent across every environment. Cold temperatures thicken oil in lubricated units, making startup harder and increasing wear during the first few minutes of operation until the oil warms and thins out; many manufacturers recommend a lighter-weight oil for winter use in unheated garages or outdoor storage. Cold air is also denser than warm air, which can slightly increase the effective CFM output of a compressor, though this is a minor effect compared to the startup and lubrication concerns.
At higher altitudes, the opposite issue appears: thinner air means the compressor’s pump has to work harder to draw in the same volume of air, which can slightly reduce both CFM output and how quickly the tank reaches full pressure. Neither of these effects usually requires a different operating approach for typical home use, but they’re worth knowing if you notice your compressor behaving differently after a move or a seasonal change. If you store your compressor in an unheated garage or shed through winter, giving it a minute of idle running time before connecting a tool lets the oil warm slightly and reduces startup strain compared to loading it with a demanding task immediately after a cold start.
Compressor Types Compared
| Type | Best For | Noise Level | Maintenance |
|---|---|---|---|
| Pancake (oil-free) | Light DIY, trim nailing, inflation | Moderate-loud | Low |
| Hot dog (oil-free) | Portable jobsite use | Moderate-loud | Low |
| Twin-stack | Stability plus portability | Moderate-loud | Low-medium |
| Stationary single-stage | Home garage/shop | Moderate | Medium |
| Stationary two-stage | Heavy shop use, continuous air demand | Moderate | Medium-high |
| Gas-powered | Remote jobsites without power | Loud | High (engine + pump) |
If you’re still deciding between these categories, our detailed best air compressors roundup compares specific models across each type, and pairs well with our best power saws guide if you’re building out a broader shop toolkit.
Frequently Asked Questions
Do I need to drain my air compressor tank every time I use it?
Yes. Draining the tank after every use removes condensed moisture that would otherwise cause internal rust and eventually lead to tank failure. This is especially important in humid climates, where the amount of water pulled in with the intake air is noticeably higher and can accumulate faster than expected if draining is skipped for even a couple of sessions in a row.
What PSI should I set my air compressor to?
It depends entirely on the tool or task. Most brad nailers run around 70-90 PSI, framing nailers closer to 100-120 PSI, and impact wrenches often need 90 PSI or more. Always check the tool’s manual and set the regulator below its maximum rating. When in doubt, start at the lower end of the recommended range and increase gradually while testing on scrap material, rather than starting high and risking damage to the tool or workpiece.
Can I use an air compressor indoors?
Small oil-free compressors can be used indoors in a well-ventilated space, but larger gas or oil-lubricated units should be run outdoors or in a garage with the door open because of noise, heat, and exhaust concerns. If you do run a compressor indoors, keep it away from flammable materials and make sure the space has some airflow, since even electric motors generate noticeable heat during extended cycles.
Why does my air compressor keep tripping the circuit breaker?
This usually happens when the compressor is on an undersized circuit, an extension cord that is too long or too thin, or when the motor is drawing a high startup current on a shared circuit with other appliances. Try plugging directly into a dedicated outlet with nothing else running on the same circuit before assuming there’s a fault with the compressor itself.
How often should I change the oil in an oil-lubricated compressor?
Most manufacturers recommend an oil change after the first 50 hours of use, then every 500 to 1,000 hours or roughly once per season of regular use, whichever comes first. If you use your compressor heavily for professional work, checking the oil’s color and consistency monthly is a good habit even between scheduled changes, since dark or gritty oil signals it’s time to change early.
Is it safe to leave an air compressor plugged in overnight?
It is not recommended. Unplugging the unit when not in use reduces strain on the motor, avoids unexpected cycling, and lowers fire risk from a stuck pressure switch. This is a small habit that costs nothing and meaningfully reduces long-term wear, similar to unplugging other appliances you’re not actively using.
What size hose should I use with my air compressor?
A 3/8-inch inner diameter hose is the most common all-purpose size, offering a good balance of airflow and flexibility for most home and light shop tools. For high-CFM tasks like spray painting or sandblasting, consider a 1/2-inch hose to reduce pressure drop over longer runs, while a 1/4-inch hose is fine for light-duty tasks like inflation and light nailing.
Do pancake compressors need oil?
Most pancake-style compressors sold for home use are oil-free and require no lubrication, though you should always confirm this in your specific model’s manual, since a small number of pancake-style units on the market do use oil-lubricated pumps despite the compact form factor.
Why is my air pressure dropping when I use a tool?
A pressure drop under load usually means the tool is drawing more cubic feet per minute of air than the compressor can supply continuously, which is common with high-demand tools like sanders or impact wrenches on small tanks. Upgrading to a larger tank or a compressor with a higher CFM rating at your working pressure is the long-term fix if this happens consistently.
Can I use an air compressor to inflate car tires?
Yes, as long as you use a tire chuck attachment and set the regulator to the tire’s recommended PSI, checking the pressure with a separate gauge since built-in gauges are not always precise. Inflate in short bursts and recheck pressure between them, since it’s easy to overshoot the target quickly with a shop compressor compared to a small dedicated tire inflator.
What’s the difference between a single-stage and two-stage compressor?
A single-stage compressor compresses air to its final pressure in one piston stroke, while a two-stage unit compresses it partially, cools it, then compresses it further in a second cylinder, allowing it to reach higher pressures more efficiently. Two-stage compressors are generally reserved for heavier shop use where sustained high pressure and CFM matter more than portability.
How long does an air compressor typically last?
With regular maintenance, a quality oil-lubricated compressor can last well over a decade of regular use, while oil-free units tend to have a shorter service life, often in the range of five to eight years under similar conditions, since their pumps aren’t designed to be rebuilt in the same way.
Setting Up a Home Shop Air System (Multiple Stations)
Once you move beyond dragging a single hose around a garage, it’s worth considering a simple piped air system that runs a fixed line along the wall with drop-down outlets at each work station. This isn’t necessary for casual use, but it becomes genuinely convenient if you regularly work at a bench, a lift, and a paint booth in the same space and don’t want to keep coiling and uncoiling a long hose between them.
A basic setup starts at the compressor with a short flexible hose to reduce vibration transfer, then feeds into rigid piping — commonly PEX, copper, or purpose-made aluminum air pipe — run along the wall with a slight downward slope away from the compressor. This slope lets any condensation that forms in the line drain toward low points rather than pooling at your tool outlets. Each drop should come off the top of the horizontal run, not the bottom, so moisture in the main line doesn’t flow directly into your tools; branch down to the outlet only after building up and back over the top of the pipe run.
At each station, a local filter/regulator combo lets individual users dial in pressure for their specific tool without walking back to the main compressor, which is especially useful in a shared shop or garage where different family members or coworkers use different tools throughout the day. If you’re only running one or two stations, this level of complexity usually isn’t worth the effort — a good quality hose reel and a single regulator at the compressor will cover most home needs just fine.
Energy Use and Running Costs
Air compressors are not particularly heavy energy users for occasional home tasks, but it’s a reasonable question if you’re planning to run one frequently or for extended sessions. A typical 1.5 to 2 horsepower home compressor draws somewhere in the range of 1,500 to 2,000 watts while actively running, though the motor only runs a fraction of the total session time for burst-style tasks like nailing, since most of your time is spent positioning material rather than firing the tool.
For continuous-draw tasks like spray painting or extended sanding, expect the motor to run closer to constantly, which raises the effective energy cost of the session proportionally. If you’re comparing operating costs against renting a compressor or hiring out a task, it’s worth noting that the electricity cost of even several hours of home compressor use is typically modest compared to the cost of the tools, fasteners, or materials involved in most home projects.
Quick Buying Checklist (If You Haven’t Purchased Yet)
If you’re reading this before buying your first unit, run through this short checklist alongside our full buying guide to make sure you land on the right size and type for your actual needs rather than over- or under-buying.
- List every tool you plan to run, and note each one’s CFM requirement at its rated PSI
- Choose the tool with the highest CFM demand as your baseline — your compressor needs to meet or exceed it
- Decide whether portability or continuous run time matters more for how you’ll actually use it
- Confirm your available power source: standard household outlet, dedicated circuit, or no power at all (gas)
- Factor in noise tolerance for your space — shared walls or indoor use may steer you toward a quieter model
- Budget for basic accessories up front: hose, filter/regulator, and a couple of quick-connect fittings
Glossary of Air Compressor Terms
| Term | Meaning |
|---|---|
| PSI | Pounds per square inch; a measure of pressure |
| CFM | Cubic feet per minute; a measure of air volume delivered over time |
| Duty cycle | The ratio of run time to rest time a motor is designed to handle |
| Cut-in pressure | The tank pressure at which the motor automatically restarts |
| Cut-out pressure | The tank pressure at which the motor automatically shuts off |
| Regulator | The control that sets output pressure independent of tank pressure |
| Quick-connect coupler | A tool-free fitting used to attach and detach hoses and accessories |
| Check valve | A one-way valve that prevents compressed air from flowing back into the pump |
| Safety/relief valve | A valve that automatically vents air if tank pressure exceeds a safe limit |
| In-line filter | An accessory that removes moisture and debris from the air stream before it reaches a tool |
| Single-stage | A compressor design that reaches final pressure in one compression stroke |
| Two-stage | A compressor design that compresses air twice, through two cylinders, for higher efficiency at higher pressures |
Who This Guide Is Best For
This walkthrough is written primarily for homeowners, hobbyists, and DIYers picking up their first air compressor, or upgrading from a small pancake unit to something larger for a home garage or shop. If you’re a first-time buyer, pairing this operating guide with our how to choose an air compressor resource and our sizing guide before you buy will save you from picking a unit that’s mismatched to the tools you actually plan to run.
Tradespeople and professionals who already understand the fundamentals covered here may find the troubleshooting table and CFM comparison chart the most immediately useful sections, since those are the areas where experienced users most often still run into avoidable downtime — usually from mismatched CFM expectations rather than any fault in the machine itself.
Pairing Your Compressor With Other Shop Tools
A compressor rarely operates in isolation — it’s usually one piece of a broader shop setup that includes corded or cordless power tools for tasks compressed air isn’t suited to, like cutting. If you’re building out a home shop from scratch, it helps to think about where compressed air genuinely earns its place versus where a standalone power tool is the more practical choice. Fastening, inflation, cleaning, and spray finishing are strong use cases for compressed air; cutting, drilling, and most joinery work are better served by electric or battery-powered tools.
For cutting tasks that complement the fastening and finishing work covered in this guide — trimming boards to length before nailing them, cutting metal stock before drilling and fastening — our best power saws guide rounds up options that pair naturally with an air compressor setup in a home garage or small shop, so you’re not left improvising a cut with the wrong tool halfway through a project.
Thinking about your shop as a small system, rather than a collection of unrelated purchases, tends to produce a more efficient workflow over time. A compressor that’s sized correctly for your nailer and impact wrench, paired with a saw that handles your cutting needs and a handful of the accessories covered earlier in this guide, will carry the average homeowner through the overwhelming majority of projects without needing to rent or borrow additional equipment along the way.
Renting vs. Buying: A Quick Note
If you’re only facing a single one-off task — inflating a large number of tires before a road trip, running a rented framing nailer for a weekend deck project — renting a compressor from a local tool rental shop can make more sense than buying outright, especially for larger stationary units with a higher upfront cost. For anything you expect to reach for more than a few times a year, buying tends to pay for itself quickly once you account for rental fees and the convenience of having a unit on hand whenever a small task comes up unexpectedly, from a flat tire to a squeaky hinge that needs a quick blast of air to clear out debris before oiling.
A reasonable middle ground for many households is starting with a smaller, less expensive portable unit to build familiarity with compressed air tools generally, then upgrading to something larger only once you’ve identified a specific recurring task that the smaller unit can’t comfortably handle. This avoids overspending on capacity you may never actually use while still leaving room to grow into a larger setup later.
Ready to Put This Into Practice?
Using an air compressor safely comes down to a simple rhythm: place it well, check your fluids, build pressure, set the regulator to match your tool, and always drain the tank when you’re done. Once that rhythm becomes second nature, you’ll find yourself reaching for the compressor for dozens of small jobs around the house and shop — quick fixes, weekend projects, and everything in between — without a second thought about the setup process.
If you’re still narrowing down which unit to buy, or want to compare specific models side by side, our best air compressors roundup is the natural next stop, and our safety guide is worth a second read once you’ve had a few sessions of hands-on experience under your belt.
Shop Air Compressors on Amazon