What Size Air Compressor Do I Need? A Complete Sizing Guide
Match CFM, PSI, tank size, and horsepower to your tools so you never buy the wrong compressor again.
Why Compressor Size Matters More Than You Think
Walk into any home center and you will see air compressors ranging from small pancake units under a hundred dollars to towering two-stage machines that cost as much as a used car. The temptation is to assume that bigger is always safer, or that the compressor with the highest horsepower number printed on the box must be the best choice. Neither assumption holds up once you actually start using the tool for real work.
An undersized compressor will leave you frustrated the very first time you try to run a framing nailer for more than a few shots in a row, or when your impact wrench slows to a crawl halfway through breaking loose a lug nut. A compressor that cannot keep up with a tool’s air demand causes the pressure to drop, the tool to lose power, and the motor to cycle constantly, which shortens its lifespan and drives up your electricity bill. On the other end of the spectrum, an oversized compressor is not free of downsides either. Larger units are heavier, louder, more expensive to buy, and often require a dedicated 220-volt circuit that most home garages simply do not have.
The goal of this guide is to help you land in the middle: a compressor that comfortably meets the air demand of the tools you actually use, with a bit of headroom for growth, without paying for capacity you will never need. We will walk through every number on the spec sheet, translate the confusing jargon into plain language, and give you real sizing charts you can reference the next time you are standing in the aisle trying to decide between two nearly identical-looking tanks.
Before diving into the technical details, it helps to understand that compressor sizing is really an exercise in matching supply to demand. Your air tools are the demand side of the equation; they need a certain volume of air, at a certain pressure, delivered consistently while you are pulling the trigger. The compressor is the supply side; its job is to keep the tank full enough that the tool never notices a gap between what it needs and what it gets. Everything else in this guide, from CFM ratings to duty cycle percentages, exists to help you answer one simple question: can this compressor keep up with what I am asking it to do?
There is also a financial dimension to getting sizing right that goes beyond the sticker price of the unit itself. An undersized compressor forces its motor to cycle on and off far more frequently than it was designed for, which accelerates wear on the pump, the check valve, and the pressure switch. Over a year or two of regular use, that extra cycling can shave real years off the machine’s service life, meaning the “cheaper” small compressor you bought to save money upfront may end up costing more in replacement parts or an early repurchase than if you had bought the correctly sized unit from the start. Compressors that run within their intended operating range, by contrast, tend to last considerably longer because the motor spends more time at rest and less time straining against a demand it cannot fully meet.
There is also a safety angle worth mentioning briefly, even though this guide focuses on sizing rather than safety in general. A compressor that is chronically overworked runs hotter, and excess heat is one of the more common contributors to premature pump failure and, in rare cases, safety switch malfunctions. Buying the right size is not just about convenience or performance; it is also about keeping the equipment operating within the tolerances the manufacturer actually engineered it for. For a full rundown of safe operating practices once you have the right unit in hand, see our dedicated air compressor safety guide.
The Three Numbers Every Buyer Should Understand: CFM, PSI, and Tank Size
Every air compressor spec sheet revolves around three core numbers, and if you understand what each one actually measures, the rest of the sizing process becomes much easier.
CFM (Cubic Feet per Minute)
- Measures the volume of air delivered
- Determines whether a tool runs continuously without stalling
- The single most important number for tool compatibility
PSI (Pounds per Square Inch)
- Measures air pressure, not volume
- Most tools operate in the 70 to 100 PSI range
- High PSI does not compensate for low CFM
The third number, tank size measured in gallons, tells you how much reserve air is stored and ready to use before the motor needs to kick on and refill it. A larger tank gives you a longer burst of usable air for intermittent tasks like nailing or inflating tires, but it does not increase the compressor’s actual output rate. Think of the tank as a bucket and the pump as the hose filling that bucket. A bigger bucket buys you time, but if the hose is too thin, you will eventually drain the bucket faster than it can refill, no matter how large it is.
Many first-time buyers focus almost entirely on tank size because it is the number printed largest on the box. In reality, tank size is the least important of the three figures for tools that require continuous air flow, such as sanders, grinders, and spray guns. For those tools, CFM output at your required PSI is what determines whether the tool performs correctly, and no amount of tank capacity will fix a pump that cannot keep up.
Understanding CFM in Depth
CFM, or cubic feet per minute, describes how much air a compressor’s pump can physically move in sixty seconds. Manufacturers typically list two CFM figures: one measured at 40 PSI and one measured at 90 PSI. Since air pressure and volume are inversely related within a fixed pump capacity, the CFM number at 90 PSI will always be lower than the figure at 40 PSI. This matters because most pneumatic tools, especially impact wrenches, nailers, and ratchets, are designed to run at or near 90 PSI, so that is the number you should compare against a tool’s stated air consumption.
Tool manufacturers publish their own CFM requirement, sometimes as a flat average and sometimes as a range depending on how hard the tool is being worked. A framing nailer driving occasional fasteners might average 2.2 CFM, but the same nailer running at a rapid pace on a busy framing crew could spike closer to 3.5 CFM. When comparing a compressor’s rated CFM to a tool’s requirement, it is wise to add a buffer of roughly 20 to 30 percent to account for line loss, fittings, hose length, and the reality that published figures are measured under ideal lab conditions rather than in a dusty garage on a hot afternoon.
It is also worth noting that CFM requirements differ dramatically between tools that fire in short bursts and tools that draw air continuously. A brad nailer only pulls air for a fraction of a second each time you pull the trigger, so even a modest compressor can keep the tank topped off between shots. A random orbital sander running continuously for two minutes at a time, however, is constantly drawing from the tank, and if the pump cannot refill air as fast as the sander consumes it, pressure will drop and the tool will lose performance mid-task.
Manufacturer-published CFM figures are a reliable starting point, but they are measured under controlled lab conditions with new equipment and short, clean hose runs. Real shops rarely match those exact conditions, since hoses accumulate small leaks at fittings over time, ambient temperature swings affect pump efficiency, and tools themselves wear slightly as internal seals age. None of this means published figures are useless, but it does reinforce why the standard buffer recommended throughout this guide exists: it is not padding for padding’s sake, it is a practical adjustment for the gap between lab conditions and a real garage or shop floor.
Understanding PSI in Depth
PSI, or pounds per square inch, measures the force behind the air being delivered rather than the volume. Most compressors are built with a maximum tank pressure somewhere between 125 and 175 PSI, but that number is largely irrelevant to daily use because a regulator on the compressor reduces the output pressure down to whatever the connected tool actually requires, typically in the 70 to 100 PSI range.
A common misconception is that a compressor with a higher maximum PSI rating is automatically more powerful or capable. In practice, maximum tank pressure mainly affects how long the compressor can run before the motor needs to cycle back on, since a higher-pressure tank simply stores more compressed air molecules in the same physical space. It does not mean the compressor can supply air faster, and it will not make an underpowered pump suddenly capable of running a spray gun that needs 12 CFM.
| Tool Category | Typical Operating PSI |
|---|---|
| Brad and finish nailers | 70–90 PSI |
| Framing nailers | 90–120 PSI |
| Impact wrenches | 90 PSI |
| HVLP spray guns | 25–40 PSI (at the gun tip) |
| Tire inflation | 30–35 PSI (passenger), up to 100+ (truck) |
| Die grinders and sanders | 90 PSI |
| Sandblasting cabinets | 90–100+ PSI |
Where PSI does matter for sizing is when you are calculating CFM requirements, because a tool’s CFM demand is always tied to a specific pressure. A compressor advertised as delivering 6.5 CFM might only hit that number at 40 PSI, and drop to 5.0 CFM at 90 PSI. Always compare apples to apples by looking at the CFM figure rated at the pressure your tools actually use.
It is also worth pointing out that running a tool below its recommended PSI does not simply make it work “a little slower.” Nail guns can under-drive fasteners, leaving them proud of the surface instead of flush. Impact wrenches lose meaningful torque output, sometimes struggling to break loose a fastener they would otherwise handle easily at full pressure. Spray guns atomize paint poorly at low pressure, leading to a heavier, uneven coat. Rather than treating PSI as a soft target, it is worth setting your regulator to the tool manufacturer’s specified pressure and leaving it there, adjusting only when switching to a different tool with different requirements.
Understanding Tank Size and What It Actually Buys You
Tank size is measured in gallons and represents how much compressed air the unit can store before it needs to run the motor again to refill. A larger tank does not increase how fast air is produced, but it does increase how long you can pull from the compressor before the pump needs to catch up, and it reduces how frequently the motor cycles on and off during intermittent use.
| Tank Size | Best For | Typical Portability |
|---|---|---|
| 1–6 gallons | Trim nailing, stapling, light inflation | Highly portable, hand-carry |
| 10–20 gallons | Occasional framing, small shop use | Wheeled, moderately portable |
| 20–30 gallons | Home garage, mixed tool use | Wheeled, stationary-leaning |
| 30–60 gallons | Regular workshop, automotive tasks | Mostly stationary |
| 60–80+ gallons | Continuous-air tools, small business use | Stationary, often 220V |
A useful way to think about tank size is in terms of the type of work you do rather than the tools themselves. If your air use is bursty, such as firing a nail gun every few seconds with pauses in between, a mid-size tank paired with a modest pump is often perfectly adequate because the pump has time to catch up during the pauses. If your air use is continuous, such as running a die grinder or paint sprayer for extended stretches, tank size becomes secondary to raw CFM output, because you will drain even a large tank quickly if the pump cannot keep pace with consumption.
Tank shape and orientation also play a small role worth mentioning briefly. Pancake tanks are wide and low, which gives the unit a stable footprint and makes it easy to stand a tool or spare hose on top while working, a small but genuinely useful feature for solo DIYers. Hot dog and twin-stack tanks are longer and narrower, which some users find easier to tuck against a wall or slide into a truck bed. Vertical tanks, common on larger stationary units, take up less floor space for their capacity but require more overhead clearance, which is worth checking against your garage or shop ceiling height before buying a tall 60-gallon-plus unit.
Where Horsepower Fits Into the Equation
Horsepower is the number most beginners gravitate toward because it feels familiar from cars and lawn equipment, but it is actually the least reliable spec for comparing air compressors. The reason is that horsepower ratings are not standardized across manufacturers. Some brands list “peak HP,” which reflects a brief surge the motor can handle for a split second, while others list “running HP,” a more honest measure of sustained output. A compressor advertised at 5 peak horsepower might perform closer to a genuine 2 running horsepower unit from a different brand.
Because of this inconsistency, horsepower should be treated as a rough indicator at best, and never the primary factor in your buying decision. Two compressors with identical horsepower ratings can have meaningfully different CFM outputs depending on pump design, efficiency, and stage configuration. Always let CFM at your required PSI be the deciding metric, and treat horsepower as a secondary detail worth noting only after CFM and tank size have already narrowed your options.
- See our guide on how air compressors work for a deeper look at pump mechanics.
- Read how to choose an air compressor for a broader buying framework beyond sizing alone.

Popular Pick: 20-Gallon Single-Stage Compressor
A well-balanced choice for home garages running nailers, inflators, and the occasional impact wrench.
Check Price on AmazonDuty Cycle: The Spec Most Buyers Overlook
Duty cycle describes the percentage of time within a given period, usually measured in ten or fifteen-minute windows, that a compressor’s motor can safely run without overheating. A compressor rated for a 50 percent duty cycle over ten minutes is designed to run for roughly five minutes and then rest for five minutes. Pushing a compressor beyond its rated duty cycle causes the motor to overheat, which can trip a thermal overload switch or, in cheaper units, cause permanent damage.
Duty cycle matters enormously for tools that draw air continuously. A homeowner running a brad nailer intermittently will likely never come close to testing a budget compressor’s duty cycle limits, because the pauses between nail strikes give the motor plenty of rest time. A hobbyist running a spray gun for ten straight minutes on a project, however, can easily exceed a 50 percent duty cycle unit, causing the compressor to overheat mid-job.
To see how this plays out in practice, consider a compressor rated for a 50 percent duty cycle over a ten-minute window paired with a random orbital sander that needs to run continuously while sanding a large tabletop. After roughly five minutes of continuous sanding, the compressor’s motor has reached its rated run limit for that window and needs an equal five-minute rest before it can safely resume without risking thermal shutdown. A compressor rated for a 100 percent duty cycle, by contrast, can theoretically run the entire ten minutes without a mandatory rest period, which is the practical difference a duty cycle rating makes once you move beyond short, intermittent tool use.
Compressor Size by Use Case
The fastest way to answer “what size air compressor do I need” is to identify which category of user you fall into. Below are the most common use cases and the sizing range that fits each one.
Home DIY and Light Garage Use
If your air compressor duties consist of inflating tires, running a brad or finish nailer occasionally, and the odd stapling project, a small 1 to 6-gallon pancake or hot dog style compressor delivering 2 to 4 CFM at 90 PSI is typically all you need. These units are inexpensive, lightweight, and easy to store in a corner of the garage.
This category tends to serve homeowners who use their compressor in short, spaced-out bursts rather than sustained sessions, which is exactly the pattern a small tank handles well. A weekend spent hanging trim or assembling flat-pack furniture with a brad nailer involves plenty of pauses between shots to walk, measure, and reposition, giving even a modest 3-gallon tank ample time to recover between uses. Where this category starts to fall short is the moment you introduce a tool that draws air continuously for more than a few seconds, so it is worth being honest with yourself about whether your project list is likely to stay this light before committing to the smallest option on the shelf.
Home Workshop with Mixed Tool Use
Woodworkers and hobbyists running framing nailers, brad nailers, and occasional pneumatic sanders should look at 20 to 30-gallon single-stage compressors producing 4 to 6 CFM at 90 PSI. This size gives enough reserve capacity for bursts of nailing without constant motor cycling.
This middle tier is the most popular category among serious hobbyists precisely because it covers the widest range of realistic projects without forcing a jump to 220V wiring or a stationary shop unit. A 20 to 30-gallon compressor in this range can comfortably handle an afternoon of cabinet assembly, deck building, or general repair work, and it typically still fits on wheels that let you roll it between the garage and a driveway project. The tradeoff appears the moment you try to run a die grinder or sander for an extended stretch, where you will start to notice pressure sag if the pump cannot keep pace with continuous draw.
Automotive and Impact Tool Use
Impact wrenches, air ratchets, and other automotive tools demand sustained CFM output, often in the 4 to 10 CFM range depending on the tool’s size and torque rating. A 60-gallon two-stage compressor delivering at least 10 to 14 CFM at 90 PSI is the realistic minimum for home mechanics doing regular wheel and suspension work.
Automotive work is deceptively demanding because a single lug nut removal only takes a few seconds, which can trick buyers into assuming a small compressor will suffice. The reality is that most home mechanics end up removing and reinstalling multiple wheels in a single session, cycling the impact wrench repeatedly with little downtime in between, which behaves more like continuous draw than the occasional burst of a nail gun. Larger 1/2-inch drive impacts used for stubborn, rusted, or high-torque fasteners push CFM demand even higher, which is why serious home mechanics tend to size up to the 60-gallon two-stage range rather than trying to make a 20-gallon unit stretch further than it comfortably can.
Spray Painting and HVLP Finishing
HVLP spray guns are among the most demanding tools on this list because they require continuous, high-volume airflow rather than short bursts. Most HVLP guns need 8 to 14 CFM at 40 PSI, which typically calls for a two-stage compressor in the 60 to 80-gallon range with at least a genuine 5 running horsepower motor.
Spray finishing punishes an undersized compressor faster than almost any other application on this list, because the gun is drawing air the entire time the trigger is held, often for minutes at a stretch while covering a panel or piece of furniture. If the compressor cannot keep pace, pressure at the gun tip drops mid-pass, which shows up in the finished coat as uneven atomization, visible texture, or dry spots where the paint did not lay down properly. Because the quality of the finished project is directly tied to consistent air pressure, this is one use case where it genuinely pays to size slightly above the manufacturer’s stated minimum rather than right at it.
Framing and Trim Carpentry (Job Site Use)
Contractors running framing nailers all day benefit from portable twin-stack or wheeled compressors in the 4 to 8-gallon range that can still deliver 3.5 to 5 CFM at 90 PSI, prioritizing portability over sheer tank size since the tool’s air draw per shot is relatively small.
Job site compressors live a harder life than shop units, getting loaded in and out of trucks, exposed to weather, and run on generators as often as household outlets, so durability and weight matter alongside raw output. Because a nail gun’s air draw happens in a fraction of a second per shot, a compact twin-stack compressor can usually keep pace with even a fast-paced framing crew as long as its CFM rating comfortably clears the 3.5 to 5 CFM range, making portability the deciding factor over tank size for this category.
Sandblasting and Abrasive Work
Sandblasting cabinets are extremely air-hungry, often requiring 10 to 25+ CFM at 90 to 100 PSI depending on nozzle size. This is one of the few residential use cases where an 80-gallon or larger two-stage compressor is genuinely necessary rather than optional.
Blast media consumes air continuously and at high volume for as long as the trigger is engaged, which means even a strong 60-gallon setup can feel underpowered the moment you move to a larger nozzle tip. Because abrasive blasting is also one of the more physically demanding tasks on a compressor’s duty cycle, pairing an 80-gallon-or-larger tank with a genuinely rated two-stage pump is less about convenience here and more about avoiding a compressor that cannot finish the job without overheating partway through.
Small Business and Semi-Industrial Use
If you are running an auto shop, small fabrication business, or production woodworking operation, a stationary two-stage compressor in the 80 to 120-gallon range with a 5 to 10 HP motor and a 100 percent duty cycle rating is the appropriate baseline, often paired with a dedicated 220V circuit.
At this scale, the compressor is no longer a convenience item but a piece of production infrastructure that multiple tools and possibly multiple employees will depend on throughout the day. Downtime caused by an undersized or overheated compressor translates directly into lost billable hours, which is why businesses in this category typically budget for a stationary two-stage unit with genuine industrial-duty ratings rather than trying to stretch a homeowner-grade compressor beyond its intended use.
Real-World Sizing Scenarios
Specification charts are useful, but seeing how the numbers play out in an actual buying decision often makes the process click. Below are five realistic scenarios walked through step by step.
Scenario 1: Weekend Furniture Assembly
A homeowner wants to assemble flat-pack furniture and occasionally use a brad nailer for small trim repairs. The highest CFM tool in this scenario is the brad nailer at roughly 0.5 CFM, and the work happens in short bursts with long pauses. A 3 to 6-gallon pancake compressor rated for 2 CFM or more easily clears this bar with room to spare, making this one of the simplest sizing decisions on the list.
Scenario 2: Deck Building with a Framing Nailer
A DIYer building a backyard deck plans to run a framing nailer steadily over a weekend, driving hundreds of fasteners. The nailer’s CFM demand of roughly 2.2 to 3.5 CFM, combined with a faster shooting pace than casual trim work, pushes the ideal target to a 6 to 8-gallon portable compressor rated for at least 4 CFM once the standard buffer is applied. A small 3-gallon pancake unit could technically limp through this job, but would likely cycle its motor far more often than a slightly larger unit, so most buyers in this scenario are better served stepping up one size.
Scenario 3: Home Mechanic Doing Brake Jobs
A home mechanic wants to use a 1/2-inch impact wrench for regular brake and wheel work, along with an air ratchet for smaller fasteners. The impact wrench alone requires 4 to 5 CFM, and because wheel work often involves repeated, closely spaced trigger pulls across four wheels, this behaves closer to continuous draw than a single quick burst. A 60-gallon two-stage compressor rated for at least 7 to 8 CFM at 90 PSI, after applying the buffer, is the realistic target, even though the tool’s spec sheet alone might suggest a smaller unit could work.
Scenario 4: Refinishing Furniture with an HVLP Gun
A hobbyist plans to refinish several pieces of furniture using an HVLP spray gun rated for 10 CFM at 40 PSI. Because spray guns draw air continuously throughout each pass, the 20 to 30 percent buffer is especially important here, pushing the effective target closer to 13 CFM. This firmly rules out single-stage compressors under 60 gallons and points toward a two-stage unit with a genuine 5 HP-class motor capable of sustaining that output for several minutes at a time without overheating.
Scenario 5: A Small Auto Repair Shop
A two-bay repair shop runs impact wrenches at both bays during busy periods, along with an occasional air ratchet and tire machine. Because both bays could realistically be in simultaneous use, the shop needs to add the CFM demand of two impact wrenches together, landing in the 9 to 12 CFM combined range before the buffer is even applied. This scenario justifies a stationary 80 to 120-gallon two-stage compressor with a 100 percent duty cycle rating and a dedicated 220V circuit, since intermittent-use assumptions from the home categories above no longer hold once two stations can draw air at the same time.
Air Tool CFM Requirement Chart
The table below lists average CFM requirements at 90 PSI for the most common pneumatic tools. Remember to add a 20 to 30 percent buffer above these figures when comparing against a compressor’s rated output.
| Tool | Average CFM @ 90 PSI | Recommended Minimum Tank |
|---|---|---|
| Brad nailer | 0.3–0.5 | 1–6 gal |
| Finish nailer | 0.5–1.0 | 4–6 gal |
| Framing nailer | 2.2–3.5 | 4–8 gal |
| Staple gun | 0.3–0.5 | 1–6 gal |
| Impact wrench (1/2″) | 4–5 | 30–60 gal |
| Impact wrench (3/4″) | 8–10 | 60–80 gal |
| Air ratchet | 3–5 | 20–30 gal |
| Die grinder | 4–6 (continuous) | 30–60 gal |
| Random orbital sander | 6–9 (continuous) | 30–60 gal |
| HVLP spray gun | 8–14 (continuous) | 60–80 gal |
| Tire inflator | 1–3 | 4–20 gal |
| Sandblasting cabinet | 10–25 (continuous) | 80+ gal |
Keep in mind these are averages drawn from typical manufacturer specifications. Always check the exact CFM requirement printed on your specific tool, since torque output, nozzle size, and brand engineering can shift these numbers meaningfully.
It is also worth scanning this chart for patterns rather than treating each row in isolation. Notice that the tools requiring the smallest tanks, brad nailers, staple guns, and finish nailers, are all trigger-actuated tools with a very brief per-shot air draw, while the tools requiring the largest tanks and highest CFM, sanders, spray guns, and sandblasting equipment, are all tools that stay actuated continuously while in use. If you already know which pattern your primary tools fall into, you can often shortcut the sizing process considerably: trigger-actuated tools rarely need more than a mid-size single-stage compressor, while continuously-actuated tools almost always point toward a two-stage unit in the 60-gallon range or larger, regardless of the exact CFM number printed on the box.
Sizing for Multiple Tools
Most shops do not run a single tool in isolation, which raises the question of how to size a compressor when you own several pneumatic tools with different air demands. The good news is that you almost never need to add up every tool’s CFM requirement, because in a typical one-person shop, you are only running one tool at a time.
The correct approach is to identify the single tool with the highest continuous CFM draw you own, apply the standard 20 to 30 percent buffer, and size your compressor to comfortably exceed that number. If your most demanding tool is an HVLP spray gun needing 12 CFM, buying a compressor rated for exactly 12 CFM leaves no margin, so targeting 15 to 16 CFM of real-world output is a safer bet.
| Scenario | Sizing Approach |
|---|---|
| Single user, one tool at a time | Size to highest single-tool CFM + 30% buffer |
| Single user, occasional simultaneous use | Size to highest two-tool combined CFM |
| Multi-station shop | Size to sum of all stations expected to run concurrently |
It also helps to think about your tool collection in terms of where it is headed rather than only where it stands today. If you currently own only a brad nailer but know you plan to add a spray gun or impact wrench within the next year or two, it is often more cost-effective to size your compressor purchase around that near-future tool now rather than buying twice. Compressors are not typically an item people replace on a whim, both because of the upfront cost and because of how bulky they are to store or resell, so a small amount of forward planning at the buying stage tends to pay for itself.
On the other hand, resist the urge to size for a hypothetical tool you have no concrete plans to buy. Sizing up “just in case” for tools you are unlikely to ever own means paying for capacity, weight, and possibly a 220V circuit upgrade that never gets used. The goal is a realistic one-to-three-year outlook on your tool needs, not an unlimited hedge against every possible future purchase.
Portable vs. Stationary Compressors
Portable Compressors
- Lightweight and easy to move between job sites
- Lower upfront cost
- Runs on standard 120V household outlets
- Best for nailing, stapling, and light-duty tasks
Stationary Compressors
- Heavier and typically wheeled or bolted in place
- Higher CFM output and larger tanks
- Often requires a dedicated 220V circuit
- Better suited for shop-based, continuous-air tools
Choosing between the two categories usually comes down to where you work and how demanding your tools are. Contractors moving between job sites benefit from a portable unit they can toss in a truck bed, while a dedicated home workshop or garage that stays in one place is a better candidate for a stationary compressor that can deliver higher sustained output.
It is worth noting that “portable” is somewhat relative in this category. A 4 to 8-gallon twin-stack unit with a molded handle is genuinely easy for one person to carry up a ladder or across a job site, while a 20 to 30-gallon wheeled compressor is portable in the sense that it can be rolled between a garage and a driveway, but it is not something you would want to lift into a truck bed solo on a regular basis. If frequent transport between locations is a priority, weigh the unit’s actual carry weight and footprint alongside its CFM output, since the lightest compressor that still meets your CFM requirement is usually the right call for job site work.
Single-Stage vs. Two-Stage Compressors
Single-stage compressors compress air to its final pressure in one piston stroke, making them simpler, lighter, and less expensive. They are well suited to home and light workshop use where maximum pressure requirements stay under roughly 135 PSI and CFM demands are moderate.
Two-stage compressors compress air in two steps, cooling it between stages, which allows them to reach higher maximum pressures, typically up to 175 PSI, more efficiently and with less heat buildup. They are the standard choice for continuous, high-CFM applications like spray painting, sandblasting, and busy automotive shops, and they generally offer better duty cycles for sustained operation.
| Feature | Single-Stage | Two-Stage |
|---|---|---|
| Typical max PSI | Up to 135 | Up to 175 |
| Best for | Home, light workshop | Shop, continuous-air tools |
| Price range | Lower | Higher |
| Duty cycle | Moderate | Higher, often 100% |
A useful mental shortcut is that single-stage compressors are built around the assumption of intermittent use with rest periods in between, while two-stage compressors are built around the assumption of sustained, repeated demand throughout a working day. Buying a two-stage compressor for occasional weekend nailing is not wrong, but it is often unnecessary spending, since the single-stage category already covers that use case comfortably at a lower price point. Conversely, trying to run a spray gun or busy automotive shop on a single-stage unit tends to expose its cooling and duty cycle limitations quickly, regardless of how large its tank happens to be.
Oil-Lubricated vs. Oil-Free Compressors
Oil-Lubricated
- Runs cooler and quieter under sustained load
- Longer pump lifespan with proper maintenance
- Better suited for daily or heavy shop use
- Requires periodic oil changes
Oil-Free
- Lighter and more portable
- No maintenance oil changes needed
- Tends to run louder and hotter
- Shorter pump lifespan under heavy use
For occasional homeowner tasks like inflating tires or firing a nail gun a few times a month, an oil-free unit’s convenience usually outweighs its downsides. For anyone using a compressor several times a week, especially with continuous-air tools, the extended lifespan and quieter operation of an oil-lubricated pump tend to justify the added maintenance.
There is also a middle path worth mentioning: some manufacturers now offer oil-free pumps built with more durable synthetic components specifically designed to close the lifespan gap with traditional oil-lubricated units. These tend to cost more than a basic oil-free pancake compressor but less than a full oil-lubricated shop unit, and they can be a reasonable compromise for buyers who want low maintenance without sacrificing as much durability. As with tank size and CFM, it is worth checking the specific pump technology on a given model rather than assuming all oil-free units behave identically.
Electrical Requirements: 120V vs. 220V
Compressor sizing does not stop at CFM and tank gallons; the electrical circuit feeding the unit is just as important, especially once you move beyond the smallest categories. Most compressors up to roughly 1.5 to 2 running horsepower are designed to operate on a standard 120V, 15 or 20-amp household outlet, which is why pancake and hot dog style units remain so popular for homeowners who do not want to deal with special wiring.
Once you move into the 60-gallon two-stage range and beyond, many compressors are built around 220V motors, which require a dedicated circuit and often a specific outlet configuration that a standard garage may not already have. This is not a minor detail to discover after the unit arrives; running a 220V-rated compressor on an underpowered or shared 120V circuit can trip breakers repeatedly, and in some cases can damage the motor’s start capacitor over time. If you are shopping in the larger size categories, check your garage or shop’s existing electrical service before finalizing a purchase, and budget for an electrician if a new circuit is needed.
| Compressor Class | Typical Voltage | Notes |
|---|---|---|
| Pancake / hot dog (1–6 gal) | 120V | Standard household outlet |
| 20–30 gal single-stage | 120V (some 240V options) | Check amperage draw before use with extension cords |
| 60 gal two-stage | 120V or 240V (model-dependent) | Verify before purchase |
| 80–120+ gal two-stage | 240V, often 3-phase in commercial settings | Dedicated circuit typically required |
It is also worth noting that long or thin extension cords can cause voltage drop that mimics the symptoms of an undersized compressor, including a motor that struggles to start or trips its thermal overload. Manufacturers typically specify a minimum wire gauge and maximum cord length for their units, and skipping this detail can make a correctly sized compressor perform as though it were too small for the job.
Noise Levels and Where You Can Run a Compressor
Noise output is rarely the first thing buyers think about when sizing a compressor, but it directly affects where and when you can realistically use the unit, which in turn can influence which size actually fits your situation. Smaller oil-free pancake compressors are notorious for producing sharp, high-pitched noise in the 78 to 90 decibel range, loud enough to require hearing protection during extended use and likely to draw complaints in a shared garage or attached workspace.
Larger oil-lubricated compressors, somewhat counterintuitively, often run quieter per unit of output because the oil bath dampens mechanical noise and the pump does not need to work as close to its ceiling to meet demand. Some manufacturers now offer dedicated “quiet” or low-decibel compressor lines in the 60 to 68 decibel range, roughly comparable to normal conversation, which can be worth the added cost if you plan to run the compressor in a garage attached to living space or in a shared building.
Accessories That Affect Real-World Performance
Even a perfectly sized compressor can underperform if the accessories connecting it to your tools are undersized or poorly matched, which is a detail many buyers overlook after focusing all their attention on the compressor itself. It is a common and frustrating experience to correctly size a compressor using every guideline in this article, only to have performance fall short because a cheap, narrow hose or an undersized coupler is quietly choking the air supply between the tank and the tool. Treating the compressor, hose, regulator, and fittings as a single connected system, rather than shopping for the compressor alone and treating everything else as an afterthought, tends to produce far more satisfying real-world results.
Hose Diameter and Length
A long, narrow air hose introduces meaningful pressure drop between the tank and the tool, especially for high-CFM applications like spray guns or sanders. As a general guideline, a 3/8-inch inner diameter hose is the practical minimum for most shop tools, while high-demand tools and longer runs benefit from a 1/2-inch hose to minimize restriction.
Regulators and Gauges
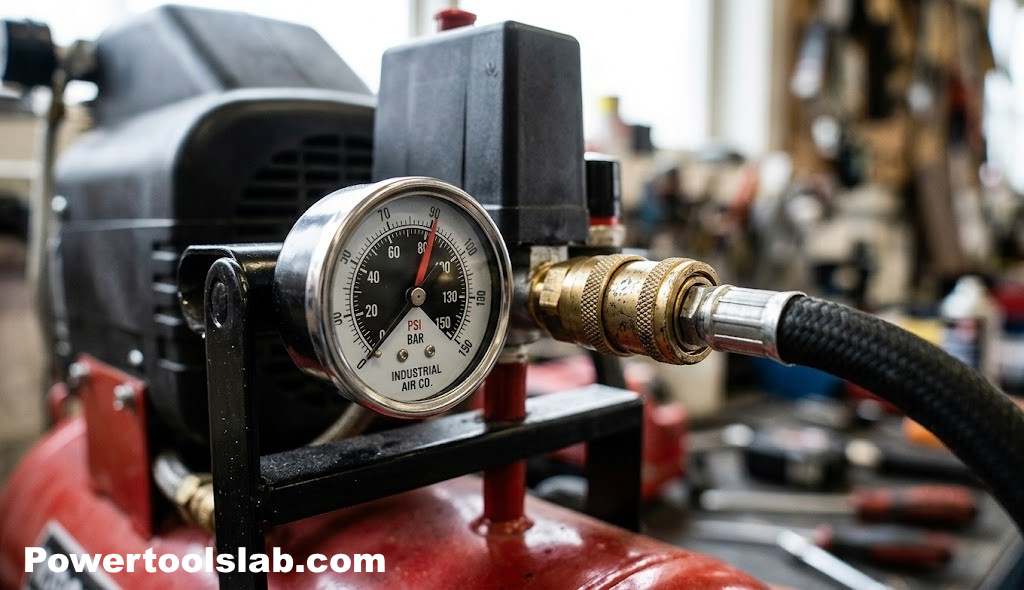
A quality regulator lets you dial in the exact PSI a given tool needs without relying on the tank’s default output, which both protects sensitive tools like finish nailers from over-driving fasteners and helps you get the most efficient use out of your compressor’s stored air.
Water Separators and Filters
Compressing air generates moisture, and that moisture travels down the line toward your tools unless it is captured first. A water separator or inline filter protects spray equipment and pneumatic tools from internal corrosion, and it is especially important for HVLP finishing work, where trapped moisture can ruin a paint job by causing fisheyes or blotching in the finish.
Quick-Connect Fittings
Undersized quick-connect couplers are a surprisingly common bottleneck, particularly on compressors upgraded with high-CFM tools after the fact. Standard 1/4-inch fittings can noticeably restrict airflow for tools drawing more than roughly 8 CFM, so shops running spray guns or sandblasters often upgrade to larger-bore fittings to avoid choking the very air supply the larger compressor was bought to provide.
Altitude and Environmental Factors
Air density decreases as elevation increases, which means a compressor rated for a given CFM output at sea level will deliver slightly less effective air volume at higher altitudes. If you live or work at 5,000 feet or higher, it is wise to size up by roughly 10 to 15 percent above the baseline recommendation to compensate for thinner air.
Temperature also plays a role, though a smaller one. Extremely hot working environments can cause a compressor’s motor to run closer to its thermal limits, effectively reducing the practical duty cycle even if the rated duty cycle stays the same on paper. If you work in a hot garage or uninsulated shop during summer months, favor a unit with some extra duty cycle headroom rather than one sized exactly to your minimum requirement.
Signs Your Compressor Is Undersized
If you already own a compressor and are trying to figure out whether sizing is the source of your frustrations, a handful of symptoms tend to show up consistently across tool types.
| Symptom | Likely Cause |
|---|---|
| Tool loses power mid-use | CFM output below tool demand |
| Motor runs almost constantly | Tank too small or CFM too low for task pace |
| Nail gun double-fires or under-drives fasteners | Pressure drop under repeated firing |
| Spray finish looks uneven or textured | Inconsistent pressure at the gun tip |
| Compressor trips breaker repeatedly | Circuit undersized or extension cord too long/thin |
| Motor overheats and shuts off | Duty cycle exceeded for the task |
If you recognize two or more of these symptoms, it is a strong signal that the issue is sizing-related rather than a defective unit, and upgrading to the next tier in this guide’s charts is likely to resolve the problem more reliably than troubleshooting the existing compressor further.
Maintenance and Longevity Considerations by Size
The maintenance burden of an air compressor scales with its size and how close to its rated capacity it typically runs. Small oil-free units are largely maintenance-free by design, with no oil to change, though their simpler pumps also tend to wear out faster under sustained use, which is part of why they are not recommended for continuous-air tools in the first place.
Mid-size and larger oil-lubricated compressors require periodic oil changes, typically every few hundred hours of runtime or on a seasonal schedule for lighter use, along with regular tank draining to remove condensed moisture that would otherwise promote internal rust. Draining the tank after each use, or at minimum weekly for frequent users, is one of the simplest habits that meaningfully extends a compressor’s service life regardless of size.
Compressors that are properly sized for their workload also tend to need less maintenance overall, simply because the motor is not working at its absolute ceiling during normal use. A compressor sized with the recommended buffer built in spends more time idle and less time straining, which translates into fewer motor starts, less heat cycling, and generally a longer gap between service intervals compared to an undersized unit pushed to its limit on a daily basis.
Filters on the intake side also deserve routine attention regardless of compressor size, since a clogged intake filter forces the pump to work harder to draw in the same volume of air, which can mimic the symptoms of an undersized unit even on a compressor that was sized correctly to begin with. Checking and cleaning or replacing the intake filter on the same schedule as oil changes is a simple habit that keeps a correctly sized compressor performing the way it was rated to perform.
Budget Considerations: Cost vs. Capability
Price generally tracks CFM output and tank size fairly closely across the market, which means the sizing exercise in this guide doubles as a budgeting exercise. Small pancake compressors typically start under a hundred dollars, mid-size 20 to 30-gallon single-stage units commonly fall in the low-to-mid hundreds, and 60-gallon two-stage compressors capable of supporting spray guns or impact wrenches often land in the high hundreds to low thousands depending on brand and duty cycle rating.
It is tempting to save money by buying one tier smaller than your calculated requirement, but this often backfires in the form of frustrated tool performance, more frequent motor cycling, and a shorter service life, all of which can end up costing more in the long run through repairs or an early replacement. A more reliable way to manage budget is to buy accurately sized equipment for your current tools and treat any future tool upgrades as a reason to revisit sizing later, rather than trying to guess at future needs by overbuying now.
Common Sizing Mistakes to Avoid
Mistakes That Undersize
- Buying based on tank gallons alone, ignoring CFM
- Trusting peak horsepower instead of running HP
- Ignoring the 20–30% real-world buffer
- Not accounting for future tool purchases
Mistakes That Oversize (Wasted Money)
- Buying a 220V shop unit for occasional nail gun use
- Overpaying for duty cycle you will never approach
- Choosing a heavy stationary unit when portability was the actual need
The single most common mistake buyers make is comparing tank size across two compressors and assuming the larger tank automatically means the better or more capable machine. As covered earlier, tank size and CFM output are two entirely different specifications, and a 30-gallon tank paired with a weak pump can still stall out under a demanding tool that a smaller tank with a stronger pump would handle without issue.
A second common mistake is comparing CFM figures measured at different pressures without noticing the discrepancy. Because a compressor’s CFM output at 40 PSI will always look higher than its output at 90 PSI, a marketing spec sheet that leads with the 40 PSI number can make a unit appear far more capable than it actually is for tools running at 90 PSI. Always locate the 90 PSI figure specifically when comparing units for nailers, impact tools, or sanders.
A third mistake worth flagging is assuming that because a tool “worked fine” on a smaller compressor during a brief test at the store, it will perform identically during a full afternoon of real use. Store demonstrations are typically short bursts that never come close to testing sustained draw or duty cycle limits, so a compressor that feels adequate in a five-second test can still fall short once you are running the same tool continuously for twenty minutes at home.
Choosing Between Two Adjacent Size Categories
When your calculated CFM requirement lands close to the boundary between two size categories, a few tie-breaker questions can help you decide which way to go. If your tool use is likely to grow in the next year or two, lean toward the larger option now rather than buying twice. If space, weight, or budget are tight constraints and your current tools sit comfortably within the smaller category’s range, there is little practical benefit to paying for the next tier up. And if you are unsure how a specific tool will behave in practice, err toward the larger category, since the cost of mild oversizing is almost always lower than the frustration and potential tool damage caused by an undersized unit straining to keep up.

Shop-Grade Pick: 60-Gallon Two-Stage Compressor
Built for automotive tools, spray guns, and continuous-air demands in a home or small business shop.
Check Price on AmazonHow Tank Recovery Time Affects Real-World Use
Recovery time refers to how long it takes a compressor’s motor to refill the tank from its low-pressure cutoff back up to its high-pressure cutoff after a burst of tool use has drawn air down. This figure rarely appears prominently on marketing materials, but it has a direct effect on how a compressor actually feels to use, especially for tasks involving repeated, closely spaced bursts like driving a series of fasteners or cycling an impact wrench across several lug nuts.
Two compressors with identical tank sizes can have very different recovery times depending on pump strength. A 30-gallon tank paired with a strong pump might recover in under a minute, while the same size tank paired with a weaker pump could take two to three times as long, leaving you standing around waiting for pressure to rebuild during a project. This is another reason CFM output deserves more attention than tank size alone; a stronger pump not only sustains continuous-draw tools better but also gets you back to full pressure faster after any burst of use.
Step-by-Step Compressor Sizing Checklist
If you want a condensed process to walk through before making a purchase, work through the following steps in order.
- List every tool you currently own or plan to buy within the next year that will run off the compressor.
- Find the CFM requirement at 90 PSI (or 40 PSI for spray equipment) for each tool from its manual or manufacturer spec sheet.
- Identify your highest single-tool CFM demand, or the combined CFM of any tools you expect to run simultaneously.
- Apply a 20 to 30 percent buffer to that number to account for real-world line loss and fitting restrictions.
- Check whether your tools draw air in short bursts or continuously, since continuous-draw tools should push you toward a higher duty cycle and two-stage design.
- Confirm your available electrical circuit can support the compressor you are considering, especially for units in the 60-gallon-plus range.
- Factor in portability needs if the compressor will move between locations rather than stay fixed in one spot.
- Compare recovery time and duty cycle between similarly sized models rather than assuming all units at a given tank size perform equally.
- Budget for accessories like properly sized hoses, a regulator, and a water separator, since these affect real-world performance as much as the compressor itself.
- Choose the smallest compressor that comfortably clears your buffered CFM requirement, rather than defaulting to the largest option available.
Recommended Compressor Sizes by Category
Small (1–6 Gallons, 2–4 CFM)
Good For
- Trim and finish nailing
- Tire and sports equipment inflation
- Light stapling projects
Limitations
- Cannot support impact wrenches or spray guns
- Frequent motor cycling under moderate use
Medium (20–30 Gallons, 4–6 CFM)
Good For
- Home garage all-around use
- Framing nailers and occasional sanders
- Light automotive tasks
Limitations
- Struggles with continuous-air tools like HVLP guns
- Heavy-duty impact work will cycle the motor often
Large (60–80+ Gallons, 10–14+ CFM)
Good For
- Automotive shops and impact tools
- Spray painting and HVLP finishing
- Sandblasting and continuous-air applications
Limitations
- Heavier, less portable
- Often requires 220V wiring
- Higher upfront cost
For a deeper comparison of specific models within each of these categories, see our roundup of the best air compressors, which breaks down top picks by budget and use case. If you are still deciding between a compressor and other power tools for a specific project, our guide to the best power saws may also help round out your shop.
Quick Reference: Matching a Compressor to Common Projects
If you would rather skip straight to a recommendation based on the specific project in front of you, the table below maps common household and shop projects to the compressor category most likely to handle them without frustration.
| Project | Recommended Category |
|---|---|
| Assembling flat-pack furniture | Small (1–6 gal) |
| Building a fence or small deck | Small to Medium (6–20 gal) |
| Installing baseboard and trim | Small (1–6 gal) |
| Framing a shed or addition | Medium (20–30 gal) |
| Changing tires and brakes at home | Large (60 gal, two-stage) |
| Refinishing furniture with a spray gun | Large (60–80 gal, two-stage) |
| Painting a car panel | Large (60–80 gal, two-stage) |
| Sandblasting rusted parts | Extra Large (80+ gal, two-stage) |
| Running a two-bay home shop | Extra Large (80–120 gal, two-stage) |
| Inflating sports equipment and tires | Small (1–6 gal) |
This table is intentionally conservative, favoring the category that comfortably covers the listed project rather than the bare minimum that might technically get by. If your project sits at the edge of two categories in the table, revisit the step-by-step checklist above and lean toward the larger option if your tool use is likely to expand, or the smaller option if budget and portability are the higher priority.
It is also worth remembering that this table assumes fairly typical tool choices within each project category. A framing job using a heavier-duty nailer with a higher per-shot CFM draw, or automotive work involving a larger 3/4-inch impact wrench instead of a standard 1/2-inch model, can push a project’s real requirement into the next category up, so treat this table as a starting point to confirm against your specific tools rather than a final answer on its own.
A Note on CFM vs. SCFM
Occasionally you will see compressor and tool specifications listed as SCFM rather than plain CFM. SCFM stands for Standard Cubic Feet per Minute, and it refers to airflow measured under a standardized set of reference conditions for temperature, pressure, and humidity, which allows for a fairer apples-to-apples comparison between different manufacturers’ equipment. In everyday shopping, CFM and SCFM figures are close enough that most buyers can treat them interchangeably, but if you are comparing spec sheets from two different brands and the numbers look surprisingly different for similarly sized units, check whether one is listing SCFM and the other is listing standard CFM, since that distinction can occasionally explain an otherwise confusing gap between two seemingly comparable machines.
Quick Glossary of Terms
| Term | Definition |
|---|---|
| CFM | Cubic Feet per Minute; the volume of air a compressor delivers per minute at a given pressure. |
| PSI | Pounds per Square Inch; a measure of air pressure. |
| SCFM | Standard CFM; CFM measured under standardized temperature, pressure, and humidity conditions for fair comparison between units. |
| Duty Cycle | The percentage of a given time period a compressor’s motor can run without overheating. |
| Single-Stage | A compressor design that compresses air to final pressure in one piston stroke. |
| Two-Stage | A compressor design that compresses air in two steps, cooling it between stages for higher pressure and efficiency. |
| Pressure Switch | The component that turns the motor on and off based on tank pressure thresholds. |
| Regulator | A valve that lets you set and control the output PSI delivered to a connected tool. |
| ASME Tank | A compressor tank certified to American Society of Mechanical Engineers pressure vessel standards. |
Frequently Asked Questions
What size air compressor do I need for a home garage?
For a typical home garage running one tool at a time, such as a nail gun, inflator, or occasional impact wrench, a 20 to 30-gallon single-stage compressor delivering 4 to 6 CFM at 90 PSI is usually enough.
How many CFM do I need for a spray gun?
Most HVLP spray guns need between 8 and 14 CFM at 40 PSI, which typically calls for a two-stage compressor with at least a 5 HP motor and a 60-gallon tank.
Is a bigger tank always better?
Not necessarily. A larger tank gives you more reserve air and longer run time between motor cycles, but CFM output and duty cycle matter more for tools that use air continuously, such as sanders or spray guns.
What is the difference between CFM and PSI?
PSI measures air pressure, while CFM measures the volume of air delivered per minute. A tool needs both enough pressure to function and enough volume to run without stalling.
Can I run two air tools at the same time?
You can, but you need to add the CFM requirements of both tools together and choose a compressor that can supply that combined figure continuously, not just at peak.
What size compressor do I need for framing nailers?
Framing nailers typically need 2 to 3.5 CFM at 90 PSI, so a portable 4 to 6-gallon pancake or hot dog compressor is often sufficient for trim and framing work.
How much horsepower do I need for an air compressor?
Horsepower alone is a poor sizing metric because manufacturers rate it differently. It is more reliable to size a compressor by its CFM output at your required PSI rather than by HP rating.
What size air compressor do I need for automotive work?
For automotive tasks like impact wrenches and air ratchets, look for a two-stage compressor with at least 60 gallons of tank capacity and 10 to 14 CFM output at 90 PSI.
Does altitude affect air compressor sizing?
Yes, air density decreases at higher elevations, which reduces a compressor’s effective output, so it is wise to size up slightly if you work at higher altitudes.
What is duty cycle and why does it matter?
Duty cycle is the percentage of time a compressor can run within a given period without overheating. Tools that need continuous air, such as sanders, require a compressor with a higher duty cycle.
Should I buy an oil-lubricated or oil-free compressor?
Oil-lubricated compressors run cooler and last longer under heavy use, making them better for shops, while oil-free models are lighter and more convenient for occasional homeowner tasks.
How do I calculate the right compressor size for multiple tools?
Identify the single tool with the highest continuous CFM demand, add a 30 percent safety buffer, and choose a compressor that meets or exceeds that number at your required PSI.
Conclusion: Match the Compressor to the Work, Not the Other Way Around
Sizing an air compressor correctly comes down to working through three questions in order. First, what is the highest CFM demand among the tools you plan to run, measured at the PSI those tools actually use? Second, will you ever need to run two of those tools simultaneously, and if so, do their combined CFM figures change your target? Third, does your work involve continuous-air tools that require a strong duty cycle, or bursty tools like nailers that give the motor time to rest between cycles?
Once you have honest answers to those three questions, the gallon size, horsepower rating, and single-stage versus two-stage decision tend to fall into place naturally, because they are downstream of the CFM and duty cycle requirements rather than independent choices. Resist the urge to buy based on tank size alone or to chase the highest horsepower number on the shelf, and instead let your actual tools dictate the spec sheet you are shopping against.
It is also worth remembering that sizing a compressor is not a one-time decision you have to get perfectly right on the first attempt with no room for adjustment. Most compressors hold their resale value reasonably well precisely because sizing mismatches are such a common experience, so if you do end up needing to size up as your tool collection grows, a correctly maintained unit is usually easy to sell or hand down to a lighter-duty task elsewhere in the shop. That said, working through the checklist and scenarios in this guide before you buy will save you the hassle of that transition in the majority of cases, and it puts you in a much stronger position than simply picking the compressor with the biggest tank on the shelf.
If you are ready to compare specific models that fit the category you landed on, our full best air compressors roundup breaks down top picks across every size range covered in this guide, and our air compressor buying guide walks through the rest of the decision beyond sizing alone.
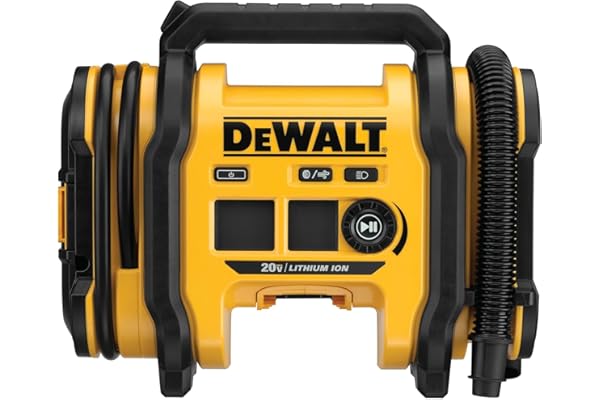
Best Value Pick: Compact Portable Compressor
A reliable all-around choice for homeowners tackling nailing, inflation, and light-duty pneumatic tasks.
Check Price on Amazon