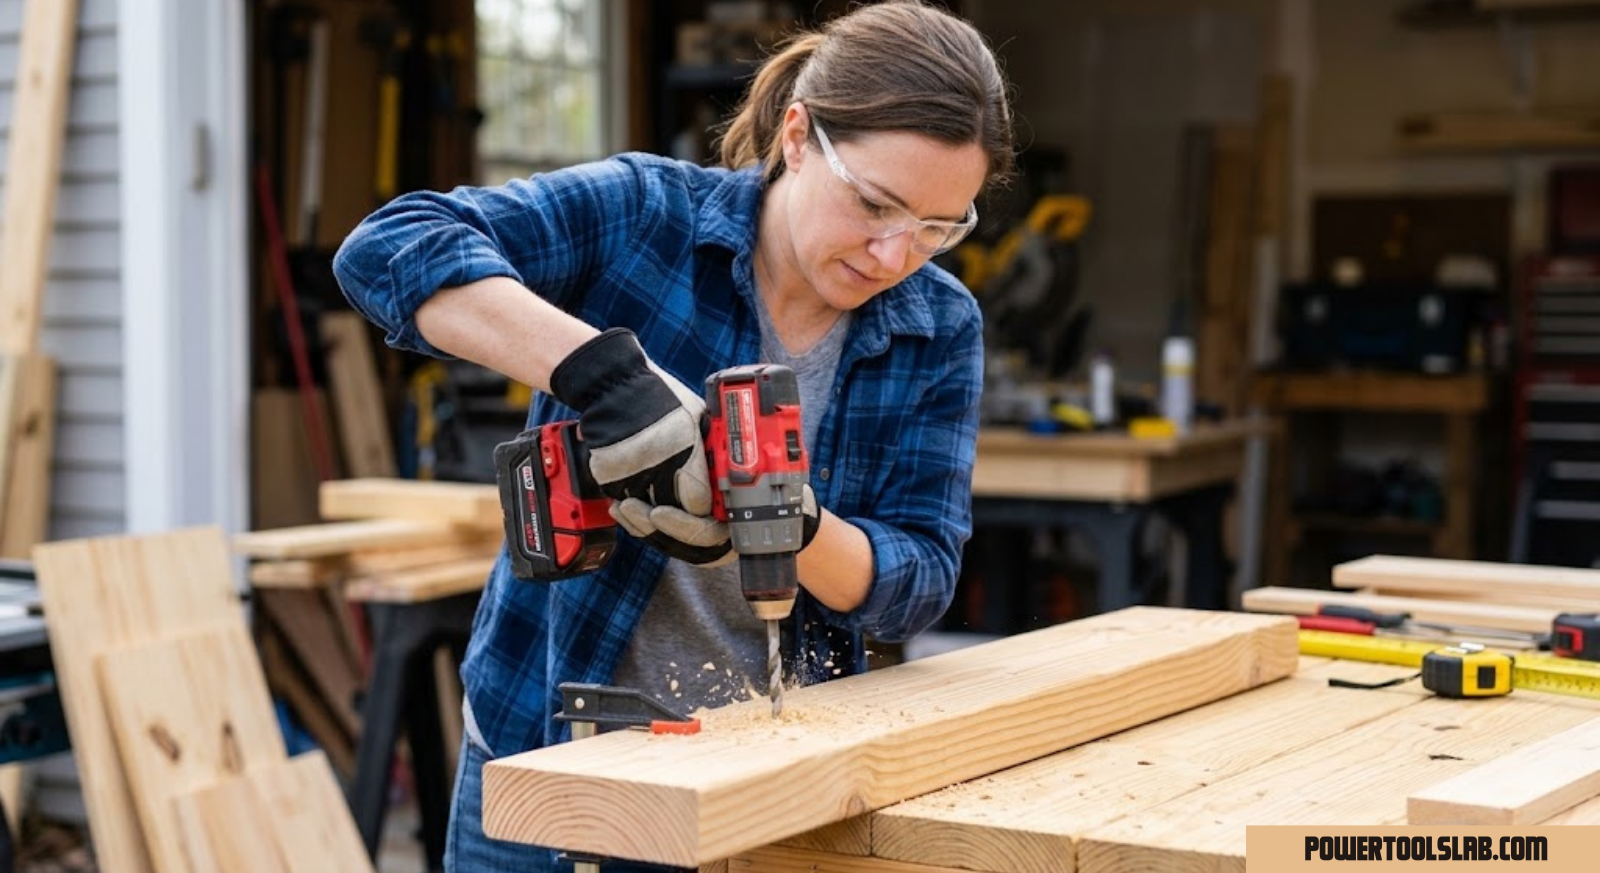
How to Use a Drill: A Complete Step-by-Step Guide for Beginners and DIYers
From picking the right bit to drilling clean holes in wood, metal, and masonry — everything you need to run a drill safely and confidently, explained in plain language.
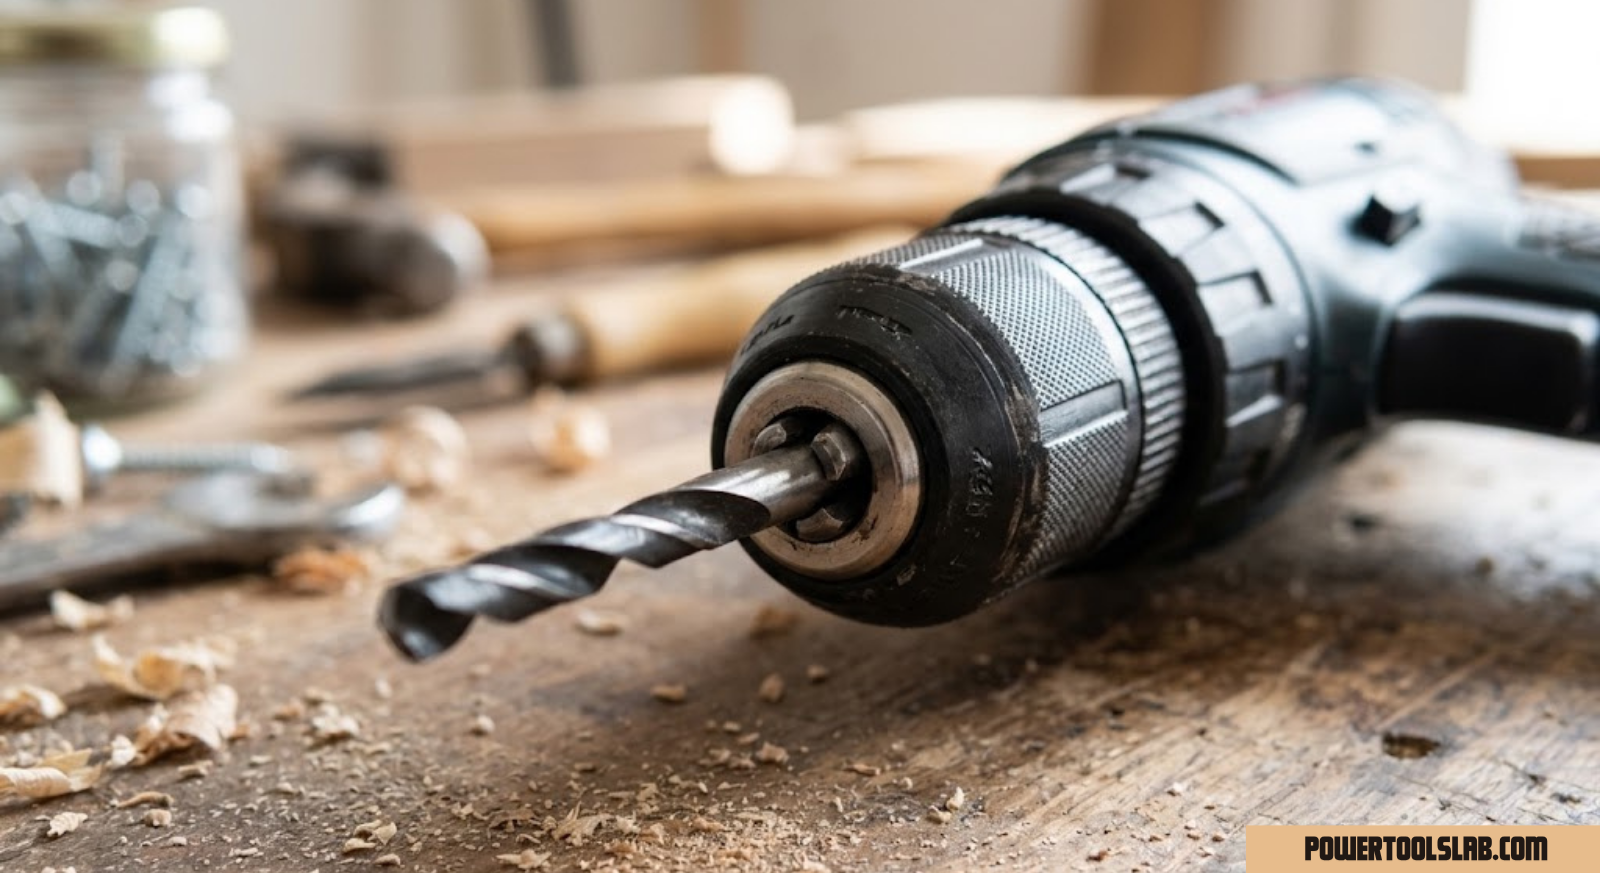
Why Learning to Drill Properly Matters
A power drill is probably the single most useful tool you can own. It hangs shelves, assembles furniture, mounts curtain rods, builds decks, and drives thousands of screws over its lifetime. Yet a surprising number of people pick one up, squeeze the trigger, and hope for the best — and then wonder why their holes wander off-center, their screws strip, or their bit snaps clean in half halfway through a cut.
Using a drill correctly isn’t complicated, but it is a skill with a handful of small details that separate a clean, professional-looking result from a frustrating mess. Grip, speed, torque setting, bit selection, and body position all play a role. Once you understand how these pieces fit together, drilling stops being a guessing game and becomes second nature — the kind of task you can do quickly, safely, and accurately without thinking twice.
This guide walks through everything from the parts of a drill to a full step-by-step process for drilling in wood, metal, masonry, and plastic, along with the mistakes that trip up most beginners. Whether you’re hanging a picture frame or building a bookshelf from scratch, the fundamentals here will serve you for years.
It’s also worth pointing out that the skill transfers well beyond the specific examples covered here. Once your hands understand what correct pressure, speed, and alignment feel like, you’ll find yourself drilling more confidently in situations this guide never explicitly mentions — a strange bracket, an unusual material, an awkward angle in a tight cabinet. The underlying principles stay the same no matter what the specific job looks like, which is exactly why it’s worth taking the time to build the habit properly from the start rather than picking up shortcuts that only work some of the time.
Anatomy of a Drill: Know Your Tool
Before you drill your first hole, it helps to know what every part of the tool actually does. Most cordless drills share the same basic layout, and understanding each component makes every later step in this guide much easier to follow.
- Chuck — the clamping mechanism at the front of the drill that grips the bit. Most modern drills use a keyless chuck you tighten by hand.
- Trigger — controls both the on/off function and the speed. The harder you squeeze, the faster the drill spins.
- Forward/reverse switch — usually located just above the trigger, this toggles the direction of rotation so you can back screws out or reverse a stuck bit.
- Clutch collar — the numbered ring behind the chuck that sets how much torque the drill applies before it stops driving, protecting screws from stripping.
- Gear selector — usually a switch marked 1 and 2 (sometimes with a hammer setting) that changes the speed and torque range.
- Battery pack — powers cordless drills; capacity is measured in amp-hours (Ah), which affects how long you can work before recharging.
- Handle and grip — often rubberized for comfort and control, sometimes with a built-in level or LED work light.
Spend a minute physically locating each of these on your own drill before moving forward. Being able to find the clutch collar or the reverse switch without looking will save you real time once you’re mid-project.
Choosing the Right Drill for the Job
Not every drill is built for the same task. A basic drill/driver is fine for furniture assembly and light household work, but if you’re drilling into concrete or driving hundreds of deck screws, a hammer drill or impact driver will save your wrist and your bits.
It’s also worth understanding how a standard drill differs from an impact driver, since the two tools look similar but behave very differently under load. Our comparison of a drill vs impact driver explains when each one is the better choice. Likewise, if you’re regularly working with brick, block, or concrete, a dedicated hammer drill vs a regular drill comparison will help you decide whether the added hammering action is worth the investment.
Power source matters too. Cordless drills offer freedom of movement and have become powerful enough for almost any home task, while corded models still hold an edge for continuous, heavy-duty use where battery life would be a limitation. If you’re on the fence, our breakdown of corded vs cordless drills covers the trade-offs in detail.

Not sure which drill to buy?
See our current top pick for DIY and professional use, tested for power, comfort, and battery life.
Check Price on AmazonChoosing the Right Drill Bit
The bit you choose matters just as much as the drill itself. Using the wrong bit for the material is one of the fastest ways to ruin a workpiece, snap a bit, or burn out the tip before the hole is even finished.
| Bit Type | Best For | Notes |
|---|---|---|
| Twist bit (HSS) | Wood, plastic, thin metal | Most common general-purpose bit |
| Brad-point bit | Wood | Sharp center point prevents wandering |
| Spade bit | Wood, rough holes | Fast but leaves a rough edge |
| Masonry bit | Brick, concrete, block | Carbide tip; use with hammer drill for best results |
| Titanium-coated bit | Hardened metal, steel | Longer-lasting cutting edge |
| Countersink bit | Pre-drilling screw holes | Lets screw heads sit flush |
| Forstner bit | Flat-bottomed holes in wood | Used for hinges and dowels |
As a rule, match the bit material to the workpiece: standard HSS twist bits handle wood and soft metal fine, but masonry and hardened steel both need bits specifically designed for those materials, or you’ll dull a general-purpose bit in seconds. Diameter matters just as much as material — always check the packaging or a bit gauge if you’re unsure, since a bit that’s even slightly oversized for a screw will leave the fastener loose, while one that’s too small will make driving unnecessarily difficult and risk snapping the fastener’s head.
It’s also worth keeping bits sorted and labeled rather than tossed loosely into a drawer. A cheap plastic organizer case pays for itself quickly the first time you need a specific size mid-project and don’t want to test five different bits before finding the right one.
Safety Prep Before You Drill
A few seconds of preparation prevents most drilling accidents. None of these steps take long, but skipping them is how people end up with eye injuries, ruined workpieces, or a hole through a hidden pipe or wire.
Do This Every Time
- Put on safety glasses, even for “quick” jobs
- Check the area behind the surface for wires or pipes
- Clamp small workpieces down so they can’t spin
- Fully charge or check your battery before starting
- Tie back long hair and remove loose jewelry
Avoid These Habits
- Wearing gloves loose enough to catch on the bit
- Drilling freehand into small unclamped pieces
- Using a cracked or chipped drill bit
- Drilling into walls without checking for wiring first
- Standing directly behind the bit’s exit path
Step-by-Step: How to Use a Drill
This is the core process. Once you can run through these steps without hesitating, you’ll be able to handle almost any drilling task around the house.
Step 1: Insert the Correct Bit Into the Chuck
Hold the chuck (the collar just behind the bit opening) with one hand and twist it counter-clockwise to open the jaws. Slide the bit in as far as it will go, then twist the chuck clockwise until it’s snug. Give the bit a light tug to confirm it’s locked in place before you drill.
Step 2: Set the Clutch and Speed Setting
Rotate the clutch collar to a low number (1–3) for small screws in soft material, and a higher number for larger screws or denser wood. For pure drilling (not driving), switch the clutch to the drill-bit icon so the motor doesn’t stop early. Use gear 1 for high torque/low speed, and gear 2 for higher speed and less torque.
Step 3: Mark and Center Your Drilling Point
Use a pencil to mark an X or dot exactly where you want the hole. For precision work, use an awl or center punch to create a small starter indent — this keeps the bit from wandering when you first apply pressure.
Step 4: Position Your Body and the Drill
Stand with your feet shoulder-width apart and keep your weight balanced. Hold the drill with your dominant hand on the grip and your trigger finger relaxed, while your other hand steadies the body or a side handle if the drill has one. Line the bit up perpendicular (90°) to the surface unless the job calls for an angled hole.
Step 5: Start Slow, Then Increase Speed
Squeeze the trigger gently to begin the hole at a low speed — this prevents the bit from skating across the surface. Once the bit has bitten in and created a small starter hole, gradually increase pressure on the trigger for full speed and steady, even pressure until you’re through the material.
Step 6: Withdraw and Clear Debris
Once the hole is complete, ease off the trigger and pull the bit straight back out — don’t yank it sideways, which can chip the edges of the hole. For deep holes, pull the bit out every inch or so to clear sawdust or debris, especially in wood and masonry.
Drilling Into Different Materials
The basic steps above apply everywhere, but each material has its own quirks worth knowing before you start.
Wood
Wood is the most forgiving material to drill. Use a brad-point or twist bit, moderate speed, and steady pressure. For larger diameter holes, drill a smaller pilot hole first, then follow up with the full-size bit — this keeps the larger bit from wandering and reduces strain on the motor.
Metal
Metal needs a slower speed and constant, even pressure. Center-punch your mark first, and consider a drop of cutting oil on the bit for thicker steel — it reduces heat buildup and extends bit life significantly. Never force the bit; let it cut at its own pace.
Masonry (Brick, Block, Concrete)
Masonry requires a carbide-tipped masonry bit and, ideally, a hammer drill set to hammer mode, which combines rotation with rapid forward pulses to break up the material. Go slow, apply steady pressure, and back the bit out periodically to clear dust. If you don’t have a hammer drill, a standard drill can still work on softer brick with patience — just expect it to take longer and wear the bit faster.
Tile and Glass
Use a specialized tile or glass bit with a spear-point tip, run the drill at low speed, and keep the area lightly misted with water to reduce heat and prevent cracking. Start at a slight angle to create a starter notch, then straighten to vertical once the bit has bitten in.
Plastic
Plastic can crack or melt if you go too fast. Use a sharp bit, moderate-to-low speed, and light pressure, and back off periodically to let the bit cool if you feel resistance building.

Grab a versatile bit set
A quality mixed bit set covers wood, metal, and masonry so you’re never stuck mid-project.
Check Price on AmazonUsing a Drill to Drive Screws
Driving screws is technically a different job than drilling holes, but most drill/drivers handle both. The key differences are the bit (a screwdriver bit instead of a drilling bit) and the clutch setting, which should be dialed in to stop the motor once the screw is seated — protecting both the screw head and the material around it from damage.
For larger screws in hardwood, pre-drilling a pilot hole slightly narrower than the screw’s shaft prevents splitting and makes driving noticeably easier. Start the screw with light pressure and a low clutch setting, then increase torque only if the screw isn’t seating fully. If you’re driving hundreds of screws for a deck or fence, an impact driver will save considerable wrist fatigue compared to a standard drill — worth revisiting our drill vs impact driver comparison if that’s your next project.
Drilling at an Angle: Toe-Nailing and Pocket Holes
Not every hole is meant to be straight up and down. Certain framing and joinery techniques rely on intentionally angled holes, and knowing how to control that angle is a useful extension of the straight-drilling skills covered above.
Toe-Nailing With Screws
Toe-nailing is the technique of driving a screw at roughly a 45-degree angle through the end of one board and into a second board or framing member, commonly used when a straight, face-on screw isn’t possible. Start the pilot hole at a shallow angle against the corner of the board, let the tip bite in, then straighten to your target angle as you continue driving. It takes a few tries to get consistent, so practice on scrap material before committing to a visible piece.
Pocket Hole Joinery
Pocket holes use a specialized jig to guide a stepped, angled bit through one board so a screw can be driven into an adjoining board at a hidden angle — a technique widely used in cabinetry and furniture building. While the jig does most of the alignment work, the drilling principles are identical to what’s covered in this guide: steady pressure, correct speed, and periodic withdrawal to clear chips from the stepped bit.
Angled Holes for Deck Railings and Stair Stringers
Some structural connections, like deck railing posts or stair stringers, call for a specific angle set by a speed square or angle guide rather than free-handing it. Clamp an angle guide to the workpiece as a visual reference, and start the bit slowly against the guide before applying full speed — this keeps the angle consistent across every hole in a run of framing.
Adjusting for Comfort: Grip, Handedness, and Fatigue
Drilling for a few minutes rarely causes discomfort, but a few hours of repetitive work — building a deck, assembling a full room of flat-pack furniture, or driving hundreds of drywall screws — can leave your wrist and forearm sore if your grip and posture aren’t set up well.
Most drills are designed to be reasonably ambidextrous, with the trigger positioned so either hand can operate it comfortably, though the forward/reverse switch is sometimes easier to reach with one hand than the other. If you’re left-handed, spend a minute testing the switch position before starting a big job so you’re not fighting the tool’s layout mid-task.
To reduce fatigue on longer projects, keep your wrist as straight as possible rather than bent at an angle, let the drill’s weight rest in your palm rather than gripping tightly with your fingers, and take short breaks every twenty to thirty minutes during repetitive driving sessions. A drill with a side handle — common on larger or hammer-capable models — also helps distribute effort across both arms instead of putting all the strain on your dominant wrist.
Common Mistakes to Avoid
- Pressing too hard. Let the bit do the cutting — excess force just generates heat and dulls the edge faster than a light, steady pace ever would.
- Wrong bit for the material. A wood bit in masonry (or vice versa) will dull almost immediately and can snap under the extra strain.
- Skipping the pilot hole. Especially in hardwood, skipping this step is the number one cause of split boards and off-angle screws.
- Ignoring the clutch setting. Driving screws on full torque with no clutch limit is the fastest way to strip a screw head or crack drywall around the fastener.
- Not clamping the workpiece. Small pieces that spin freely are both dangerous and nearly impossible to drill accurately.
- Drilling at an angle by accident. Even a slight lean can send a long screw or bit out the side of the material, especially in thinner stock.
- Letting the battery run flat mid-project. A drill that’s losing charge slows down and loses torque well before it dies completely, which can lead to underdriven screws — keep a spare charged if you’re mid-project.
- Reusing a bit that’s visibly dull or chipped. A worn bit takes far more force to cut, which increases both wandering and the odds of snapping mid-hole.
Most of these mistakes share a common thread: they come from rushing a step that only takes a few extra seconds to do correctly. Building the habit of marking, clamping, and setting the clutch before every job pays off almost immediately in cleaner results and fewer ruined workpieces.
Drill Types Compared
| Drill Type | Best Use | Torque | Ideal User |
|---|---|---|---|
| Standard Drill/Driver | General DIY, furniture, shelves | Moderate | Homeowners, beginners |
| Hammer Drill | Brick, block, concrete | High (with impact) | Renovators, masons |
| Impact Driver | Heavy screw driving, lag bolts | Very High | Deck builders, framers |
| Right-Angle Drill | Tight spaces, plumbing, electrical | Moderate | Tradespeople |
| Rotary Hammer | Heavy demolition, deep concrete | Extreme | Contractors |
For most homeowners, a standard cordless drill/driver covers 90% of tasks. If you regularly work with masonry, comparing a hammer drill vs regular drill will help you decide if the upgrade is worth it for your project list.
Cleaning and Maintaining Your Drill
A well-maintained drill lasts for years and performs more consistently. After each use, wipe down the body and chuck with a dry cloth to remove dust, especially after masonry work. Periodically use a small brush or compressed air to clear debris from the vents and chuck jaws, since built-up dust restricts airflow and can cause the motor to run hotter than it should.
Store batteries at room temperature and avoid letting them sit fully depleted for long periods, as this shortens lithium-ion battery lifespan. If you ever notice unusual heat, a burning smell, or a drop in power mid-task, stop and let the tool cool down — our guide on why your drill might be smoking walks through the most common causes and what to do about them.
Good Maintenance Habits
- Wipe down after every use
- Store in a dry, temperature-stable space
- Check the chuck for wobble periodically
- Keep bits sharp and organized by type
Habits That Shorten Tool Life
- Leaving batteries in a hot car
- Running the motor at stall speed for long periods
- Ignoring grinding or squealing noises
- Storing with a dull or damaged bit still installed
Troubleshooting Common Problems
The drill won’t start
Check the battery charge first, then confirm the forward/reverse switch isn’t stuck in the center (neutral) position, which disables the trigger on most models.
The bit keeps slipping in the chuck
Open the chuck fully, clean out any dust or debris inside the jaws, and reinsert the bit as far as it will go before tightening.
The drill is overheating or smoking
This usually points to prolonged high-load use, a dull bit forcing the motor to work harder, or worn internal brushes. Give the tool a rest and see our full breakdown of drill smoking causes and fixes for a complete diagnostic checklist.
Screws keep stripping
Lower the clutch setting, use the correct driver bit size, and make sure you’re pressing straight in behind the bit while driving.

Keep a spare battery on hand
A backup battery pack means no downtime waiting on a charge mid-project.
Check Price on AmazonRecommended Drill Brands
Once you’ve got the technique down, the tool itself makes a real difference in comfort and consistency. A few brands consistently stand out for build quality, battery ecosystem, and warranty support.
- DEWALT — Known for durable, high-torque drills with a huge battery ecosystem. See our best DEWALT drill picks.
- Milwaukee — Favored by tradespeople for power and brushless motor efficiency. See our best Milwaukee drill picks.
- Makita — Lightweight, well-balanced drills with a loyal following. See our best Makita drill picks.
- Bosch — Strong all-around performance with excellent ergonomics. See our best Bosch drill picks.
- Ryobi — Budget-friendly and beginner-approachable, with a wide tool ecosystem. See our best Ryobi drill picks.
If you’re just getting started and want a single, well-rounded recommendation across brands and price points, our full roundup of the best drills for DIY and pro use is the best place to start.
Understanding Torque, Speed, and Power Ratings
Once you’ve handled a drill for a while, the spec sheet starts to matter a lot more than it does on day one. Torque, measured in inch-pounds (in-lbs) or newton-meters (Nm), describes how much rotational force the motor can apply before it stalls. A higher torque rating means the drill can drive longer screws, bore larger holes, and push through denser material without bogging down. Most homeowner-grade drills sit somewhere in the 300–500 in-lbs range, while professional models built for framing or deck work can exceed 1,000 in-lbs.
Speed, measured in RPM (revolutions per minute), is a separate number worth understanding. A drill with a two-speed gearbox typically offers a low range around 0–450 RPM for high-torque, controlled work like driving screws or drilling large-diameter holes, and a high range around 0–1,500 RPM or more for fast, lower-torque work like small pilot holes. Matching the gear to the task, rather than always drilling in high gear, is one of the simplest ways to get cleaner results and put less strain on both the motor and the bit.
Voltage is another number that gets thrown around a lot in marketing, and it’s easy to over-index on it. A 20V drill from one brand and an 18V drill from another can perform almost identically in practice, because voltage alone doesn’t tell you anything about the internal gearing, motor efficiency, or battery chemistry. Instead of chasing the biggest voltage number, look at torque ratings, no-load speed, and — just as importantly — real user reviews describing how the tool performs under actual working conditions.
Battery amp-hours (Ah) affect runtime rather than power. A 2.0Ah battery will run out faster than a 5.0Ah battery of the same voltage, but both will spin the motor at the same speed and torque when fresh. If you’re doing all-day projects, a higher-capacity battery — or a second battery to swap in in) — will matter more than almost any other spec on the box.
Drilling for Common Household Projects
The fundamentals covered earlier apply everywhere, but a few everyday projects have their own specific quirks worth calling out individually.
Hanging Shelves and Wall Art
Start by locating studs with a stud finder whenever possible — screws driven into a stud hold dramatically more weight than screws in drywall alone. Mark your hole locations, use a level to keep brackets straight, and pre-drill pilot holes slightly smaller than your screw diameter. For heavier shelving units without a stud behind them, use rated drywall anchors rather than relying on the screw alone.
Assembling Flat-Pack Furniture
Most flat-pack furniture uses small, soft cam screws and pre-formed holes, so the biggest risk is over-tightening and stripping the particleboard. Set your clutch to a low setting, drive slowly, and stop the moment you feel resistance increase sharply — that’s usually the sign the screw has seated.
Mounting Curtain Rods and Blinds
These brackets are usually light, but precise spacing matters more than raw holding power. Measure twice, mark both bracket positions before drilling either one, and use a small bit to start a pilot hole so the mounting screw goes in straight rather than at a slight angle.
Building a Deck or Outdoor Structure
Exterior projects call for corrosion-resistant screws and, ideally, a higher-torque drill or impact driver, since you’ll be driving hundreds of fasteners into treated lumber. Pre-drilling near board ends prevents splitting, and countersinking the screw heads slightly below the surface gives a cleaner, longer-lasting finish.
Installing Door Hinges and Hardware
Hinge screws are short but need to sit perfectly flush, so a countersink bit or a self-countersinking screw is worth using. Drill pilot holes at a low speed to avoid splitting the door jamb, and double-check hinge alignment with the door closed before fully driving the final screws.

Building or mounting something this weekend?
A dependable drill/driver combo makes household projects faster and far less frustrating.
Check Price on AmazonUseful Drill Accessories
A handful of inexpensive accessories make almost every drilling task faster, cleaner, and safer. None of these are strictly required, but each one solves a specific, common frustration.
- Stud finder — locates framing behind drywall so screws land in solid wood rather than empty cavity.
- Bit organizer case — keeps bits sorted by size and type so you’re not hunting through a loose pile mid-project.
- Magnetic bit holder — holds screwdriver bits securely and reduces wrist strain during long driving sessions.
- Depth stop collar — clamps onto a bit to prevent drilling past a set depth, useful for repeated identical holes.
- Center punch — creates a starter dimple in wood or metal so the bit doesn’t wander at the start of a hole.
- Right-angle attachment — extends your drill’s reach into tight corners and cabinets without buying a dedicated tool.
- Extra battery pack — eliminates downtime waiting for a charge, especially useful for all-day projects.
None of these need to be purchased all at once. Most people build up a small accessory kit gradually, adding pieces as specific projects call for them — a stud finder before hanging heavy shelves, a depth stop before repeating dozens of identical holes, and so on. Keep accessories together in a small case near your drill so you’re not digging through unrelated drawers every time a project comes up; a five-minute search for a missing bit is one of the most common reasons small projects stall out halfway through.
It’s also worth keeping a basic hand tool nearby even when you’re working with a power drill — a manual screwdriver for final, delicate tightening, and a small hammer for tapping stubborn dowels or hardware into place. Power tools handle the bulk of the work, but a few manual finishing touches often produce a cleaner, more controlled result than pushing the drill to do absolutely everything.
Frequently Asked Questions
Do I need a special drill for concrete?
You’ll get much better results with a hammer drill and a carbide masonry bit. A standard drill can work on soft brick with patience, but concrete and dense block are far easier with hammer action.
What speed should I use for drilling wood?
Medium-to-high speed works well for most wood drilling, especially with smaller bits. Slow down for larger diameter bits or hardwoods to avoid burning the wood or overheating the bit.
Why does my drill bit keep wandering off the mark?
This usually happens when you skip the center-punch or pilot mark step. Starting the bit at low speed with a marked or punched starting point keeps it from skating across the surface.
Can I use a drill as a screwdriver?
Yes — most drill/drivers include a clutch setting specifically for driving screws without stripping them. Just switch to the correct driver bit and dial the clutch to a low-to-moderate setting.
How do I stop my drill bit from overheating?
Reduce speed, apply steady rather than forceful pressure, back the bit out periodically to clear debris, and use cutting oil on metal for thicker materials.
What’s the difference between a hammer drill and a regular drill?
A hammer drill adds a rapid hammering motion behind the rotation, which helps break up masonry. For a full breakdown, see our hammer drill vs regular drill guide.
Is a cordless or corded drill better for beginners?
Cordless drills are generally more beginner-friendly thanks to their portability and lack of a trailing cord, though corded models still offer consistent power for longer jobs. Compare both in our corded vs cordless drill comparison.
Why did my drill suddenly start smoking?
This is usually caused by prolonged heavy use, a dull bit forcing the motor to strain, or worn internal components. Stop immediately and let it cool — see our dedicated guide on why a drill smokes for troubleshooting steps.
Do I need to pre-drill before driving screws?
For hardwood or when working near the edge of a board, yes — a pilot hole prevents splitting. For softwood and drywall, it’s usually optional but still recommended for larger screws.
How do I know what size drill bit to use for a screw?
As a general rule, the pilot hole should be slightly smaller than the screw’s shaft diameter — many drill bit sets are labeled with matching screw sizes to make this easier.
What should I do if my drill bit gets stuck in the material?
Switch the drill to reverse and gently pull back while running the motor in reverse. Avoid yanking sideways, which can bend the bit or damage the hole.
Can a regular drill handle driving deck screws?
It can for small projects, but for large decks or repetitive screw driving, an impact driver is far easier on your wrist and less likely to strip screw heads. See our drill vs impact driver comparison for details.
Buying Your First Drill: What Actually Matters
If you’re shopping for your very first drill, it’s easy to get overwhelmed by spec sheets full of voltage numbers, RPM ranges, and torque ratings that don’t mean much until you’ve used a few tools side by side. In practice, a handful of factors matter far more than the rest for everyday use.
Weight and balance affect comfort more than almost anything else, especially for overhead work like ceiling fixtures or upper cabinet installation — a heavier drill that feels fine for five minutes can become exhausting after an hour. Battery ecosystem is another practical consideration: if you already own tools from a particular brand, buying a drill on the same battery platform lets you share batteries and chargers instead of accumulating duplicates. Warranty and parts availability matter too, since a drill you plan to keep for a decade should be backed by a brand with accessible replacement parts and service.
Finally, don’t discount how a drill feels in your hand before you buy. Grip diameter, trigger resistance, and where the balance point sits all vary between brands and models, and a tool that feels awkward in the store rarely improves with use. If possible, handle a few options at a hardware store before ordering online, or lean on detailed buying guides — like our full best drills for DIY and pro use roundup — that account for these ergonomic differences alongside the raw specs.
Final Thoughts
Learning to use a drill properly comes down to a handful of habits: choosing the right bit, setting the correct clutch and speed, marking your point, keeping the bit perpendicular, and letting the tool do the work instead of forcing it. Once these steps become automatic, you’ll drill cleaner holes, strip fewer screws, and get more life out of both your bits and your drill.
Whether your next project is hanging a shelf or building something from the ground up, the fundamentals in this guide apply every time you pick up the tool. If you’re ready to upgrade your setup, browse our full roundup of the best drills for DIY and pro use to find the right match for your projects.
And if something ever feels off mid-project — unusual heat, a stripped screw that won’t stop spinning, or a bit that suddenly won’t grip — don’t push through it. Stop, diagnose the issue using the troubleshooting steps above, and pick the job back up once the tool and the material are both behaving the way they should. That patience is really the whole secret behind clean, professional-looking work: not speed, but knowing when to slow down.
Ready to start your next project?
Pick up a reliable cordless drill kit and put these steps into practice today.
Check Price on Amazon