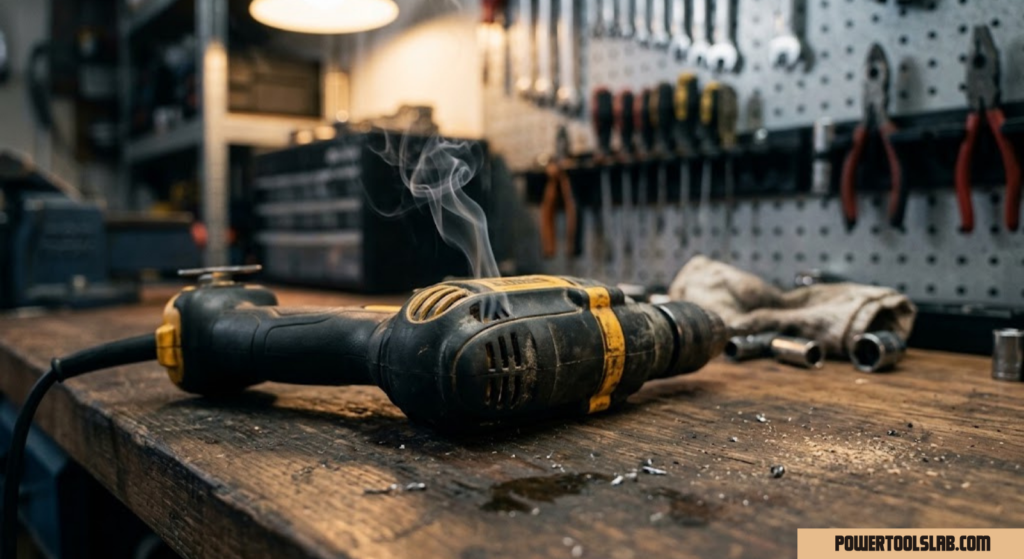
Why Is My Drill Smoking? A Complete Cause-By-Cause Diagnosis
A wisp of smoke from your drill is your tool’s way of waving a warning flag. Here’s exactly what’s overheating, why it happens, and how to stop it before the motor is toast.
'/><rect x='120' y='230' width='560' height='90' rx='16' fill='%23F5F3EF'/><rect x='650' y='255' width='230' height='40' rx='8' fill='%23E3A93A'/><circle cx='920' cy='275' r='55' fill='%23211F1C'/><circle cx='920' cy='275' r='30' fill='%23FBFAF7'/><g fill='%23C8511F' opacity='0.85'><ellipse cx='700' cy='190' rx='18' ry='26'/><ellipse cx='735' cy='150' rx='22' ry='32'/><ellipse cx='770' cy='100' rx='26' ry='38'/><ellipse cx='680' cy='140' rx='14' ry='20'/></g><text x='600' y='450' font-family='Arial' font-size='26' fill='%23EFEDE6' text-anchor='middle' opacity='0.7'>Overheated motor housing releasing smoke</text></svg>)

Diagram: the three internal zones most responsible for a smoking drill
Short answer: a drill smokes when something inside it is generating more heat than it can dissipate — usually from motor overload, worn carbon brushes, blocked air vents, a failing battery, or years of dust packed into the housing. A little haze after heavy use can be harmless. A steady stream of smoke, a burning-plastic smell, or visible sparks means stop immediately and let the tool cool before you touch it again.
If you’ve ever pulled the trigger on a stubborn lag bolt and watched a thin grey curl rise from the vents of your drill, you already know how alarming it looks. Power tools are built to run hot under load, but they are not built to run that hot, and the difference between “normal warmth” and “about to fail” is narrower than most people think. This guide walks through every realistic cause of a smoking drill, in the order a technician would actually check them, so you can figure out what’s happening in your specific tool instead of guessing.
Whether you’re running a budget cordless driver from the garage or a job-site staple like a DeWalt, a Milwaukee, or a Makita, the underlying physics is identical: electric motors convert some of their input energy into heat as a byproduct, and every part of the tool is engineered around getting rid of that heat fast enough. Smoke is what happens when that system breaks down somewhere along the chain — at the motor, the brushes, the battery, the cord, or the airflow path.

Not sure if your drill is worth saving?
Compare today’s best-rated DIY and pro-grade drills before you decide to repair or replace.
Before You Diagnose Anything: Immediate Safety Steps
Diagnosing the exact cause matters, but it can wait a few minutes. The moment you see smoke or smell something burning, the priority is getting the tool into a safe state, not figuring out why it happened. Release the trigger immediately and, if it’s a cordless model, pop the battery out and set it down on a hard, non-flammable surface a few feet away from anything that could catch — a concrete floor or a metal workbench, not a pile of sawdust or a wood bench top. If it’s a corded drill, unplug it at the outlet rather than yanking the cord itself, which can worsen existing cord damage.
Resist the urge to keep working through it “just to finish this one hole.” Heat compounds quickly once a fault has started, and a tool that’s smoking lightly now can escalate to open flame within seconds if the underlying short or arc is left energized. Set the drill down where you can watch it for a few minutes, keep the area clear of anything flammable, and have a basic fire extinguisher or a bucket of sand nearby if you’re working somewhere without easy access to one — a Class C rated extinguisher is appropriate for electrical fires, while water should never be used on a tool that’s still connected to a power source.
Once the smoke has stopped and the tool has had at least fifteen to twenty minutes to cool fully, you can move on to inspection. Don’t rush this step: opening a motor housing or handling internal wiring while components are still hot risks burns, and residual heat can also make it harder to accurately judge which part is discolored from the current event versus normal long-term wear. Patience here costs you a few minutes and saves you from either a nastier injury or a misdiagnosis.
1. Overloading the Motor
The single most common reason a drill starts smoking is also the simplest: you’re asking the motor to do more work than it’s rated for, and it’s fighting back by drawing extra current. Every drill motor has a sweet spot where torque, speed, and heat stay balanced. Push past that sweet spot — by drilling an oversized hole, driving a long lag screw into hardwood, or forcing the tool through material it wasn’t designed to cut — and the motor windings start pulling more amperage than the wire gauge inside them can handle comfortably.
That extra current has to go somewhere, and in an electric motor it shows up as heat in the copper windings. Because those windings are wrapped in a thin layer of insulating varnish, sustained overheating eventually scorches that varnish. The smell you get is almost always burning enamel insulation, not burning plastic, even though the smoke seems to come from the plastic housing near the vents. Once the varnish burns off a winding, that section of copper can short against its neighbor, which is when a light haze turns into genuine smoke and, in bad cases, a dead motor.
How to tell if overload is your problem
Overload smoking almost always happens mid-task, not while idling. You’ll notice the drill bogging down, the trigger response getting sluggish, and a rising whine in pitch right before the smoke appears. If you were pushing hard on a large spade bit, a hole saw, or mixing paint or thinset with a mixing paddle attachment not rated for that drill class, overload is the leading suspect.
The fix is almost always behavioral rather than mechanical: match bit size and material to your drill’s rated capacity, let the tool’s clutch or torque settings do their job instead of forcing it, and step up to a higher-torque tool — like many models compared on our best drills for DIY and pro use guide — if you’re consistently working beyond what a compact driver was built for.
It’s also worth paying attention to how you’re holding the trigger during a tough hole. Many people instinctively feather the trigger — pulsing it on and off rapidly — when a bit binds or a screw stalls, thinking it reduces strain on the motor. In practice, this often does the opposite: each restart draws a brief surge of current higher than steady-state running, called inrush current, and repeated surges in quick succession can heat the windings faster than one continuous push would. If a hole is binding, it’s usually better to back the bit out fully, clear the debris, and restart cleanly rather than pulsing through resistance.
2. Worn Carbon Brushes (Brushed Motors Only)
If your drill uses a traditional brushed motor rather than a brushless one, two small carbon brushes ride against a spinning copper commutator to transfer electricity into the rotating armature. Those brushes are a wear item by design — they’re made of soft carbon specifically so they erode slowly instead of damaging the much more expensive commutator. Over years of use, or after a few hundred hours of heavy trigger time, the brushes shorten until spring pressure can no longer hold them firmly against the commutator surface.
When contact becomes inconsistent, you get arcing: tiny electrical sparks jumping the gap every time contact breaks and reconnects. Arcing generates localized heat and produces a distinctive smell — sharper and more ozone-like than the “hot electronics” smell of an overloaded winding — along with visible sparks you can sometimes see through the rear vents in a dim room. Left unaddressed, worn brushes will eventually chew grooves into the commutator itself, which turns a five-dollar brush replacement into a full motor rebuild.
What to do about it
Carbon brushes are one of the cheapest, most beginner-friendly repairs on any brushed drill. Most manufacturers sell replacement brush sets for a few dollars, and swapping them typically only requires removing two small caps on the motor housing — no full teardown needed. If your drill is a newer brushless model, this cause doesn’t apply to you at all, since brushless motors use electronic commutation and have no brushes to wear out, which is one reason brushless tools tend to run cooler over their lifetime.

Replacement carbon brush kits
A five-minute fix that stops arcing before it damages the commutator.
3. Blocked Ventilation and Dust Buildup
Every drill motor relies on a small internal fan and a set of vent slots to pull cooling air across the windings while it runs. That system works brilliantly in a clean shop and terribly on a drywall-dust-covered job site. Fine dust — drywall powder, concrete dust, sawdust, insulation fibers — gets pulled straight through those vents along with the cooling air, and over time it packs itself around the windings and fan blades like insulation batting.
Once dust cakes onto the motor, it does two damaging things at once: it insulates the windings so heat can’t escape into the airstream, and it partially blocks the fan from moving air at all. The drill ends up trying to cool itself through a layer of its own exhaust. This is an especially common culprit for anyone doing renovation work, drilling into masonry, or running a drill regularly in a dusty garage or basement workshop without ever opening it up to clean it.
Recognizing dust-related overheating
This cause tends to sneak up gradually rather than appearing suddenly. The drill runs a little hotter every month, you start noticing it needs “breaks” more often than it used to, and eventually smoke shows up during otherwise ordinary tasks that never used to bother it. If you tip the drill toward a light and can see dust matted around the vent slots, or if compressed air blown into the vents comes back grey, dust buildup is very likely part of the story.
Cleaning is straightforward: with the battery removed or the tool unplugged, use short bursts of compressed air through the vents to dislodge loose dust, and for drills that see heavy dusty use, do this every few weeks rather than waiting for a problem. If you’re regularly drilling into concrete or brick, comparing the ventilation design and duty cycle of options in our hammer drill vs. regular drill breakdown can help you pick a tool actually built for that dust load.
Storage conditions play a supporting role here too. Drills left in a garage or shed where humidity swings widely can accumulate condensation inside the housing overnight, which then mixes with airborne dust into a fine paste around the vents and windings — far more effective at trapping heat than dry dust alone. If your drill lives somewhere damp or unheated, wiping it down and storing it in a case rather than leaving it exposed on a shelf measurably reduces this kind of buildup over a season of use.
4. Battery and Charging Problems (Cordless Drills)
Cordless drills add an entirely separate heat source to the equation: the lithium-ion battery pack itself. Li-ion cells generate heat any time current flows through them, and that heat scales up sharply under high discharge loads — exactly the conditions created by an overloaded motor or a long run of continuous drilling. A battery that’s old, that’s been dropped, that’s been left in a hot car, or that’s simply reaching the end of its usable cycle life will run hotter than a healthy one under the same workload, sometimes hot enough that the smoke you’re seeing is actually coming from the battery pack, not the motor housing.
It’s worth separating the smoke source carefully here, because the fix is completely different depending on where it’s coming from. Motor-housing smoke smells like hot electronics or scorched enamel and comes from the vents near the chuck end or the rear of the tool body. Battery smoke tends to come from the pack itself, often smells faintly sweet or solvent-like, and can be accompanied by a swollen or warped battery casing — a serious warning sign that means the pack should be removed, placed somewhere non-flammable, and not reused.
Charger and cell health
Charging habits matter too. Repeatedly running a battery down to zero, charging it immediately after heavy use while it’s still hot, or using a mismatched or damaged charger can all accelerate internal degradation that shows up later as excess heat under load. If your drill has started running noticeably hotter over the past several months and you can pinpoint the change to the battery rather than the tool, a fresh battery pack often solves the problem outright — and it’s worth checking how your current setup stacks up against options covered in our corded vs. cordless drill comparison if heat management is a recurring frustration.
Ambient temperature matters more than most people expect, too. Lithium-ion chemistry is most efficient in a moderate temperature range, and pushing a pack hard when it starts out already hot — say, after sitting in direct sun on a job site, or being used back-to-back without a break on a summer afternoon — leaves it far less thermal headroom before it hits its own safety cutoff. Letting a battery return closer to room temperature before a demanding task, and avoiding storing spares in a hot vehicle between jobs, meaningfully extends both performance and lifespan.

Replacement lithium-ion battery packs
A tired or swollen pack runs hotter under load and can be the real source of the smoke.
5. Damaged Cord or Internal Wiring (Corded Drills)
Corded drills remove battery heat from the equation but introduce their own failure point: the power cord and the internal wiring that connects it to the motor and trigger switch. A cord that’s been run over, pinched under a door, kinked tightly around the tool for storage, or simply aged and cracked can develop internal strand breaks that you can’t see from the outside. At the break point, the remaining strands carry more current than they’re rated for, heat up, and can smoke or even ignite the cord’s outer insulation.
The trigger switch itself is another common failure point on older corded drills. Internally it’s a set of contacts that open and close every time you pull the trigger, and after years of use those contacts can pit, corrode, or develop resistance that generates heat right at the switch. If your drill smokes specifically near the handle or trigger area rather than up near the chuck or motor housing, the switch or the cord entry point — not the motor — is the more likely cause.
Inspecting cord and switch damage
With the drill unplugged, run your fingers along the full length of the cord feeling for soft spots, kinks, or exposed copper, paying particular attention to the point where the cord enters the tool body, since that’s the highest-flex, highest-stress area. Any visible melting, discoloration, or a brittle, cracked outer jacket means the cord needs replacing before the tool is used again — this is not a “wait and see” repair, since a compromised cord is a genuine shock and fire hazard.
If you’re deciding whether it’s worth repairing an older corded model at all, it can help to weigh that against upgrading; our Bosch and Ryobi roundups both include budget-friendly options that avoid cord-related wear entirely by going cordless.
6. Ignoring the Duty Cycle
Every drill, no matter how well built, has a duty cycle — the ratio of run time to rest time it’s designed for before internal temperatures need a chance to drop. Consumer-grade drills are typically built around a light duty cycle intended for occasional DIY tasks: a few dozen holes with pauses in between, not forty-five minutes of continuous drilling into steel. Push a light-duty tool at professional-duty intensity and you’ll hit thermal limits it was never engineered to handle, even if every individual hole seemed reasonable on its own.
This cause is easy to miss because no single action looks like overload. You’re not forcing an oversized bit or fighting the material — you’re just not giving the motor a chance to shed heat between operations. Drilling twenty pilot holes back-to-back with no pause, running a hole saw through multiple studs in one session, or using the drill as a impromptu mixer for an extended batch of mortar can all add up to the same thermal result as a single dramatic overload event.
Building in recovery time
The practical fix is simply pacing your work: for repetitive tasks, build in short pauses every few minutes to let the housing cool, especially with compact or budget drills that lack the thermal mass and cooling capacity of higher-end tools. If your workload regularly involves sustained, heavy-duty drilling, it’s worth stepping up to a tool built for that duty cycle — several models in our Milwaukee lineup and comparable pro-grade options are specifically engineered with larger motors and better thermal headroom for exactly this kind of continuous use.
It also helps to think in terms of task batching rather than raw hole count. Ten holes drilled over the course of an hour, spread across other tasks, put very little cumulative heat load on a drill. The same ten holes drilled in ninety seconds flat put a concentrated load on the motor with almost no recovery time between them. If your project allows it, interleaving drilling with other steps — measuring, positioning the next piece, fetching the next fastener — naturally builds in the cooling gaps a light-duty motor needs, without costing you any real time on the overall job.
7. Using the Wrong Bit for the Material
Friction is heat, and the wrong bit generates a lot more friction than the right one. A wood bit forced through metal, a dull masonry bit ground down to the point where it’s rubbing rather than cutting, or a twist bit run at far too high an RPM for the material it’s in will all fight the drill far harder than a correctly matched bit doing the same job. That extra resistance shows up back at the motor as increased current draw and increased heat, even though the underlying cause has nothing to do with the drill itself.
Dull bits deserve special mention here because the failure is gradual and easy to rationalize away. A bit that’s lost its edge doesn’t stop cutting outright — it just cuts less efficiently, forcing you to push harder and run the drill longer to finish the same hole. That combination of extra pressure and extra run time is a near-perfect recipe for the kind of sustained heat buildup that eventually shows up as smoke, even in a perfectly healthy drill.
Matching bit, speed, and material
Keeping a dedicated set of bits for wood, metal, and masonry — rather than using one generic set for everything — and swapping out bits once they visibly dull goes a long way toward keeping heat in check. Slowing down your RPM for harder materials and letting the bit do the cutting instead of forcing it through with extra downward pressure reduces friction heat dramatically. For a broader refresher on getting speed, pressure, and bit choice right, our how to use a drill guide covers technique fundamentals that directly affect how much heat you generate per hole.

Multi-material drill bit sets
Matched bits for wood, metal, and masonry cut cooler and cut cleaner.
8. Bearing and Gear Failure
Inside every drill, a small set of bearings supports the motor shaft and the gearbox that steps that speed down into usable torque. Bearings are precision components packed with a small amount of grease, and they’re designed to spin with very low friction for the life of the tool. When a bearing starts to fail — usually from age, from grease drying out, or from dust and grit working its way past its seals — friction at that single point can spike dramatically, generating localized heat close enough to the housing that it can produce a smoky, slightly metallic smell distinct from the electrical smell of a winding or brush problem.
Gearbox issues follow a similar pattern. Stripped or worn gear teeth, or grease that’s broken down and turned gummy after years of use, increase mechanical resistance every time the drill runs, which the motor compensates for by drawing more current and generating more heat, even though the actual fault lives in the gearbox rather than the electrical system.
Spotting mechanical versus electrical smoke
A useful diagnostic: mechanical heat from bearings or gears usually comes with an audible clue — new grinding, rattling, or a rougher, less smooth sound when you spin the chuck by hand with the tool off — that wasn’t there before. Electrical causes like overload or brush wear typically don’t change the tool’s sound when it’s off, only when it’s running under power. If you notice new mechanical noise alongside the smoke, a gearbox service or bearing replacement is the more likely fix than anything electrical.
Age is the biggest predictor here. A drill that’s seen five or more years of regular use, even light use, has had that long for factory grease to gradually dry out and for dust to work its way past bearing seals a little at a time. This is one reason a well-maintained older tool can still develop a heat problem seemingly out of nowhere — the wear has been accumulating quietly the whole time, and it only becomes noticeable once friction crosses a threshold. Where the electrical fixes covered earlier are usually simple DIY jobs, bearing and gearbox work involves more disassembly and is a reasonable point to weigh professional service against simply retiring an older tool.
9. Cheap, Counterfeit, or Poorly Built Drills
Not every cause of a smoking drill comes down to how it’s used — sometimes it comes down to how it was built. Deeply discounted, off-brand, or counterfeit tools frequently cut corners in exactly the places that matter most for heat management: thinner-gauge motor windings that run hotter for the same output, undersized cooling fans, cheaper insulating varnish that breaks down at lower temperatures, and looser manufacturing tolerances in the gearbox that create more friction than a well-made equivalent. None of these shortcuts are obvious from the outside, but they all lower the temperature threshold at which the tool starts to fail.
This doesn’t mean every budget-friendly drill is a fire risk — reputable brands make genuinely good entry-level tools that are simply built to a lighter duty cycle rather than being poorly engineered. The distinction that matters is between an inexpensive tool from an established manufacturer and an unbranded or counterfeit tool with no real quality control behind it. If you’ve had recurring heat issues with an unfamiliar or off-brand drill despite reasonable use, the tool itself — not your technique — may be the root cause, and it’s worth comparing it against known-reliable options like those covered in our best drills for DIY and pro use guide.
A few practical tells can help you judge build quality before overheating becomes a pattern. Genuine tools from established brands list clear amperage or voltage ratings, carry recognized safety certifications printed on the housing, and have manufacturer-published spec sheets and replacement parts available online. Counterfeit or no-name tools frequently have inconsistent or missing ratings, generic unbranded packaging, and no searchable parts catalog at all — if you can’t find a model number that returns real results, that absence is itself a warning sign about what’s inside.
10. Hammer Drills vs. Regular Drills: Different Heat Profiles
If you’re using a hammer drill for masonry work, it’s worth understanding that these tools generate heat differently than a standard rotary drill. The hammering mechanism adds a percussive, back-and-forth impact action layered on top of normal rotation, which means the motor and gearbox are doing meaningfully more mechanical work per hole than a standard drill boring through wood or thin metal. That extra work translates into extra heat, and it’s part of why hammer drills are generally built with beefier motors and more robust cooling than compact everyday drivers.
Using a hammer drill in hammer mode for extended masonry work is expected to run warmer than a standard drill working softer materials — that’s normal operation, not a fault. The concern arises when a standard rotary drill, without a hammer mechanism, is pushed to do masonry-style work it was never designed for; without that mechanical assist, the motor has to compensate entirely through raw torque and current draw, heating up far faster than a purpose-built hammer drill doing the identical job. If your masonry work is a regular part of your routine rather than an occasional task, our hammer drill vs. regular drill comparison breaks down exactly which tool class fits which workload, and heat management is one of the clearest reasons to make the switch.
11. Repair or Replace? Making the Call Safely
Once you’ve identified the likely cause, the next question is whether it’s worth fixing. Some fixes — a brush swap, a battery replacement, a thorough dust cleaning — are cheap, fast, and well worth doing on almost any drill. Others, like a full motor rewind or a stripped gearbox, often cost close to what a new mid-range drill would cost, which tips the decision firmly toward replacement, especially on older or budget tools.
Worth Repairing When…
- The tool is otherwise in good condition and reasonably new
- The cause is brushes, a cord, or a battery — all cheap parts
- It’s a higher-end brand with available replacement parts
- Smoke appeared once, under a clear overload, and stopped
Time to Replace When…
- The motor windings themselves have visibly burned or shorted
- It’s an unbranded or counterfeit tool with no parts support
- Smoke keeps recurring even after cleaning and part swaps
- Repair cost approaches 50%+ of a comparable new tool
Before you attempt any repair, always disconnect the battery or unplug the tool completely, let it cool fully, and never open the motor housing while there’s any chance of residual charge in a corded tool’s capacitors. If you decide replacement makes more sense, matching your next drill to your actual workload — rather than buying the cheapest option again — is the single best way to avoid repeating this problem. Our guides comparing the DeWalt, Makita, and Bosch lineups are a good starting point for finding a tool with the thermal headroom your projects actually need, and if you’re also weighing whether a drill is even the right tool category, our drill vs. impact driver comparison is worth a read before you buy.

Ready to upgrade instead of repair?
See today’s top-rated drills built with better cooling and thermal headroom.
12. Corded vs. Cordless: Where Heat Comes From
Because corded and cordless drills generate and dissipate heat through different systems, it helps to see their most common overheating causes side by side before deciding which format better fits how you actually work.
| Heat Factor | Corded Drill | Cordless Drill |
|---|---|---|
| Primary heat source | Motor windings, trigger switch, power cord | Motor windings, battery pack, controller |
| Continuous run capacity | Generally higher — no battery drain limit | Limited by battery discharge and thermal cutoff |
| Most common fault | Worn brushes, cord or switch damage | Aging battery cells, brush wear (brushed models) |
| Dust sensitivity | High — vents draw dust continuously | High, plus battery contacts can corrode |
| Typical fix cost | Low (cord/brushes) to high (rewind) | Low (battery) to moderate (motor) |
| See also | Full corded vs. cordless comparison | |
Neither format is immune to overheating — each simply fails through its own weakest link. If you find yourself repeatedly troubleshooting battery-related heat, a corded tool removes that variable entirely at the cost of mobility. If cord damage and outlet access are your bigger frustration, a quality cordless model with a healthy battery is usually the more heat-stable choice for everyday DIY use.
Preventive Maintenance Checklist
Most of the causes covered above share a common thread: they build up gradually and are far cheaper to prevent than to repair. A short, regular maintenance routine catches most of them before they ever produce visible smoke. Here’s the checklist worth running through every few months, or more often if you use your drill heavily or in dusty conditions.
Every Few Weeks (Heavy Use)
- Blow out vents with compressed air after dusty jobs
- Check the battery for warmth, swelling, or slow charging
- Inspect the cord (corded models) for nicks or soft spots
- Wipe down the chuck and clear packed debris
Every Few Months (Any Use)
- Spin the chuck by hand and listen for new grinding noise
- Check carbon brushes if the tool is a brushed model
- Confirm the clutch and torque settings still hold properly
- Re-check bit sharpness across your most-used sizes
None of these steps require special tools or technical skill — most take less time than the job you were about to start. The payoff is a drill that runs cooler, holds its power longer between charges, and gives you a much wider warning window before a real fault develops. If you’re setting up a workshop routine from scratch, it’s worth pairing this checklist with good technique fundamentals from our how to use a drill guide, since correct technique reduces the heat your drill has to deal with in the first place.
Frequently Asked Questions
Is it normal for a drill to smell hot after heavy use?
A faint warm-electronics smell after extended, hard use is common and usually harmless, especially with budget or compact drills pushed near their limits. The line into “not normal” is crossed when you see actual visible smoke, sparks, or smell sharp burning plastic or ozone — those signs mean stop and let it cool rather than continuing to work through it.
Can I keep using a drill that smoked once?
Only after you’ve identified and addressed the cause. If it smoked from a one-time overload and shows no ongoing sparking, smell, or performance loss after cooling, cautious continued use with lighter loads is usually fine. If the smoke recurs, or if you can’t confidently explain why it happened, have it inspected before using it again.
Why does my drill smoke only when drilling into metal?
Metal generates more resistance and heat at the bit than wood, especially with a dull or incorrect bit, high RPM, or no cutting lubricant. This concentrates heat right at the point of contact and can transfer back through the chuck faster than the motor’s own heat, so it’s often a bit and technique issue rather than a motor fault.
My cordless drill’s battery feels hot and smells strange — what should I do?
Remove it immediately, place it on a non-flammable surface away from other materials, and don’t attempt to charge or use it again. A hot, unusual-smelling lithium-ion battery is a genuine fire risk and should be taken to a battery recycling facility rather than reused or thrown in household trash.
Do brushless drills ever smoke?
Yes, though less often than brushed models, since they eliminate brush-related arcing. Brushless drills can still overheat from overload, blocked ventilation, dust buildup, or a failing battery — the electronic controller board and windings can generate excess heat under the same conditions that would overheat a brushed motor.
How often should I clean the inside of my drill?
For occasional DIY use in a relatively clean space, once or twice a year with compressed air through the vents is usually enough. For frequent use around drywall dust, concrete, or sawdust, cleaning every few weeks helps prevent the gradual heat buildup that dust packing causes.
Is a smoking drill covered under warranty?
It depends on the cause. Manufacturing defects in windings, brushes, or the gearbox are typically covered under a standard warranty period, while damage from clear misuse, overload, or an aftermarket battery is usually excluded. Check your specific manufacturer’s warranty terms and keep your purchase receipt for exactly this situation.
Can dull drill bits really cause smoking?
Yes. A dull bit cuts inefficiently, forcing more downward pressure and longer run time to finish the same hole, both of which increase heat at the motor. Keeping bits sharp and matched to the material is a simple, often-overlooked way to reduce overheating risk.
Should I replace the battery or the whole drill if it keeps overheating?
If the drill is otherwise healthy — no unusual sounds, no sparking, decent overall age — replacing an aging battery is almost always the cheaper and more sensible first step. Only move to full replacement if a fresh battery doesn’t resolve the heat issue or if the tool shows other signs of wear.
What’s the difference between the smell of a burnt motor and burnt brushes?
Burnt motor windings tend to smell like scorched enamel or hot electronics, a heavier, more chemical smell. Worn brushes arcing against the commutator produce a sharper, slightly ozone-like smell, often paired with visible sparking through the vents rather than a steady haze.
Can I fix a smoking drill myself, or do I need a professional?
Brush replacement, battery swaps, cord replacement, and dust cleaning are all reasonable DIY repairs with basic tools and a screwdriver. Motor rewinding, gearbox rebuilding, or anything involving the trigger switch’s internal wiring is better left to a professional repair service or the manufacturer, both for safety and because the parts and tooling required often aren’t worth sourcing for a one-off repair.
Does drilling too fast cause overheating?
Running at an RPM too high for the material and bit type increases friction heat significantly, especially in metal and masonry. Slowing down and letting the bit cut at its intended pace, rather than relying on speed to power through resistance, keeps both the bit and the motor cooler.
Conclusion: Read the Smoke, Don’t Ignore It
A smoking drill is never something to shrug off, but it’s also rarely a mystery once you know what to check. Start with the simplest, cheapest explanations — overload, dust, a dull bit — before assuming the worst, and pay close attention to exactly where the smoke and smell are coming from, since that alone narrows the cause down to motor, brushes, battery, or cord in most cases. A few minutes of inspection now can be the difference between a five-dollar brush swap and a motor that’s gone for good.
If your drill has already told you it’s done — through repeated overheating, visible winding damage, or a repair bill that rivals a new tool — treat that as useful information rather than bad luck, and use it to choose a replacement that actually matches your workload. Whether that’s stepping up to a heavier-duty option from our Milwaukee or DeWalt comparisons, or simply picking a well-reviewed all-rounder from our best drills for DIY and pro use guide, the right tool for your actual jobs will run cooler, last longer, and give you a lot fewer smoky surprises.
Find your next reliable drill
Browse top-rated cordless and corded drills with strong thermal performance.