Hammer Drill vs Regular Drill: Which One Do You Actually Need?
A no-nonsense comparison of hammer drills and regular drills — what they do differently, where each one shines, and how to pick the right tool before you spend a single dollar.
Quick Answer First: Hammer Drill vs Regular Drill
If you only remember one sentence from this entire guide, remember this: a regular drill is a rotation-only tool built for drilling wood and metal and driving screws, while a hammer drill adds a rapid hammering motion on top of rotation, which lets it punch through masonry, brick, and concrete without wearing itself out. Everything else in this comparison is really just a deeper explanation of that one idea, and why it matters so much for the kind of work you’re planning to do.
Most homeowners who only ever hang shelves, assemble furniture, or drill into wood studs will never need the hammer function. But the moment concrete, brick, block, or stone enters the picture — mounting a TV bracket on a masonry wall, anchoring a deck ledger into a concrete foundation, or installing security bars — a regular drill will struggle, overheat, or simply refuse to make progress. That’s the gap a hammer drill exists to fill.
This guide walks through exactly how each tool works, where they overlap, where they diverge, and how to decide which one deserves a spot in your garage. Along the way we’ll also touch on how hammer drills relate to impact drivers, since those three tools get confused constantly, and that confusion is exactly what leads people to buy the wrong tool.
Want a Tool That Handles Both Jobs?
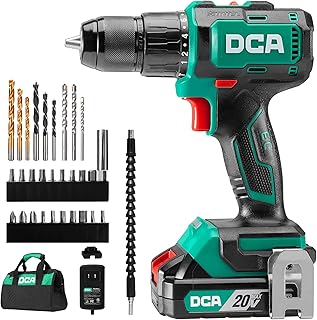
A quality hammer drill can still drill wood and metal like a regular drill — it just adds masonry capability on top. Check current pricing and availability below.
Check Price on AmazonWhat Is a Regular Drill?
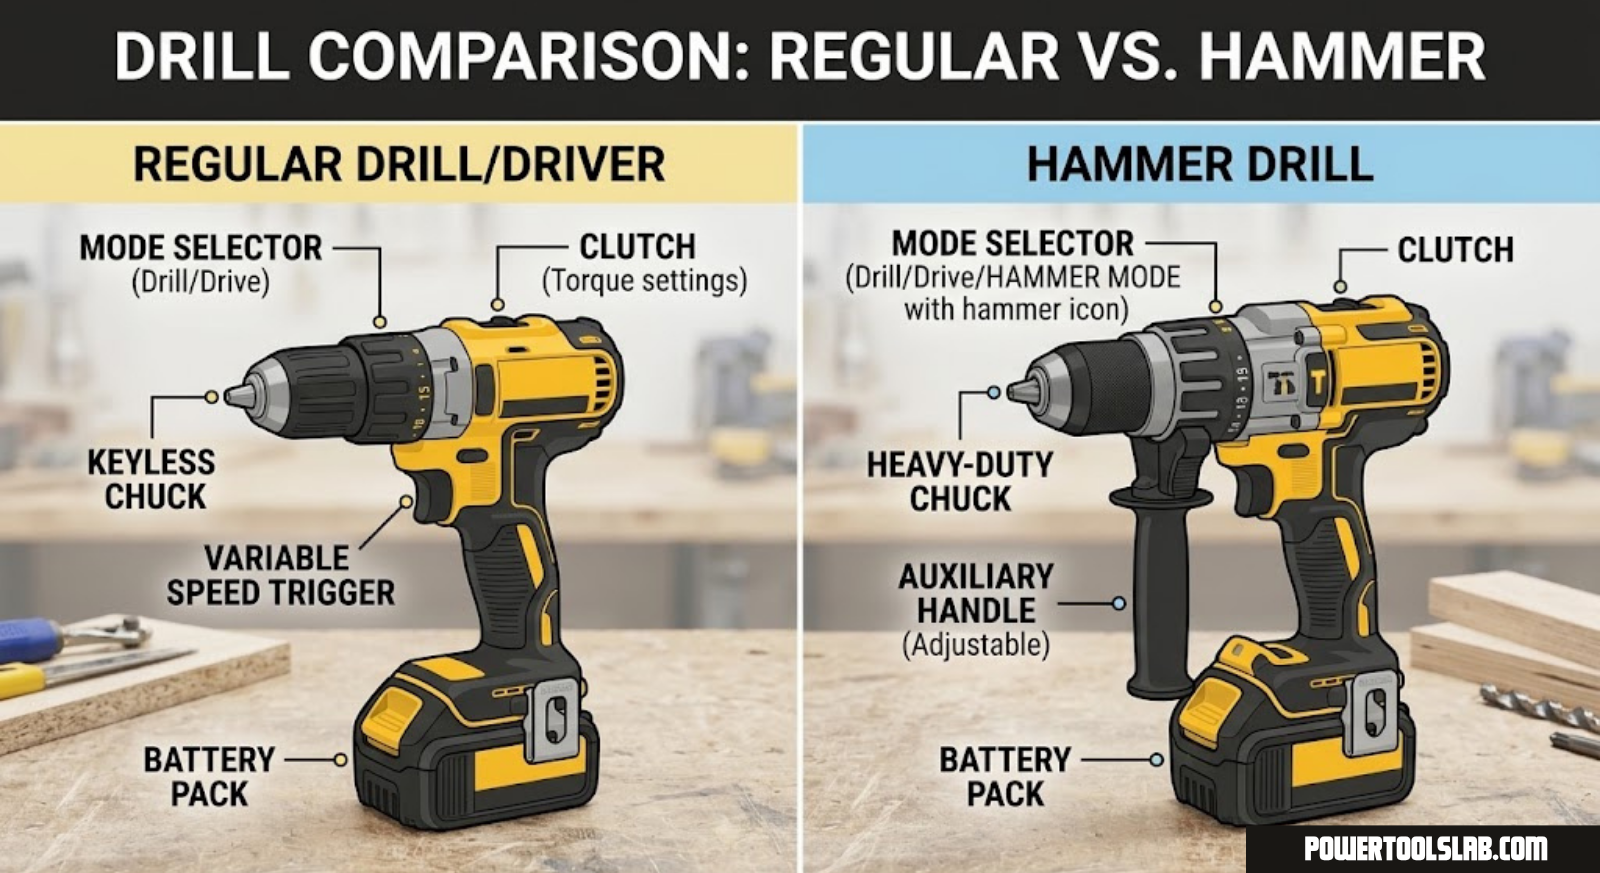
A regular drill, sometimes called a rotary drill or drill/driver, is the tool most people picture when they hear the word “drill.” It spins a chuck-mounted bit in one direction, and that’s the entirety of its motion — no hammering, no impact, just clean rotational force. Regular drills are typically sold as “drill/drivers” because the same motor and chuck can hold either drill bits for boring holes or screwdriver bits for driving fasteners, with a clutch that lets you dial in torque so you don’t strip screws or blow through drywall.
Inside a regular drill you’ll find a motor, a single or two-speed gearbox, and a chuck that clamps down on round or hex-shank bits. Most modern versions are cordless and battery powered, ranging from compact 12-volt models meant for light indoor work up to 18- or 20-volt models with enough torque for framing screws and larger spade bits. Corded regular drills still exist and remain popular in workshops where constant power and lighter weight matter more than portability.
Regular drills excel at wood, drywall, plastic, thin sheet metal, and general-purpose fastening. They’re the tool you reach for to assemble flat-pack furniture, hang a picture rail into studs, drill pilot holes, or drive deck screws. If your project list is dominated by wood and drywall, a well-built regular drill will cover nearly everything you need, and our roundup of the best drills for DIY and pro use is a good place to compare specific models.
What Is a Hammer Drill?
A hammer drill looks almost identical to a regular drill at first glance — same pistol-grip shape, same chuck, same trigger. The difference is hidden inside the gearbox. In addition to spinning the bit, a hammer drill can engage a mechanism that makes the chuck rapidly pulse forward and backward along the axis of the bit, thousands of times per minute, while it’s still rotating. That combination of spin plus pulse is what lets the bit chip away at hard, brittle materials like concrete, brick, and mortar instead of just grinding uselessly against the surface.
Most hammer drills include a switch or dial that lets you toggle between three modes: drill only (rotation), hammer only (rare, mostly for chiseling on some models), and hammer-drill combined (rotation plus hammering). This flexibility means a hammer drill can do everything a regular drill does, then step up to masonry work when you flip that switch and swap in a carbide-tipped masonry bit.
Because of that added mechanism, hammer drills tend to be a bit heavier and bulkier than a comparable regular drill, and they usually cost more. But for anyone who occasionally needs to anchor something into a brick or concrete wall — even just once or twice a year — that added weight and cost buys real capability that a regular drill simply cannot match, no matter how much torque it has.
How the Hammer Action Actually Works
The hammering mechanism inside most hammer drills relies on two interlocking cam plates, sometimes called a wobble mechanism. One plate is fixed to the housing and the other spins with the drive shaft. Both plates have small ridges or teeth machined into their faces. When you engage hammer mode, spring pressure pushes the two ridged faces together so that as the rotating plate spins, its ridges ride up and over the ridges on the fixed plate, forcing the entire chuck assembly to lurch forward and snap back thousands of times per minute.
That forward-and-back pulse is tiny — often just a couple of millimeters of travel — but it happens so rapidly that the bit effectively micro-chisels the material in front of it while the rotation clears away the resulting dust and debris. This is fundamentally different from how a rotary hammer or SDS drill works, which uses a piston-and-air-cushion system to deliver far more forceful blows with less reliance on spring pressure. That’s also why true rotary hammers can break up larger sections of concrete while a standard hammer drill is really only suited to drilling holes, not demolition.
Understanding this mechanism explains a lot of real-world behavior: why hammer drills sound and feel different in masonry mode, why the bit needs to stay roughly perpendicular to the material for the hammering to be effective, and why masonry bits are shaped the way they are, with a carbide tip ground to fracture material rather than shave it like a wood bit does.
It also explains why technique matters so much once you flip that switch. Angling the bit even slightly off perpendicular reduces the efficiency of every pulse, since the impact energy gets partially wasted pushing the bit sideways instead of driving it straight into the material. Experienced users tend to start a hole at a slower speed to let the bit establish a straight, centered path, then increase speed once the hole is a few millimeters deep and the bit is tracking true. Rushing this initial phase is one of the most common reasons masonry holes end up crooked or oversized.
The mechanism also has a natural wear pattern. Over years of heavy use, the ridged cam surfaces inside a hammer drill can wear smoother, gradually reducing the strength of the pulsing action. This is normal and expected in any tool that sees frequent masonry work, and it’s one more reason why buying a hammer drill from a reputable brand with readily available replacement parts and service support tends to pay off for anyone using the hammer function regularly rather than occasionally.
Key Differences at a Glance
Here’s a side-by-side breakdown of how these two tools compare across the factors that actually matter when you’re choosing between them.
| Factor | Regular Drill | Hammer Drill |
|---|---|---|
| Primary motion | Rotation only | Rotation + rapid hammering pulse |
| Best for | Wood, drywall, plastic, metal, driving screws | Everything a regular drill does, plus brick, block, and concrete |
| Typical weight | Lighter | Slightly heavier due to hammer mechanism |
| Noise level | Quieter | Noticeably louder in hammer mode |
| Vibration | Minimal | Higher, especially in masonry mode |
| Price range | Generally lower | Moderately higher for comparable brand and battery platform |
| Bit compatibility | Standard twist bits, spade bits, hex driver bits | Same, plus carbide-tipped masonry bits |
| Learning curve | Very beginner friendly | Slightly steeper due to mode switching and bit pressure technique |
| Ideal user | DIYers focused on wood, furniture, drywall | Homeowners and pros who occasionally or regularly work with masonry |
Performance by Material
Numbers on a spec sheet only tell part of the story. What actually matters is how each tool behaves when the bit meets real material, so let’s walk through the common categories one at a time.
Wood
Both tools handle wood equally well when hammer mode is switched off on the hammer drill. In fact, running a hammer drill in hammer mode against wood is a bad idea — the pulsing action can splinter the wood, chew up the hole, and wear the bit faster for no benefit. Keep hammer drills in rotation-only mode for any wood task.
Drywall and Plaster
Again, a wash. Rotation-only mode is all either tool needs, and a lighter regular drill is honestly a bit more comfortable to hold overhead for ceiling work since it weighs less.
Metal
Regular drills and hammer drills in rotation-only mode both drill metal fine, provided you use the correct bit (typically a cobalt or titanium-coated twist bit), moderate speed, and cutting fluid on thicker stock. Hammer mode should never be used on metal; the pulsing action does nothing useful and can damage the bit or the workpiece.
Brick and Block
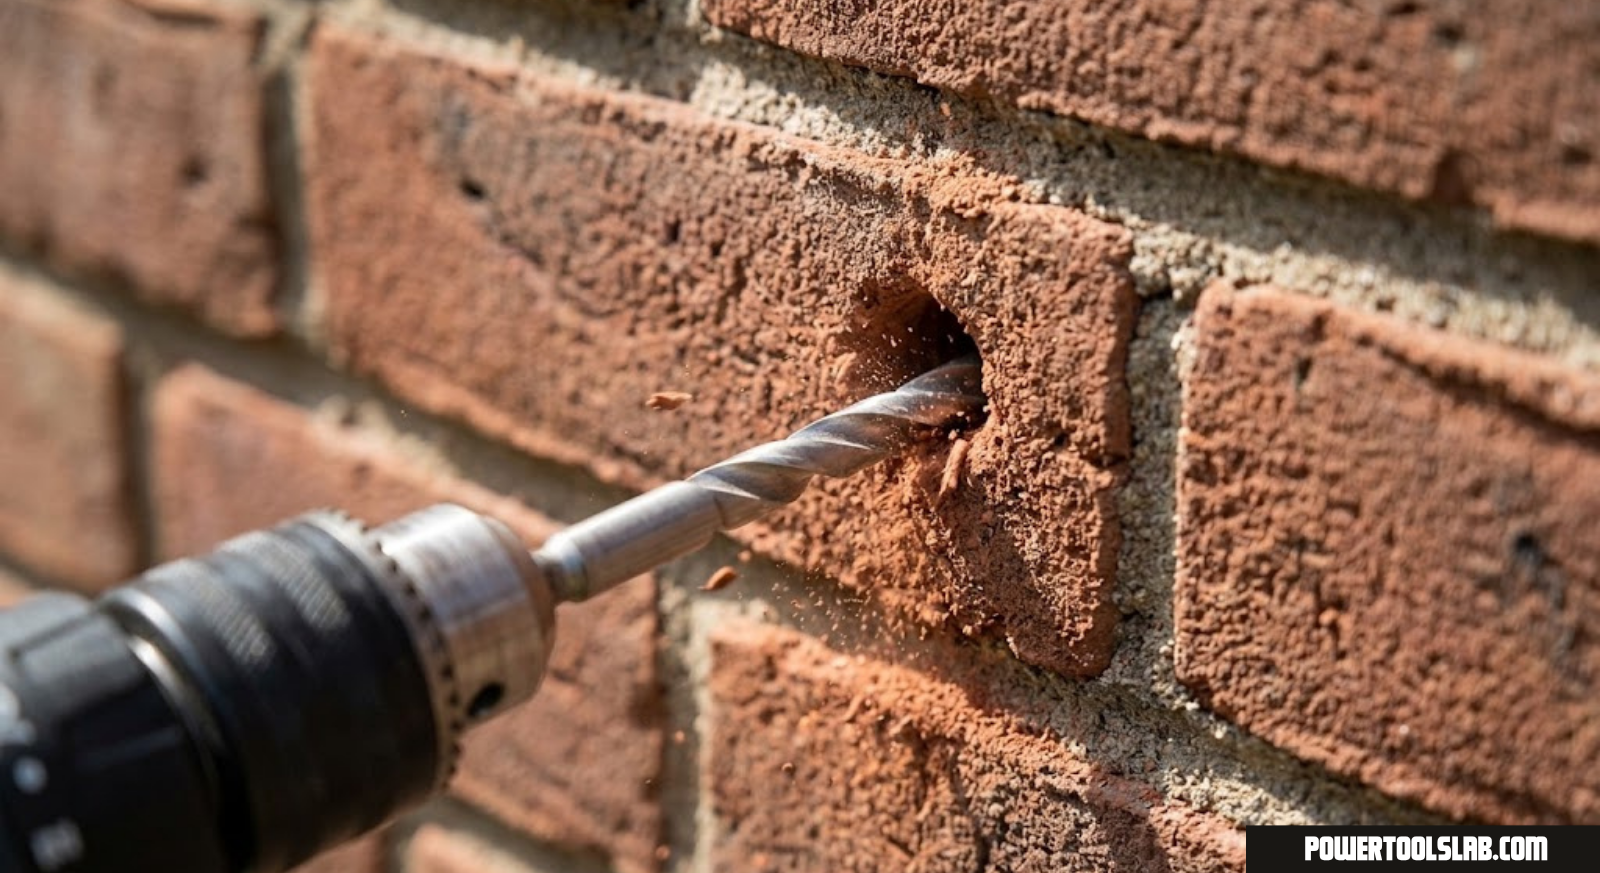
This is where the gap opens wide. A regular drill fitted with a masonry bit can sometimes bore through soft, aged brick with patience, light pressure, and a lot of bit-clearing, but it’s slow, hard on the motor, and prone to overheating. A hammer drill in hammer mode chews through the same brick in a fraction of the time with far less strain on the tool.
Poured Concrete
Dense, cured concrete is where a regular drill essentially gives up. Even with a masonry bit and maximum torque, a rotation-only drill will struggle to make meaningful progress, overheating the motor and dulling the bit long before the hole is finished. A hammer drill handles shallow to medium-depth holes in concrete comfortably; for deep anchor holes or repeated concrete drilling all day, a full rotary hammer with SDS bits is the better step up, but a hammer drill is more than capable for typical homeowner and light commercial tasks.

Pair It With the Right Masonry Bits
A hammer drill is only as good as the bit inside it. Carbide-tipped masonry bits are essential for brick and concrete drilling.
Shop Masonry Bit SetsPros & Cons of Regular Drills
Pros
- Lighter and easier to handle for long sessions
- Quieter operation, better for indoor and shared spaces
- Lower purchase price for comparable build quality
- Simpler controls with less risk of engaging the wrong mode
- Ideal for furniture, drywall, and general household tasks
Cons
- Cannot efficiently drill brick, block, or concrete
- Motor and bits wear out faster if forced into masonry
- Limits future projects if your needs expand to masonry work
Pros & Cons of Hammer Drills
Pros
- Handles wood, metal, drywall, and masonry in one tool
- Far faster and less strenuous on brick and concrete
- Reduces bit wear compared to forcing a regular drill
- One tool covers nearly every household drilling scenario
Cons
- Heavier and bulkier, which can fatigue the wrist over time
- Louder and more vibration-heavy in hammer mode
- Costs more upfront than a comparable regular drill
- Slight learning curve for mode switching and pressure control
Weight, Balance, and Everyday Handling
Weight rarely tops anyone’s list of buying criteria on paper, but it’s one of the first things you notice the moment you’re holding a drill overhead for the fifteenth screw in a row, or bracing yourself against a ladder while drilling into a brick wall above shoulder height. A hammer drill’s added internal mechanism, along with its typically larger battery and beefier motor, usually adds a noticeable amount of heft compared to a lightweight rotation-only drill, particularly in compact 12-volt regular drill lines built specifically for reduced fatigue.
That weight difference isn’t just about total ounces, either. Balance matters just as much. A well-designed hammer drill distributes its extra mass close to the grip so it doesn’t feel front-heavy or awkward to control, while a poorly balanced one can feel like it’s constantly trying to tip forward, which tires out your wrist much faster than the raw weight alone would suggest. If possible, it’s worth physically holding a few candidate models in a store before buying, especially if you know you’ll be using the tool overhead or in awkward positions frequently.
For anyone who splits their time between light indoor tasks and occasional masonry work, owning both a compact regular drill and a separate hammer drill is a common and completely reasonable setup. It avoids the tradeoff entirely: grab the light tool for furniture and shelving, grab the heavier hammer-capable tool only when brick or concrete is actually on the agenda.
Price and Long-Term Value
On the shelf, a regular drill will almost always undercut a hammer drill from the same brand and battery platform, sometimes by a noticeable margin. That price gap reflects the added engineering inside the hammer mechanism, not a difference in overall build quality. If you compare a mid-range regular drill to a mid-range hammer drill from the same product line, you’ll typically find similar motor quality, similar warranty coverage, and similar battery compatibility — the hammer drill is simply doing more.
Where the value conversation gets interesting is resale and future-proofing. A hammer drill covers every task a regular drill covers, plus masonry, which means it never becomes the “wrong tool” for a job the way a regular drill can when brick or concrete shows up unexpectedly. For many buyers, spending a modest amount more upfront on a hammer drill is cheaper in the long run than buying a regular drill now and a hammer drill later once a masonry project appears.
That said, if your project list is genuinely, permanently limited to wood and drywall — say you live in an apartment and only ever assemble furniture — there’s no reason to pay for hammer capability you’ll never use. Buy the tool that matches your actual workload, not the workload you might theoretically have someday.
Noise, Vibration & Comfort
This is an underrated factor that a lot of buying guides skip. In rotation-only mode, both tools are comparably quiet and comfortable. The moment you engage hammer mode, that changes noticeably. The rapid mechanical pulsing generates real vibration that travels straight into your wrist and forearm, and extended masonry drilling sessions can leave your hand feeling numb or fatigued, especially with older or lower-quality hammer drills that lack vibration dampening.
Better hammer drills address this with rubberized, gel-padded grips and internal counterbalance systems that soak up some of the vibration before it reaches your hand. If you expect to do regular masonry work — mounting multiple anchors, drilling a series of holes for a fence or deck ledger — it’s worth paying attention to vibration ratings and grip design rather than buying purely on price or torque numbers.
Noise is a smaller but still real consideration. Hammer mode is audibly louder than rotation-only drilling, which matters if you’re working in an apartment building, a shared workshop, or anywhere noise complaints are a concern. Scheduling masonry work for reasonable daytime hours and wearing hearing protection during extended sessions are both good habits regardless of which tool you’re using.
When to Choose a Regular Drill
A regular drill is the right call if your projects are dominated by wood, drywall, plastic, and light metal work, and masonry simply never enters the picture. Typical scenarios include assembling flat-pack furniture, hanging shelves and curtain rods into wood studs, building small wood projects, driving deck screws, and general household repairs. If you rent an apartment with drywall-and-stud walls and no plans for masonry anchoring, a regular drill will cover essentially everything you need, and you’ll enjoy the lighter weight and lower price.
It’s also the better pick for anyone who wants the simplest possible tool with the least chance of user error. There’s no mode dial to mis-set, no risk of accidentally hammering into a material that doesn’t need it, and less weight to manage on ladders or overhead work.
When to Choose a Hammer Drill
Choose a hammer drill if there’s any realistic chance you’ll drill into brick, concrete block, mortar, or poured concrete — even occasionally. Common triggers include mounting a TV bracket on a brick or block wall, anchoring a mailbox post, installing security bars or gate hardware, hanging shelving in a basement with concrete walls, or anchoring ledger boards and fence posts. Homeowners with brick exteriors or finished concrete basements tend to run into masonry drilling more often than they expect, and a hammer drill removes the guesswork entirely.
Tradespeople and serious DIYers who work across multiple material types on a regular basis will also get more mileage out of a hammer drill simply because it consolidates two tools into one. If you’re already comparing specific models, our guides on the best DeWalt drill, best Milwaukee drill, and best Makita drill break down specific hammer-capable models worth considering.

Ready to Cover Both Wood and Masonry?
A cordless hammer drill kit gives you the flexibility to switch between everyday tasks and masonry work without owning two separate tools.
View Hammer Drill KitsHammer Drill vs Impact Driver vs Regular Drill
A lot of the confusion around hammer drills actually comes from mixing them up with impact drivers, which are a completely different tool despite looking somewhat similar. An impact driver delivers rotational bursts of torque — sudden twisting jolts — rather than the linear forward-and-back pulse of a hammer drill. Impact drivers are built for driving long screws and lag bolts with minimal wrist strain, not for boring through masonry.
Here’s the simplest way to keep them straight: a regular drill rotates smoothly for drilling and light driving, a hammer drill adds linear pulsing for masonry drilling, and an impact driver adds rotational pulsing for high-torque fastening. Each solves a different problem, and plenty of serious DIYers eventually own all three. If you want a deeper breakdown of how impact drivers differ in daily use, our dedicated drill vs impact driver comparison covers that matchup in detail.
| Tool | Motion Type | Best Use |
|---|---|---|
| Regular Drill | Smooth rotation | Wood, drywall, plastic, light metal, driving screws |
| Hammer Drill | Rotation + linear hammer pulse | Everything above, plus brick, block, and concrete |
| Impact Driver | Rotation + rotational torque bursts | Driving long screws, lag bolts, high-torque fastening |
Top Brands Worth Considering
Once you’ve decided which type of drill fits your needs, the next decision is which brand and battery ecosystem to commit to, since most cordless tools within a brand share batteries and chargers. Below are a few well-regarded lines worth comparing, each with dedicated hammer-capable and standard drill options.
Explore in-depth brand comparisons on PowerToolsLab:
- Best DeWalt Drill — known for rugged build quality and a massive battery ecosystem
- Best Milwaukee Drill — favored by tradespeople for high torque and durability
- Best Makita Drill — praised for compact, lightweight designs
- Best Bosch Drill — strong option for precision and vibration control
- Best Ryobi Drill — budget-friendly with a huge lineup of compatible tools
If you’re not sure where to start, our general best drills for DIY and pro use guide compares standout models across brands and price points, including both regular and hammer-capable options side by side.
Common Mistakes That Damage Drills
Whether you’re using a regular drill or a hammer drill, a handful of habits are responsible for most premature tool failures and frustrating drilling sessions.
Forcing a Regular Drill Into Masonry
This is the single most common mistake. Pushing a rotation-only drill through brick or concrete generates excessive heat, burns out the motor faster, and quickly dulls masonry bits that were never designed to work without a hammering assist.
Applying Too Much Pressure
Letting the tool do the work is a genuine skill. Excessive forward pressure on either drill type overheats the motor, strains the gearbox, and can snap bits, particularly smaller-diameter ones. Steady, moderate pressure combined with the correct speed setting is far more effective than brute force.
Ignoring Overheating Warning Signs
If a drill starts smoking, smelling hot, or losing power mid-task, that’s a serious warning sign, not something to push through. Our detailed breakdown on why your drill is smoking covers the exact causes and how to prevent permanent motor damage.
Using the Wrong Bit for the Material
Wood bits, metal bits, and masonry bits are shaped and tipped differently for a reason. Using a standard twist bit on masonry, or a masonry bit in hammer mode against wood, wastes time and wrecks the bit far faster than matching the bit to the material.
Skipping Pilot Holes and Bit Clearing
Especially in deeper holes, failing to periodically retract the bit to clear dust and debris causes binding, overheating, and uneven holes. This applies to both wood and masonry drilling, though it matters even more in dense material.
Using Either Drill Safely
Good technique keeps both you and your tool in one piece. Always wear eye protection, since masonry drilling in particular throws off sharp dust and small chips. Keep a firm, balanced stance, especially in hammer mode where the vibration and occasional bit grab can throw off your footing if you’re not braced properly. Start every hole at a low speed to establish an accurate starting point before ramping up, and keep the bit as close to perpendicular to the surface as possible for clean, accurate holes.
For a complete walkthrough of proper technique, from selecting the right speed and torque setting to drilling straight, accurate holes in various materials, our guide on how to use a drill covers the fundamentals that apply to both regular and hammer drills.
Corded vs Cordless Considerations
Both regular and hammer drills come in corded and cordless versions, and that choice interacts with the rotation-versus-hammer decision in a few practical ways. Cordless models offer freedom of movement, which matters a lot for masonry work around a house exterior, in a basement without convenient outlets, or on a ladder where trailing a cord is awkward or unsafe. Modern battery platforms have closed most of the power gap with corded tools, especially in the higher voltage ranges common on hammer drills.
Corded drills still have a place, particularly for repetitive, stationary workshop tasks where consistent power and lighter tool weight (without a battery pack) matter more than mobility. If you’re drilling dozens of holes in one spot over an extended session, a corded model won’t lose power partway through and never needs a battery swap.
For a full breakdown of the tradeoffs, including runtime, weight, and long-term cost of battery replacement, see our dedicated corded vs cordless drill comparison.
Real-World Project Scenarios
Sometimes the clearest way to decide between these two tools isn’t a spec sheet, it’s walking through the actual projects people run into most often and seeing which tool handles each one comfortably.
Scenario 1: Hanging a Gallery Wall in a Rental Apartment
Most rental apartments have drywall over wood studs, occasionally over metal studs in newer construction. A regular drill with a stud finder and a set of drywall anchors handles this task without any complications. There’s no masonry involved, so a hammer drill would add unnecessary weight and cost here.
Scenario 2: Mounting a TV on a Brick Fireplace Wall
This is the classic case where people discover they own the wrong tool. A regular drill will bog down almost immediately against fired brick or mortar joints. A hammer drill with a carbide masonry bit and the correct anchor sleeves makes quick, clean work of the same job, usually in a fraction of the time and without overheating the motor.
Scenario 3: Building a Deck and Anchoring a Ledger Board
Ledger boards often need to be secured into a concrete foundation wall with structural anchors. This is squarely hammer drill territory, and for larger anchor diameters or deeper embedment, many contractors step up to a full rotary hammer with SDS-max bits instead of relying on a standard hammer drill.
Scenario 4: Assembling Flat-Pack Furniture
Pure driving and light drilling into particleboard or MDF. A compact, lightweight regular drill or even a basic drill/driver combo kit is more than enough, and the reduced weight is genuinely more comfortable for repetitive driving across a large piece of furniture.
Scenario 5: Installing a Security Gate on a Concrete Block Wall
Concrete block, sometimes called CMU, is dense and abrasive on bits. A hammer drill dramatically reduces the time and bit wear involved compared to a regular drill, and for larger security hardware, pre-drilling with a smaller masonry bit before stepping up in size keeps the process manageable.
Scenario 6: General Household Repairs and Maintenance
Tightening loose hinges, reattaching a wobbly handrail into wood framing, swapping out a faucet, or building small shelving units. These day-to-day repairs are almost entirely rotation-only tasks, which is exactly the environment where a regular drill’s lighter weight and simpler controls shine.
Maintenance Tips to Extend the Life of Either Drill
Regardless of which type you choose, a few simple habits will noticeably extend the working life of your tool. Keep the chuck clean and free of dust buildup, since grit trapped inside the jaws can cause bits to slip or seat unevenly over time. After heavy masonry sessions in particular, wipe down the housing and vents, since fine concrete and brick dust is abrasive and can work its way into the motor housing if left to accumulate.
Store batteries at partial charge rather than fully drained when the tool won’t be used for an extended period, since deep discharges shorten lithium-ion battery lifespan over time. Periodically check that the mode selector switch on a hammer drill moves cleanly between settings; a stiff or sticky selector is often an early warning sign that dust has worked its way into the mechanism and the tool could use a professional cleaning or service.
Finally, match bit quality to how often you use the tool. Cheap, low-quality masonry bits dull quickly and force the motor to work harder than necessary, which indirectly shortens the life of the drill itself. Investing in a mid-range or better bit set pays for itself in reduced strain on the tool and noticeably faster, cleaner holes.
Buying Guide Checklist
Before you buy, run through this checklist to make sure you’re getting the right tool for your actual workload rather than over- or under-buying.
- List your realistic project types. Be honest about whether masonry is genuinely likely, not just theoretically possible.
- Check the mode switch. On hammer drills, confirm there’s a clear rotation-only setting so you’re not stuck in hammer mode for wood and drywall work.
- Compare weight. If you do a lot of overhead or one-handed work, the extra weight of a hammer mechanism is worth feeling in person or checking specs closely.
- Match your battery platform. If you already own tools from a brand, staying within that ecosystem saves money on future purchases.
- Check torque settings and clutch range. More clutch settings give finer control for delicate driving tasks.
- Look at grip and vibration dampening. Especially important if you expect regular hammer-mode use.
- Budget for bits separately. A hammer drill is only useful for masonry if you also own quality carbide-tipped masonry bits.
Frequently Asked Questions
Can a hammer drill be used as a regular drill?
Yes. Nearly every hammer drill includes a rotation-only mode that disables the hammering mechanism, so it behaves exactly like a regular drill for wood, drywall, and metal work.
Can a regular drill drill through concrete at all?
With a masonry bit and a lot of patience, a regular drill can sometimes make progress in soft, aged concrete, but it’s slow, hard on the motor, and generally not recommended for anything beyond a single shallow hole in a pinch.
Is a hammer drill overkill for occasional home use?
Not necessarily. Since a hammer drill covers everything a regular drill does plus masonry, it’s rarely wasted capability — the main downsides are a bit more weight and cost, not reduced versatility.
Do I need special bits for a hammer drill?
Only when drilling masonry. For wood, metal, and drywall you use the same standard bits as a regular drill. For brick or concrete you need carbide-tipped masonry bits designed to withstand the hammering action.
What’s the difference between a hammer drill and a rotary hammer?
A hammer drill uses a spring-loaded cam mechanism for a relatively light pulsing action, suitable for drilling holes in brick and concrete. A rotary hammer (often SDS-style) uses a piston system to deliver much stronger blows, making it better suited for heavy-duty concrete drilling and light demolition.
Will using hammer mode on wood damage the drill or material?
Yes, it’s not recommended. Hammer mode against wood can splinter the material, chew up the hole, and cause unnecessary wear on both the bit and the tool’s internal mechanism for no real benefit.
Are hammer drills significantly more expensive than regular drills?
They’re usually somewhat more expensive within the same brand and battery platform, but the gap has narrowed over the years, and many mid-range hammer drills are priced close enough to regular drills that the added capability is worth it for most buyers.
Can I convert a regular drill into a hammer drill?
No. The hammering mechanism is a built-in mechanical feature of the gearbox and cannot be added afterward. If you need hammer capability, you need to buy a hammer-capable drill or a separate rotary hammer.
Do hammer drills work well for driving screws?
Yes, as long as you keep them in rotation-only mode with the clutch set appropriately. The hammer function has no role in driving screws and should stay switched off for that task.
Is an impact driver a substitute for a hammer drill?
No. An impact driver delivers rotational torque bursts for driving fasteners, not the linear pulsing action needed to bore through masonry. They solve different problems and aren’t interchangeable for concrete or brick drilling.
How do I know if my drill is a hammer drill?
Check for a mode selector, usually marked with a drill-bit icon for rotation-only and a hammer or jackhammer icon for hammer mode. If there’s no such selector, it’s a regular drill.
What size hole can a hammer drill make in concrete?
Most consumer hammer drills comfortably handle common anchor hole sizes, generally up to around 1/2 inch in diameter for shallow to medium depths. For larger diameters or deep holes, a rotary hammer with SDS bits is more efficient and easier on the tool.
Final Verdict: Which One Should You Buy?
If your work is limited to wood, drywall, and light metal, a regular drill is lighter, quieter, cheaper, and perfectly capable of handling everything on your list. But if there’s any real chance you’ll drill into brick, block, or concrete — even just once for a single project — a hammer drill removes that limitation entirely while still covering every task a regular drill handles. For most homeowners who want one tool that won’t leave them stuck when masonry shows up unexpectedly, the hammer drill is the safer long-term investment.

Compare Top-Rated Hammer Drills Now
See current pricing, kit options, and availability before you decide.
Shop Hammer Drills on Amazon