How to Organize Power Tools in Your Garage: A Step-by-Step System That Actually Lasts
Clear the clutter, protect your investment, and find the right drill, saw, or battery in seconds instead of minutes.
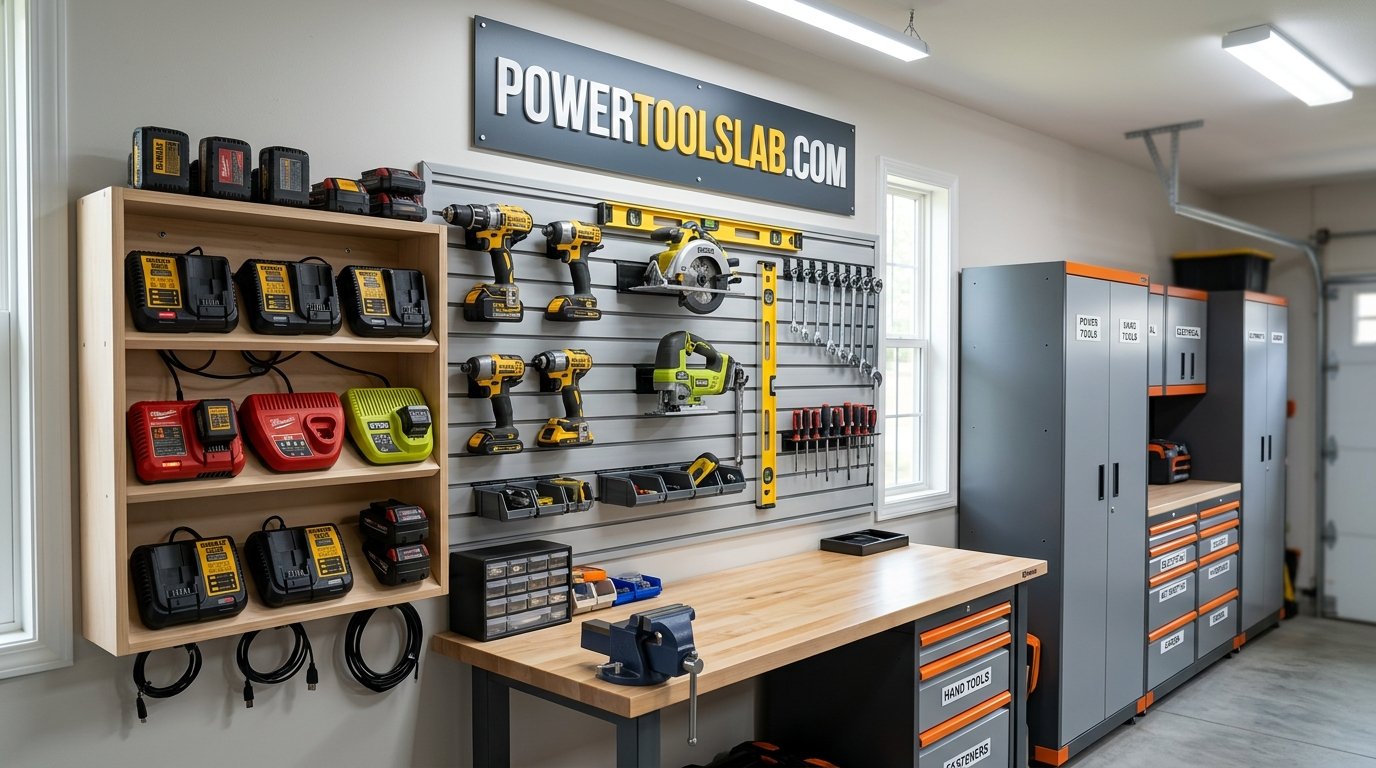
Every garage tells the same story. It starts with a clean wall and a proud new drill. A few months later there is a circular saw balanced on a paint can, three batteries that may or may not be charged, a tangle of extension cords, and a drawer full of bits that belong to at least four different sets. You know you own the tool you need. You just cannot find it.
The good news is that a garage tool setup does not need a huge budget or a full weekend of woodworking to fix. It needs a plan. In this guide you will work through eight practical steps, from sorting what you own to labeling the last shelf, with a diagram for each one so you can picture the result before you drill a single hole. Along the way we will cover storage options, battery charging, cord control, big-tool placement, safety, and the small habits that keep the system from sliding back into chaos.
Whether you own a starter drill and a saw or a full collection across several brands, the same principles apply: group by how you use things, keep the daily tools within arm’s reach, and give every item a home you can see.
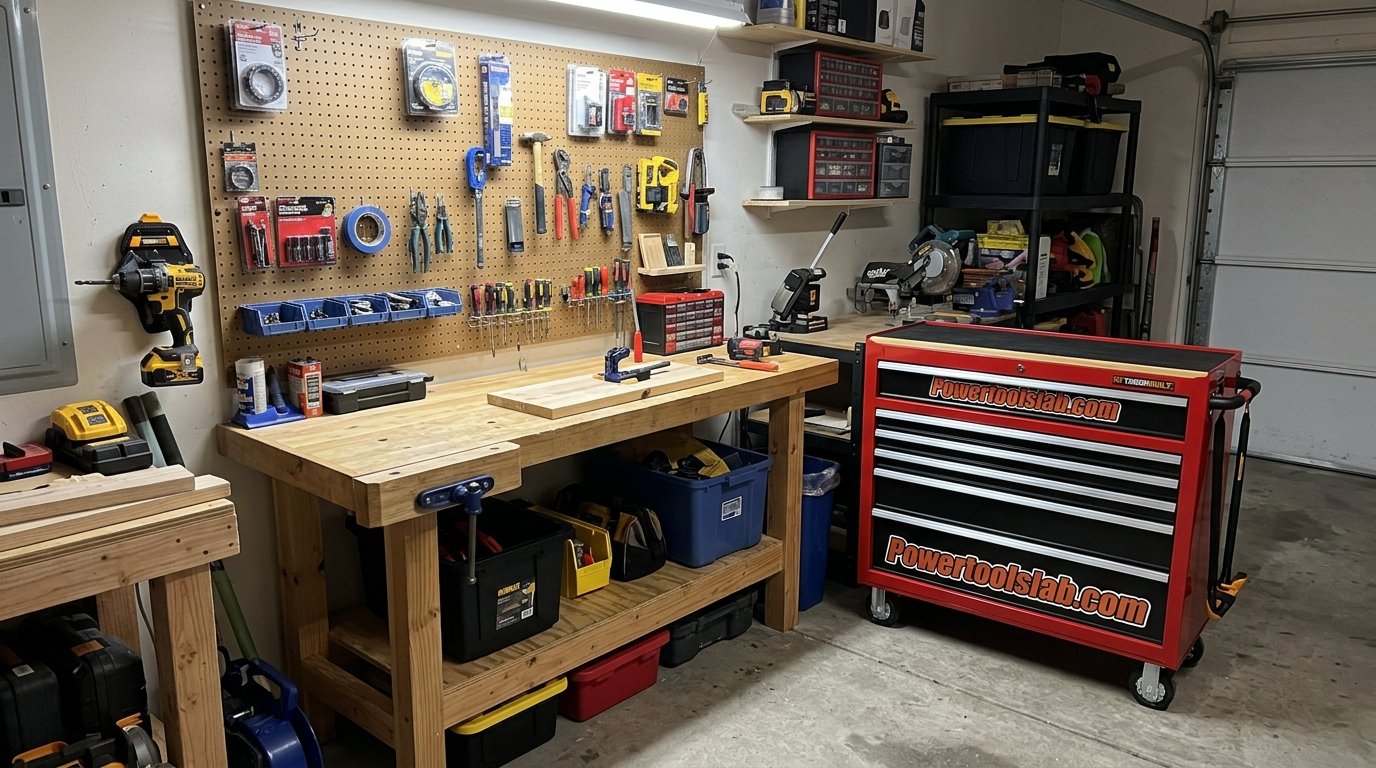
Why Organizing Your Power Tools Is Worth the Effort
It is easy to treat organization as a cosmetic upgrade, something you do so the garage looks good when the door is open. In practice it is a maintenance and safety project that happens to look good. Power tools are expensive, they contain motors, electronics, and lithium-ion batteries, and almost everything that shortens their life happens when they are tossed in a pile.
Time and frustration you get back
Think about how many small delays add up during a single project. Searching for the right charger, digging for a spare blade, untangling a cord, moving three tools to reach a fourth. None of these take long on their own, but together they can eat a quarter of a Saturday. A system with a fixed home for every item shrinks that overhead to almost nothing, and it makes you far more likely to start a small repair because the barrier to starting has dropped.
Longer tool life
Dust, moisture, and impacts are the enemies of power tools. Drills stored on a concrete floor pick up grit in the chuck and vents. Saw blades left in a pile dull each other. Batteries left in a hot corner lose capacity faster than ones stored in a cool, dry spot. Simply lifting tools off the floor, protecting them in cases or on wall mounts, and keeping batteries in a proper station can noticeably extend their working life.
Safer work
A cluttered garage is a tripping hazard, and it hides risks such as frayed cords or a battery sitting next to a flammable liquid. When every tool has a place, you spot the one that is missing, damaged, or in the wrong spot. If you want a refresher on the basics, our guide on what should never be engaged when using power tools pairs well with a tidy workspace.
Better buying decisions
Once you can see everything you own, you stop buying duplicates. You also notice gaps, such as no dedicated tool for a job you keep improvising. Many people discover that they own tools from several ecosystems and pay for extra batteries and chargers as a result. If that sounds familiar, it is worth reading about power tool brands and how their battery platforms compare before you buy the next one. A saw is a good example: knowing the types of power saws helps you avoid owning three tools that do roughly the same job.
The core idea: organize by frequency of use and by job, not by tool category alone. The drill you use every week belongs at eye level. The tile saw you use twice a year can live on a high shelf or a rolling cart.
Browse garage storage essentials to get started.
Step 1: Take Inventory and Sort Every Tool
You cannot organize what you have not seen. The first step is to pull everything out, and we mean everything: power tools, chargers, cords, blades, bits, half-empty boxes of screws, and the mystery accessories nobody remembers buying. Lay it all on a driveway, a tarp, or a set of folding tables. It will look worse before it looks better, and that is fine. Seeing the full pile is what motivates people to finish the job.
Use three simple piles
Sort the pile into three groups. Keep close covers tools you reach for at least once a month. Store away covers tools you need occasionally but still want to keep. Let go covers anything broken, duplicated, or unused for a couple of years. Be honest with that last pile. A second cordless drill from a brand you no longer use, with a dead battery and no charger, is not an asset. It is clutter with a resale value, so sell it or donate it.
Check condition as you go
While every tool is out in the open, take a minute to inspect it. Look for cracked housings, frayed or nicked cords, damaged plugs, and bent blades. Test batteries and note which ones hold a charge. If a drill has started to overheat or smell odd, do not put it back on the shelf. Our article on why a drill might be smoking explains what to check and when to stop using it.
Write down what you own
Make a quick list on your phone or on paper: tool, brand, battery platform, and approximate frequency of use. This takes ten minutes and pays off twice. It tells you how much shelf, wall, and drawer space you actually need, and it exposes overlaps. If you own both corded and cordless versions of the same tool, you may find one of them never leaves the shelf. If you are torn on which to keep, read our comparison of corded versus cordless drills and our roundup of the best drills for DIY and pro use.
- Sort into three piles
- Inspect cords and housings
- List tools and batteries
- Sell or donate extras
Stackable totes make the sort much easier.
Step 2: Map Your Garage Zones and Traffic Flow
Before you buy a single hook or cabinet, decide where things will live. Professional shops are organized into zones, and a garage works the same way even when it also has to hold a car. The goal is to place each group of tools near the place where you use it, so you are never carrying a saw across the whole garage to reach an outlet.
Pick a workbench anchor
Start with the spot where most of the work happens. For most people that is a workbench along the back or side wall. Place your most-used tools within a short reach of it: drill, impact driver, tape measure, clamps, and the batteries that power them. The closer these are, the less often you will leave a job half-finished because a tool was across the room.
Think about outlets and circuits
Power tools are hungry, and a single garage circuit is often shared with lights, a freezer, or an opener. Note where your outlets are and try to keep the charging station and the bench near them. It also helps to know how much current your tools pull. If you are planning to run a compressor and a saw on the same circuit, read our guide on how many amps a typical power tool uses so you do not trip a breaker in the middle of a cut.
Keep the traffic lane clear
Leave at least a full stride of open floor between your car and your storage walls, and never block the path to the main door or the breaker panel. Big rolling items such as a tool chest or table saw should have a permanent parking spot with enough clearance to pull them out. If the compressor is going to live in a corner, check what size you actually need first with our article on what size air compressor you need, because a larger tank means a larger footprint.
Do not skip the paper plan. Sketch the garage on graph paper, mark doors, outlets, and windows, and cut small paper rectangles for big tools. Moving paper is far easier than moving a workbench.
Good task lighting makes every zone easier to use.
Step 3: Choose the Right Storage System
There is no single best storage system. The right one depends on your wall space, budget, how often your collection changes, and whether you rent or own. Most well-organized garages combine two or three: wall storage for daily tools, closed cabinets for things that should stay clean, and a mobile cart for bulky items.
The main options compared
| System | Cost | Best for | Main drawback |
|---|---|---|---|
| Pegboard | Low | Hand tools, small accessories | Hooks fall out, weak for heavy tools |
| Slatwall panels | Medium | Clean look, movable bins and hooks | Higher price per square foot |
| French cleat wall | Low to medium | Drills, saws, custom holders | Needs cutting and mounting time |
| Steel cabinets | Medium to high | Dust protection, security, batteries | Takes floor space, hard to move |
| Rolling tool chest | Medium to high | Bench-side drawers, mobility | Heavy when full |
| Overhead racks | Low to medium | Seasonal tools, cases, long stock | Awkward for daily use |
How to decide
If you own a lot of small tools and want a fast, cheap start, pegboard is fine. If your collection includes heavier tools such as circular saws, reciprocating saws, and full-size drills, a French cleat wall or slatwall handles the weight much better. If dust is a problem, particularly for chargers and sensitive electronics, closed cabinets protect your gear far better than any open wall. And if you rent, freestanding shelving and rolling carts leave the walls untouched.
Why open wall storage works
- You see every tool at a glance
- Easy to grab and return
- Can be rearranged as you buy tools
- Uses vertical space, not floor space
Where it falls short
- Tools collect dust over time
- No security against theft
- Batteries should not sit exposed
- Can look busy if not labeled
Pegboard, slatwall, and cleat systems in one search.
Step 4: Wall-Mount Your Drills, Saws, and Cordless Tools
Your daily-use tools deserve the best real estate in the garage: the wall directly above or beside your workbench, between roughly knee and eye height. Mounting them on the wall keeps them off the bench, protects them from spills, and makes it obvious when one has gone missing. It also keeps cords and vents clear of dust that settles on flat surfaces.
Drills and drivers
Drills and impact drivers are the easiest tools to wall-mount. Simple holsters, hooks, or a shelf with cut-outs hold them by the body and keep the chuck pointed down and out of dust. Make sure the holster suits your tool, since a heavy hammer drill needs a more robust support than a compact driver. If you are not sure which type you own, our comparison of a hammer drill versus a regular drill makes the differences clear. Owners of major brands can also browse our picks for the best DeWalt drills, best Milwaukee drills, best Makita drills, best Ryobi drills, and best Bosch drills to see whether a mount needs to handle one model or several.
Circular saws, jigsaws, and reciprocating saws
Saws need to hang where the guard and blade are protected. A simple wooden hook or cradle on a cleat lets a circular saw hang by its handle or rest on its base plate. Reciprocating saws hang neatly by the rear handle. Keep the blades pointing toward the wall and never leave an unprotected blade at face height. If you are still deciding which saws belong in the collection, our guides to the best power saws, best circular saws, and best reciprocating saws are a good place to start, and the DeWalt reciprocating saw review shows what a typical pro-grade model looks like on a mount.
Build the mount to the tool
The best mounts are custom. Hold the tool up, trace its outline on a piece of scrap plywood, and cut a cradle around it. That way it seats securely, cannot slide out when someone bumps the wall, and you can tell at a glance whether it is home. Leave a few inches of space between neighbors so you can grip a tool without knocking another one loose. If you are new to drilling and cutting mounts yourself, our walkthrough on how to use a drill covers pilot holes, screw selection, and finding studs, which is what you need to hang heavy tools safely.
Mounting tip: always anchor into studs or use rated wall anchors. A fully loaded wall of power tools can weigh well over a hundred pounds, and drywall alone will not hold it.
Drill holsters and saw hooks in one place.
Step 5: Build a Dedicated Battery and Charging Station
Cordless tools have made garages more convenient and more chaotic. Batteries multiply quickly, chargers hide in drawers, and nobody remembers which pack is full. A single dedicated station solves all of it, and it is also the single most important safety upgrade you can make.
Pick a safe location
Put the charging station on a wall that is dry, cool, and away from direct sun. Avoid mounting it above or next to paint, gasoline, propane, or solvents. A metal shelf or a section of the workbench with a non-flammable surface is ideal. Do not stack batteries on top of chargers or leave them on foam, carpet, or cardboard. Lithium-ion packs are stable in normal use, but a damaged pack can fail in ways that are hard to predict, so give them space and airflow.
Organize by charge state
The trick that makes a station useful is sorting batteries by what state they are in. One row for freshly charged packs, one for drained packs waiting for a charger, and one dedicated slot for a pack that seems damaged or unreliable. When you finish a job, drained batteries go to the charger row. When you grab a battery, you always take one from the charged row. It sounds trivial, but it means you never pick up a dead pack at the worst possible moment.
Standardize where you can
The cleaner your battery ecosystem, the smaller the station needs to be. Many households end up with three or four brands and a drawer of incompatible chargers. Consider settling on one main platform and buying additional tools bare, without batteries. For a brand-by-brand view of what each ecosystem offers, see our guide to power tool brands. If you are weighing cordless against plug-in, it is also worth reading our comparison of corded versus cordless drills to decide how much of your collection really needs a battery.
Benefits of a station
- Always know which batteries are charged
- One safe, ventilated spot for charging
- Fewer tangled chargers and cords
- Simple to spot a failing pack
Things to plan for
- Needs a dedicated outlet or strip
- Requires a non-flammable surface
- Multiple brands mean multiple chargers
- Good habits must be maintained
Shelves, surge strips, and battery organizers.
Step 6: Organize Cords, Bits, Blades, and Accessories
Accessories are where organization usually breaks down. Drill bits migrate, saw blades dull in the bottom of a drawer, and sanding discs end up sticky and crushed. The fix is a set of shallow, divided drawers or bins that give every accessory type its own compartment.
Use shallow drawers
Deep drawers are where things go to disappear. Shallow, wide drawers show everything at once, so you never have to dig. Use dividers to separate categories, and keep different sizes or types within a category in their own trays. A shallow drawer for bits, another for blades, a third for sanding supplies, and a fourth for fasteners is a reliable starting layout. If you own a hammer drill, keep masonry bits in a separate tray from wood and metal bits so you do not grab the wrong one under pressure.
Cases, indexes, and blade storage
Keep bits in their original indexed cases whenever possible. The sizes are labeled, the gaps show what is missing, and the case snaps shut for transport. For saw blades, use slotted holders or blade sleeves so the teeth do not touch, and sort by tool type: circular saw blades in one place, reciprocating and jigsaw blades in another. Anyone who owns a reciprocating saw knows how quickly loose blades pile up, and our reciprocating saw guide explains why matching blade type to the material matters so much.
Tame cords and hoses
Extension cords are the number one cause of garage tangles. Coil each cord using the over-under method, secure it with a hook-and-loop strap, and hang it on a wall hook or reel. Store air hoses and cords in separate places, and label cords by length and gauge so you always choose the right one for the job. A cord that is too thin can overheat when powering a hungry tool, and our piece on how many amps power tools use is worth a read before you decide which cords to keep.
Drawer dividers, bit cases, and blade holders.
Step 7: Store the Big Tools: Saws, Compressors, and Benchtop Machines
Large tools are the hardest part of any garage. They are heavy, awkward, and often used only occasionally, which makes them tempting to shove into a corner. The trick is to give them a home that is easy to reach on project day and completely out of the way the rest of the time.
Get heavy tools onto wheels
A rolling cart or a mobile base transforms a stationary tool into one you can move in seconds. Mount a tile saw, miter saw, or benchtop planer on a cart with locking casters, and it can roll to the driveway for a cutting job and roll back afterward. Just make sure the wheels lock securely before use, since a machine that shifts mid-cut is dangerous. If you own or are considering a wet saw, take a look at our roundup of the best tile saws and the reviews of the Ryobi tile saw and the Porter-Cable tile saw to see how compact some of these machines are.
Give the compressor a corner
An air compressor is loud, heavy, and needs airflow and access to a power outlet. A corner near the door works well for two reasons: you can roll it out to reduce noise, and it stays away from your battery station and any flammable items. Mount a hose reel or hooks nearby so hoses never end up on the floor. If you are still shopping, our guides on how to choose an air compressor and the best air compressors will help you size the machine to your space. It also helps to understand how air compressors work so you know why the tank should be drained regularly and why it needs ventilation, and to review how to use an air compressor safely before your first project.
Go vertical for seasonal and specialty gear
Ceiling-mounted racks are ideal for items you use a few times a year: hard cases, long clamps, extension ladders, and cases for specialty saws. Keep the heaviest items low and near the door and reserve overhead space for lighter cases. Specialty hydraulic tools such as a porta-power are heavy and usually used infrequently, so a low shelf in a cabinet is best. If you are unsure what one is, our article on what type of tool a porta-power is explains it. Similarly, if you have a chainsaw alongside your power saws, our comparison of a power saw versus a chainsaw can help you decide which belongs on the wall and which belongs in a closed, ventilated cabinet because of fuel and oil.
| Big tool | Best storage spot | Key tip |
|---|---|---|
| Tile or wet saw | Rolling cart or low shelf | Drain and dry before storing |
| Miter saw | Fixed stand or folding bench | Keep it near a dust collection setup |
| Air compressor | Corner near a door | Drain the tank after each use |
| Router and specialty tools | Closed cabinet or drawer | Store in their original cases |
| Shop vacuum | Under the bench or on the floor | Hang the hose so it does not kink |
Mobile bases and rolling carts for heavy machines.
Step 8: Label, Outline, and Create a Return-Home System
Storage only works if tools come back to it. A system that depends on memory will slip within weeks, but one that makes the correct spot obvious tends to survive. This last step is the one that keeps everything else in place.
Outline tools on the wall
Trace the outline of each tool on the board behind it with a marker or a strip of colored tape, the way professional shops do with shadow boards. When a tool is out, the empty outline tells you at a glance, and you can even see who last had it in a shared household. It is a low-tech system, but it works better than almost anything else because it removes the decision from putting things back.
Label everything, including bins and drawers
Labels turn a good setup into one that anyone can use. Put a clear label on every drawer, bin, and shelf edge. Use plain words rather than clever ones: bits, blades, sandpaper, screws, cords. If more than one person uses the garage, labels remove the arguments about where things belong. A label maker is inexpensive, and clear, consistent labels make guests, family members, and future you far more likely to put things back correctly.
Color-code by zone or battery platform
Color is faster than reading. Use one color of tape for the workbench zone, another for the outdoor tools, and another for cleanup. You can also mark batteries and chargers by platform or by owner. A small colored dot on each battery makes it easy to see which ones belong with which tools, which is especially useful if you have more than one brand.
Set a two-minute reset rule
The last piece of any return-home system is a habit. At the end of each work session, spend two minutes returning every tool, sweeping the floor, and putting drained batteries on chargers. Two minutes each session prevents the slow buildup of clutter that ruins most organized garages.
Label makers, tape, and shadow board supplies.
Safety, Fire, and Moisture Protection in the Garage
An organized garage is only a success if it is also a safe one. The same qualities that make a garage convenient, including many tools, batteries, cords, and stored materials, can create hazards if you are not careful. A few simple safeguards go a long way.
Fire and battery safety
Keep a fire extinguisher rated for electrical and ordinary combustible fires near the exit, not next to the workbench where a fire would block it. Store lithium-ion batteries at room temperature, not in a hot attic or a freezing shed, and never charge a swollen, damaged, or hot battery. Keep flammable liquids such as gasoline, paint thinner, and aerosol cans in a proper cabinet and far from the charging station. Do not charge batteries while you sleep or while you are away from the house.
Moisture and rust
Garages swing between hot and cold, and the resulting condensation can rust blades, chucks, and exposed metal surfaces. Keep tools off the concrete floor, add a moisture absorber or dehumidifier in damp climates, and wipe metal surfaces with a light coat of protective oil before long-term storage. Silica gel packs in toolboxes and cabinets can help protect sensitive tools, and a sealed case is a good home for anything you use rarely.
Electrical safety
Check your outlets and cords regularly. Use grounded cords rated for the tool, avoid daisy-chaining extension cords, and never run a cord through a doorway where it can be pinched. Ground-fault protection is especially important in garages, where moisture and electricity often mix. If you use a compressor, follow the manufacturer’s safety rules and review our detailed guide to air compressor safety.
Know when a tool is unsafe
Retire tools that are damaged. A cracked housing, a sparking motor, a burning smell, or a cord with exposed wire is not something to work around. Read why a drill might smoke and revisit the basics of what is never to be engaged when using power tools if you are ever unsure. It is much cheaper to replace a worn tool than to deal with an injury.
Child and pet safety: if children or pets can enter the garage, lock cabinets that hold blades, chargers, and chemicals, and keep sharp tools above their reach. A simple latch is inexpensive protection.
Fire extinguishers, dehumidifiers, and GFCI cords.
Budget and Product Comparison: What to Buy First
You do not need to buy everything at once, and you should not. The best approach is to build the system in layers, starting with the pieces that solve your biggest daily frustration. For most people that means a battery station and a wall system for the tools they use every week. Everything else can wait until you have lived with the new layout for a month or two.
A sensible buying order
| Priority | Item | Budget level | What it solves |
|---|---|---|---|
| 1 | Battery and charging shelf with power strip | Low | Dead batteries, cord tangles, fire risk |
| 2 | Wall system: cleats, slatwall, or pegboard | Low to medium | Tools off the bench, easy to find |
| 3 | Shallow drawers or bins with dividers | Low to medium | Lost bits, blades, and fasteners |
| 4 | Rolling cart or mobile base | Medium | Heavy tools that are hard to move |
| 5 | Closed cabinets or tall lockers | Medium to high | Dust, theft, child safety |
| 6 | Overhead racks and ceiling storage | Low to medium | Seasonal gear and long stock |
DIY or ready-made?
Building your own French cleat wall, shelves, and tool holders costs less and lets you tailor everything to your tools. Ready-made systems, on the other hand, save time and often look cleaner. A common compromise is to buy a good cabinet and a charging shelf, then build the custom wall mounts from scrap plywood, which costs almost nothing and takes an afternoon.
Building it yourself
- Lower cost for the same capacity
- Custom fit for your exact tools
- Easy to adjust as your collection grows
- A useful first project for new tools
Buying ready-made
- Faster to install
- Consistent, professional look
- Often has warranties and locks
- Higher upfront cost
See what fits your space and budget.
Keeping Your Garage Organized for the Long Term
Most garage organization projects fail slowly, not suddenly. A single tool ends up on the bench, a battery gets tossed on a shelf, a box gets left on the floor, and within a season the old habits are back. The difference between a system that lasts and one that does not is a light maintenance routine that fits into normal life.
A simple maintenance rhythm
| How often | What to do | Time needed |
|---|---|---|
| After each use | Return tools, sweep, put drained batteries on the charger | 2 minutes |
| Weekly | Clear the bench, check the charging station, coil loose cords | 10 minutes |
| Monthly | Inspect cords and plugs, wipe tools, restock consumables | 20 minutes |
| Each season | Rotate seasonal items, check for moisture and rust, review labels | 1 hour |
| Yearly | Repeat a light version of Step 1 and let go of what you do not use | Half a day |
Adjust the system as you grow
Your collection will change, and the system should change with it. If you buy a new tool, decide where it lives before you bring it into the garage. If a spot is consistently empty, reassign it. If a shelf is always overflowing, that is a signal to add capacity or let something go. Treat the system as a living design rather than a one-time project, and it will keep serving you.
Get everyone on board
If you share the garage with family, take five minutes to show them how it works. Point out the outlines, the labeled drawers, and the battery station rules. People follow a system they understand, and a system with visible logic is easier to follow than one that lives only in your head. Ask for feedback, too. If someone consistently puts a tool in the wrong place, the label or location may need to change, not the person.
Cleaning supplies, rust prevention, and cable ties.
Frequently Asked Questions
What is the best way to organize power tools in a garage?
Start by sorting tools by how often you use them, then give each group a home near where you use it. Wall-mount daily tools, store batteries on a dedicated charging shelf, keep accessories in shallow divided drawers, and put heavy tools on wheels. Labels and outlines keep the system going.
How do I store cordless drills and batteries safely?
Store drills on a wall mount or shelf, and keep batteries on a dry, cool, non-flammable surface away from gasoline, paint, and direct sun. Sort them by charge state and keep any damaged or swollen pack completely separate. Never charge a hot or damaged battery.
Is pegboard or a French cleat wall better for power tools?
For power tools, a French cleat wall is usually better because it supports heavier loads and lets you build custom holders. Pegboard works well for hand tools and light accessories, but hooks can shift and the panels can sag under weight. Many garages use both.
How do I organize power tools in a small garage?
Go vertical. Use wall panels, overhead racks, and slim cabinets, and put heavy tools on rolling carts that tuck under a bench. Choose multi-purpose tools where possible, keep only what you use, and store rarely used items in bins on high shelves.
Where should I keep an air compressor in the garage?
A corner near the door with easy access to an outlet is ideal. That lets you roll it out for noisy jobs, keeps it away from your charging station and flammable items, and leaves floor space clear. Mount a reel or hooks for the hose nearby.
How do I keep power tools from rusting in a garage?
Keep tools off the concrete floor, control humidity with a dehumidifier or moisture absorbers, and wipe metal surfaces with a light coat of protective oil before storing them. Sealed cases and cabinets with silica gel packs give extra protection during damp seasons.
Is it okay to store power tools in a hot or cold garage?
Most tools tolerate normal garage conditions, but extreme heat or cold is hard on batteries, plastics, and electronics. Whenever possible, store batteries in the coolest, driest spot, and bring them into a climate-controlled space during severe weather. Check each manufacturer’s guidance for temperature limits.
How should I store saw blades and drill bits?
Keep drill bits in indexed cases and saw blades in slotted holders or sleeves so the teeth never touch. Sort by tool type and material, and store them in shallow drawers with dividers. That prevents dulling and makes it easy to find the right one.
How much does it cost to organize a garage full of power tools?
The cost varies widely. A basic setup with a charging shelf, a small wall system, and a few bins can be inexpensive, especially if you build the mounts yourself. Cabinets, rolling chests, and full slatwall systems cost more. Build in layers so you spread the cost over time.
How do I keep my garage organized after I finish?
Use a two-minute reset at the end of each session, label everything, and keep outlines on the wall so missing tools are obvious. Schedule a short seasonal review to remove things you no longer use and to fix any spots that keep getting messy.
Can I organize power tools in a garage that also holds a car?
Yes. Keep tools on the walls and in slim cabinets along the sides, leave a clear lane around the vehicle, and use wheeled storage for big items so they can move out of the way. Never block the door, breaker panel, or exits.
How can I organize my tools if I rent and cannot drill into walls?
Use freestanding shelving, rolling tool chests, and heavy-duty carts. Over-the-door racks and adhesive-free hooks can help for light items. A freestanding pegboard on a frame or a mobile workbench with drawers gives you wall-style storage without any permanent holes.
Conclusion: Build the System Once, Enjoy It for Years
Organizing power tools in a garage is less about buying the perfect storage and more about following a clear order of operations. Sort what you own, plan your zones, choose storage that fits your tools, mount the daily drivers within reach, set up a proper battery station, divide up the small stuff, give the big tools wheels, and finish by labeling everything so it stays that way.
You do not have to do it in a weekend. Start with the step that annoys you most, whether that is dead batteries or a lost drill bit, and build from there. Each improvement makes the next one easier, and within a few weeks you will notice the difference every time you start a project. A garage where you can grab the right tool in seconds is one you will actually use, and that is the whole point.
Pick the storage that fits your tools and your space.
As an Amazon Associate, we earn from qualifying purchases. Links marked as product searches may earn a small commission at no extra cost to you. Always follow the manufacturer’s safety instructions for every tool, battery, and storage product you use.